Tutorial: How to Use a Tee Square It
Affiliate Disclosure: As an Amazon Associate I earn from qualifying purchases. Additionally, I may get commissions for purchases made through other affiliate links in this post.
Ever heard of a Tee Square It? Today, I’m teaching you how to use a Tee Square It.
When you use your Silhouette or Cricut to create shirts for sale, your number one concern should be the quality of your product. When working with shirts, one of the biggest quality issues is lining up the design correctly.
Can you imagine going through a rack of shirts at your favorite store and each of the same shirt design is lined up different – or maybe even crooked? You probably wouldn’t buy the shirt, and your customers won’t want to either. To help you line up designs, I am introducing you to one of my favorite gadgets – the Tee Square It.
Note: The Tee Square It 3 has been updated and replaced with the Tee Square It I. It functions the same with minor improvements.
Table of Contents

What is a Tee Square It?
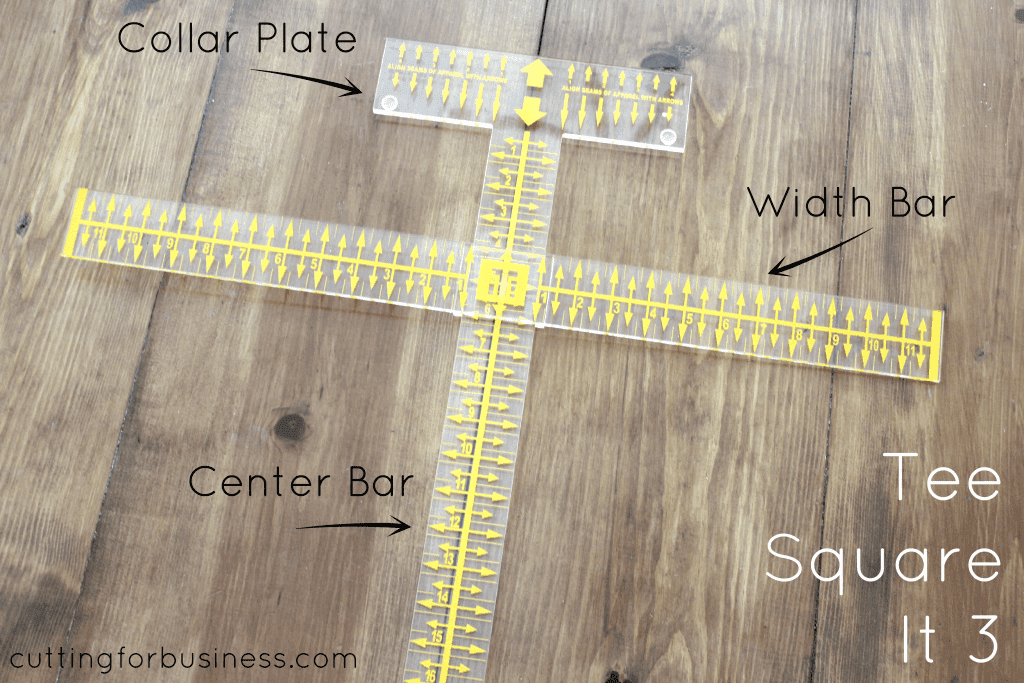
The Tee Square It is a two piece gadget that helps you line up heat transfer vinyl, iron ons, plastisol, rhinestone, stencil, or any other transfer onto your garment. It will save you time and energy in your Silhouette or Cricut based craft business. It will also help improve your product quality, because designs will be properly lined up.
How to Use a Tee Square It
- Cut and weed your design, then pre-press your shirt.
- Lay your shirt flat. You can do this on your heat press or on a nearby flat surface.
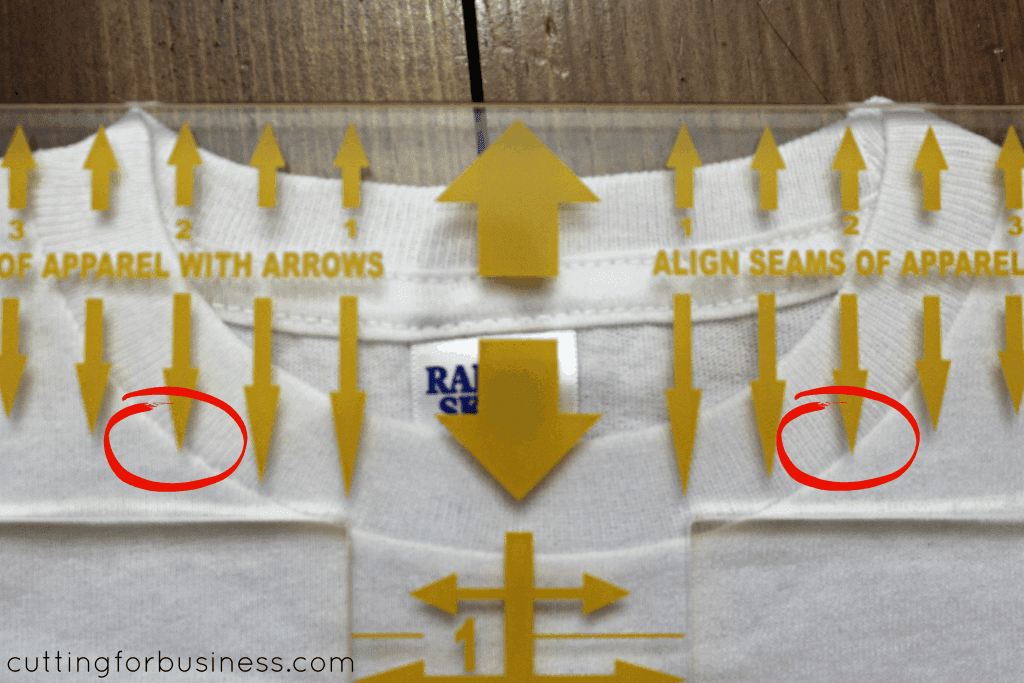
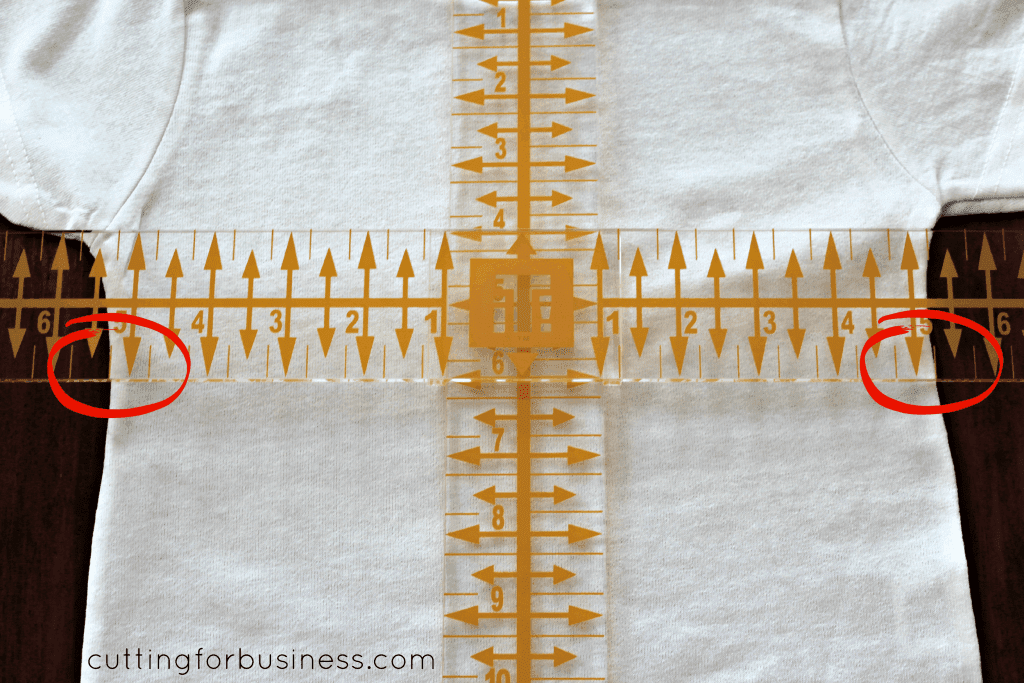
- Place the Tee Square It on top of your shirt with the collar plate over the collar. You will line up one set of the arrows on the Tee Square It 3 with the seam of your collar. You can see in the photo below I’ve circled the arrows that I’ve used to line up the seam.
- Next, you’ll line up the side seams of the shirt on the width bar. In the photo below, I circled the measurements on the side seam to show you how it should line up. In this example, the side seams line up at 5.25 inches.
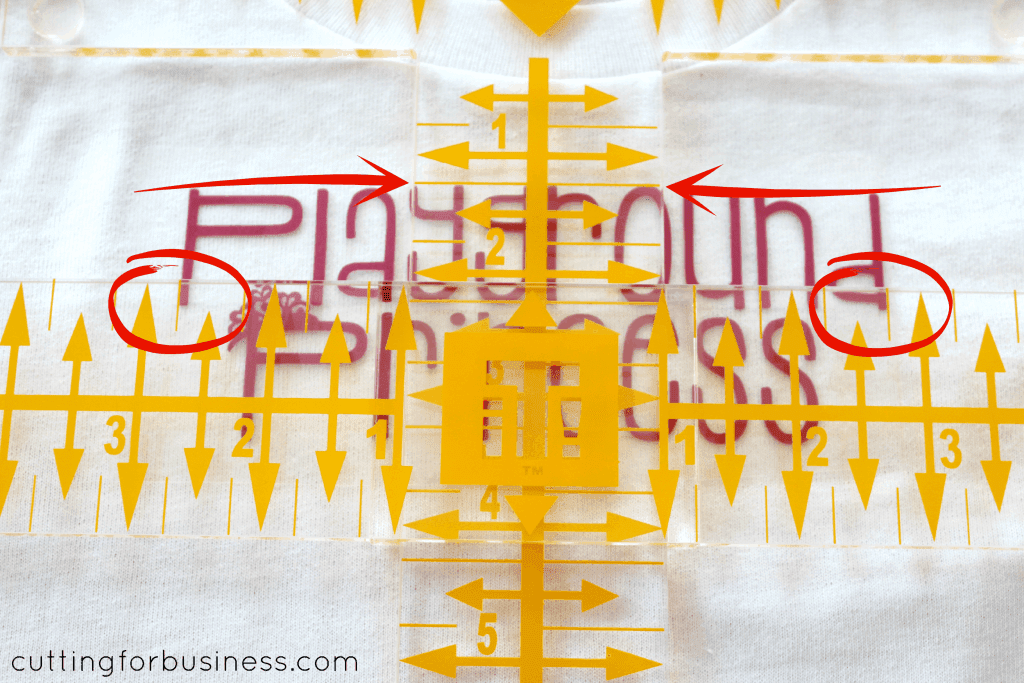
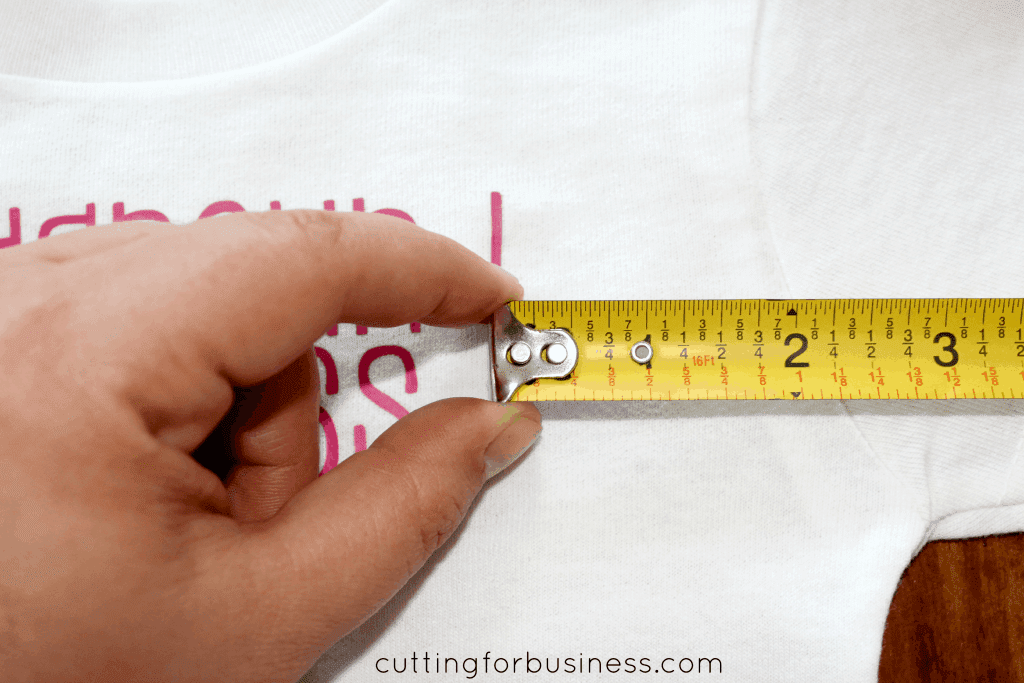
- After lining up your shirt, slide your transfer design under the Tee Square It. You will be able to use the width bar to line up your design. The photo below shows my design lined up using the width bar horizontally (marked with circles) and the center bar vertically (marked with arrows).
- Remove the Tee Square It, and your shirt is ready to press. (Tip: If you won’t be pressing it right away, you can secure your design with blue painters tape. It can safely be pressed – I do it all the time.)
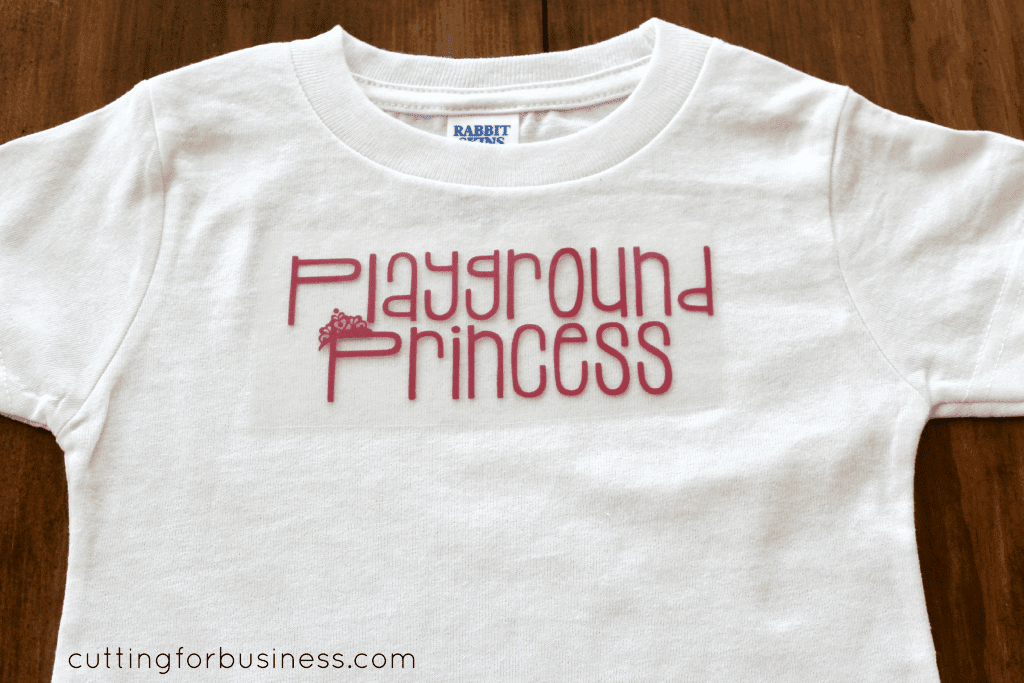
- Press your design using your heat press. Need help choosing the perfect heat press? Read my heat press guide.
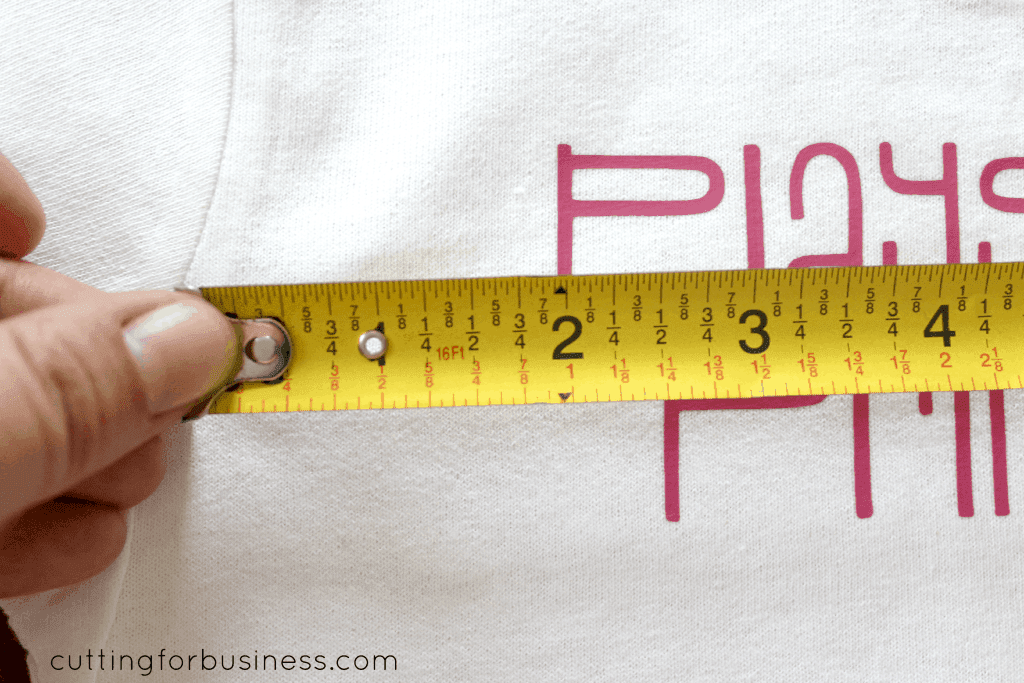
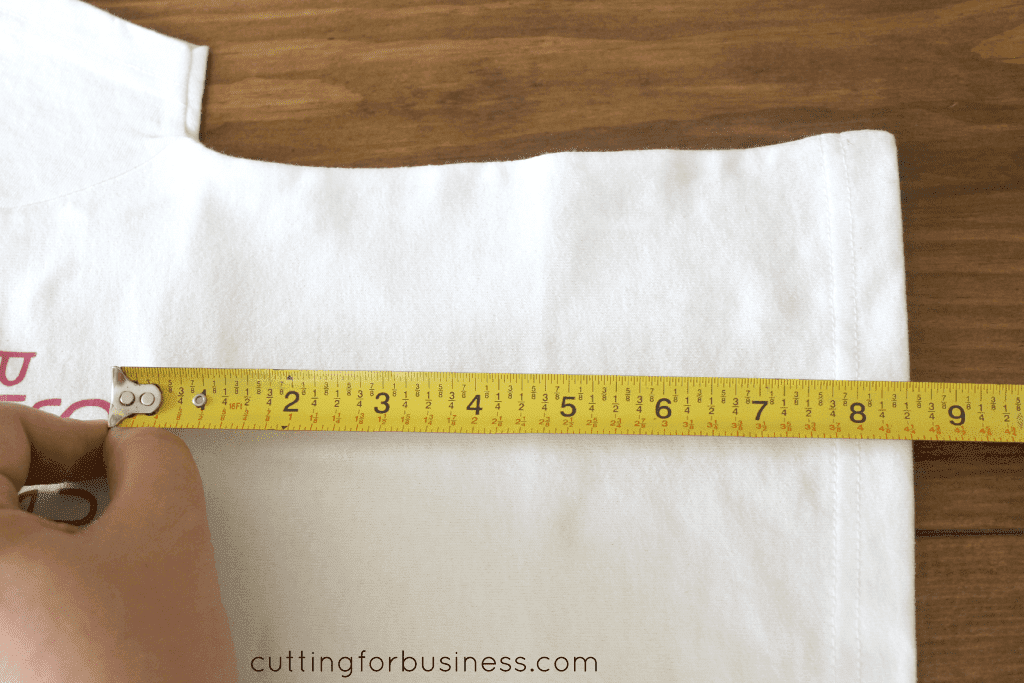
- That’s it! This whole process takes about 1-2 minutes. I showed every step of the way, so it looks time consuming, but it is not. But, don’t go yet! I want you to see that this tool actually works. Below are various measurements to show you that my heat transfer vinyl design is actually lined up.

Heads up: This is not a sponsored post. I received no compensation to write this post, nor was I asked to write this post. I’ve had a Tee Square It from before Cutting for Business was online – and it is one of the most useful gadgets I own.
Where to Buy a Tee Square It
Love the font I used in the tutorial? Download it: Stacked font.
Since 2015, Christine Schinagl has been helping crafters start and run craft businesses through her blog, Cutting for Business. As a Silhouette and Cricut crafter herself, she has a unique take on what works and what doesn’t work in the craft business world. She also enjoys teaching other crafters how to create digital SVG designs, available through the Design with Me series.