• Home
  • Work with CfB
  • Contact
    • Bloglovin
    • Facebook
    • Instagram
    • Pinterest

Cutting for Business

  • New? Start Here!
  • Visit the Shop
    • Ebooks
    • Business Names
    • Craft Business Consultations
    • Order Forms
    • SVG Files
    • Etsy Shop
  • Join Craft Business Help
  • Must Have Products
  • Etsy Shop
  • Free Cut Files
  • Free Etsy Listings


Affiliate links may be present in the following article. For my full disclosure policy, see this link.
Additionally, as an Amazon Associate I earn from qualifying purchases.

Tutorial: How to Cut Out Wood Words & Shapes Using a Scroll Saw

Filed Under: Project Tutorials

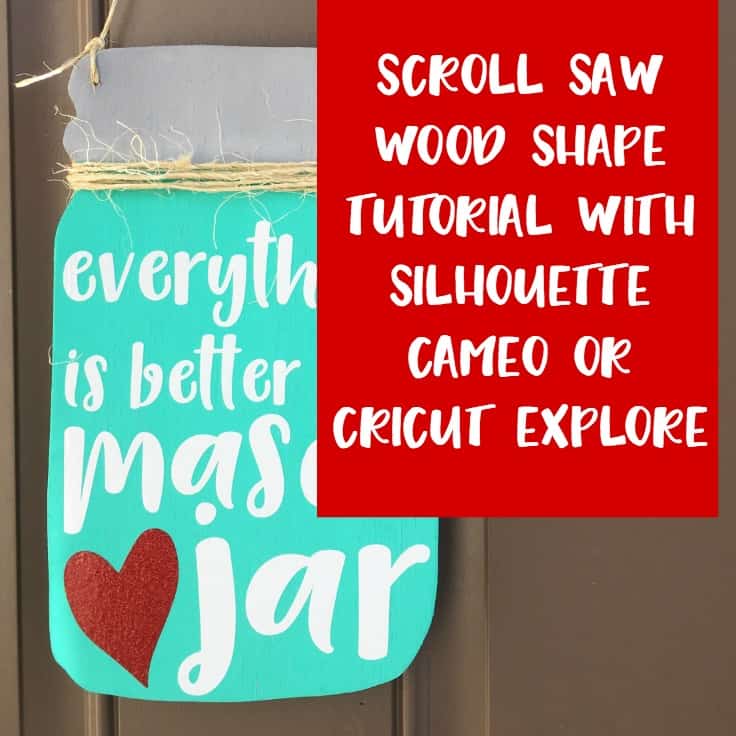
Last year, I shared a tutorial on using your Silhouette or Cricut and a scroll saw to cut out shaped blanks that you could paint or stain. (Missed it? Read it here.) I’ve been meaning to add another, and today I finally got around to it!

In the first tutorial, I kept the scroll saw cuts super simple. This time, this tutorial features more difficult cuts – like cutting out the centers of text. You’ll also notice that I used a thicker wood – 1/2 inch select pine.

How to Cut Out Wood Words & Shapes Using a Scroll Saw

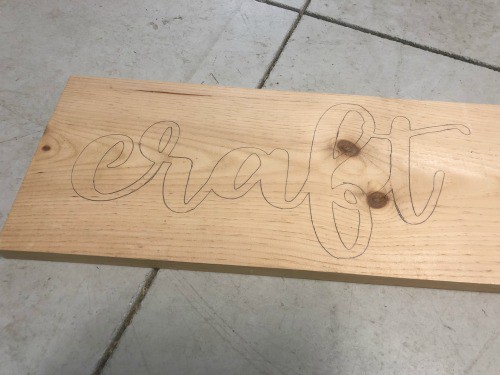
  1. Use your Silhouette or Cricut to cut a template from cardstock. I used the Hello Wedding font and the word Craft. After cutting your cardstock template, trace around it on your wood using a pencil. Tutorial: How to Cut Out Wood Words & Shapes Using a Scroll Saw and Your Silhouette Portrait or Cameo and Cricut Explore or Maker - by cuttingforbusiness.com
    Tutorial: How to Cut Out Wood Words & Shapes Using a Scroll Saw and Your Silhouette Portrait or Cameo and Cricut Explore or Maker - by cuttingforbusiness.com
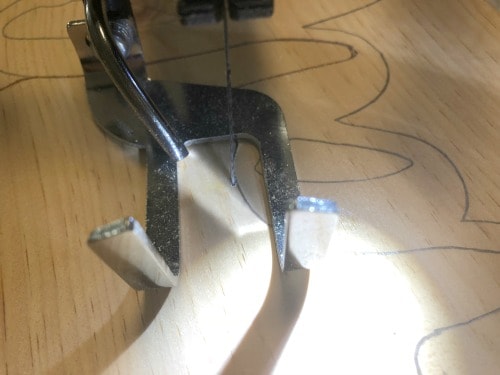
  2. Begin your scroll saw cuts and cut around the entire outside of your word or shape. Cutting with a scroll saw is much like using a sewing machine. As you complete more projects, you’ll get better at doing smooth rounded edges and corners. The one thing that helps me is to constantly keep my wood moving. (If you are curious, I don’t have a fancy scroll saw. Read more about it here.)Tutorial: How to Cut Out Wood Words & Shapes Using a Scroll Saw and Your Silhouette Portrait or Cameo and Cricut Explore or Maker - by cuttingforbusiness.com
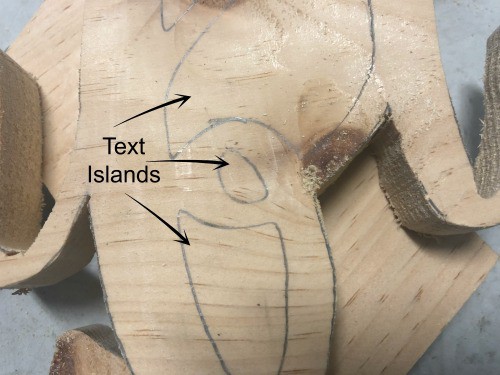
  3. After you’ve cut around the outside of the design, drill holes into the insides of the text (these are called islands). Now, consult your scroll saw manual to find out how to remove the blade. On my scroll saw, I turn a knob which releases the tension in the blade and allows me to remove and rethread the blade through my drilled hole. Then, you’ll cut out all of the islands. Tutorial: How to Cut Out Wood Words & Shapes Using a Scroll Saw and Your Silhouette Portrait or Cameo and Cricut Explore or Maker - by cuttingforbusiness.com
    Tutorial: How to Cut Out Wood Words & Shapes Using a Scroll Saw and Your Silhouette Portrait or Cameo and Cricut Explore or Maker - by cuttingforbusiness.com
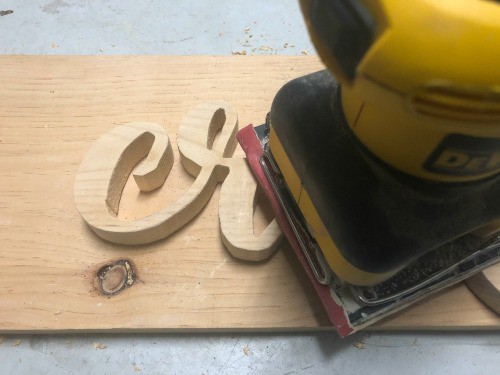
  4. After you’ve cut your shape, sand down any rough edges. (Need tips for sanding? Head to this post.) I used my palm sander for the front, back, and edges and sandpaper for the islands and other nooks and crannies. Tutorial: How to Cut Out Wood Words & Shapes Using a Scroll Saw and Your Silhouette Portrait or Cameo and Cricut Explore or Maker - by cuttingforbusiness.com
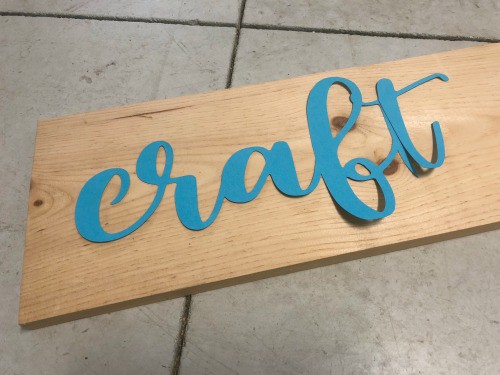
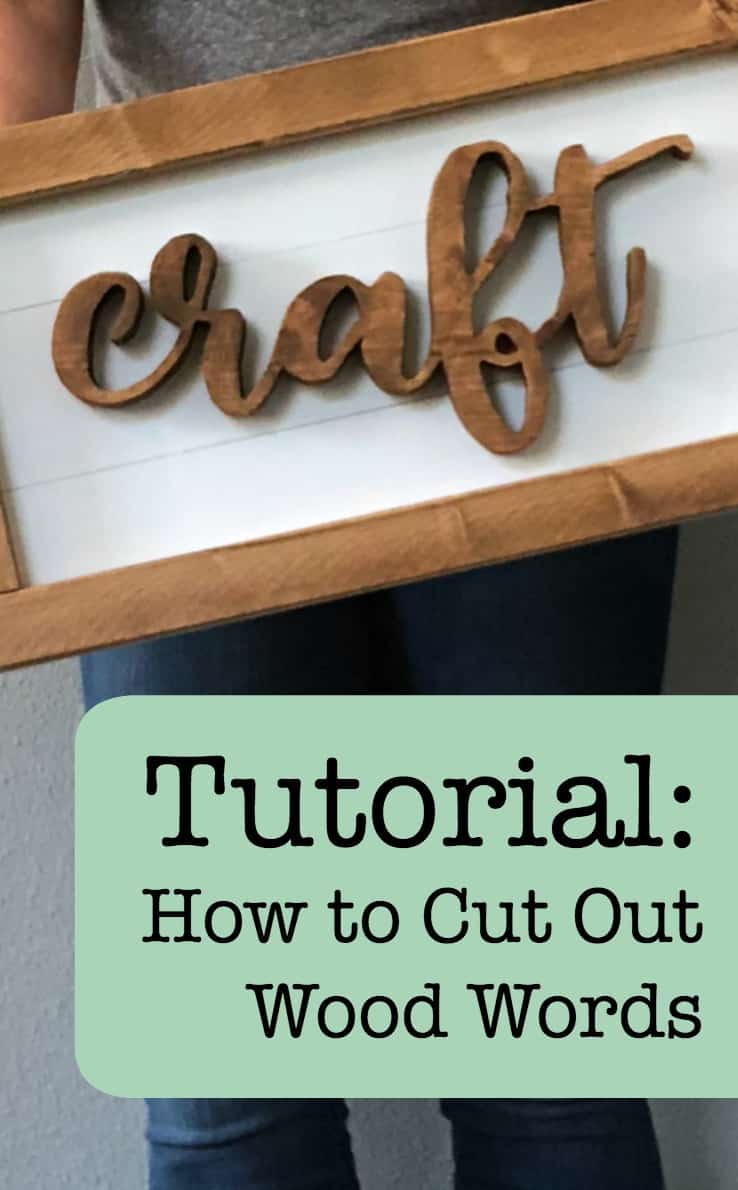
  5. Stain or paint your wood word or shape. I used spray on stain (wood stain that comes in a spray paint can). This is the first project that I’ve used it and was happy with the results. Here’s the exact one I used. After staining and painting, your wood word is ready to add a hanger to the back and hang on the wall. I usually use screw in sawtooth hangers.
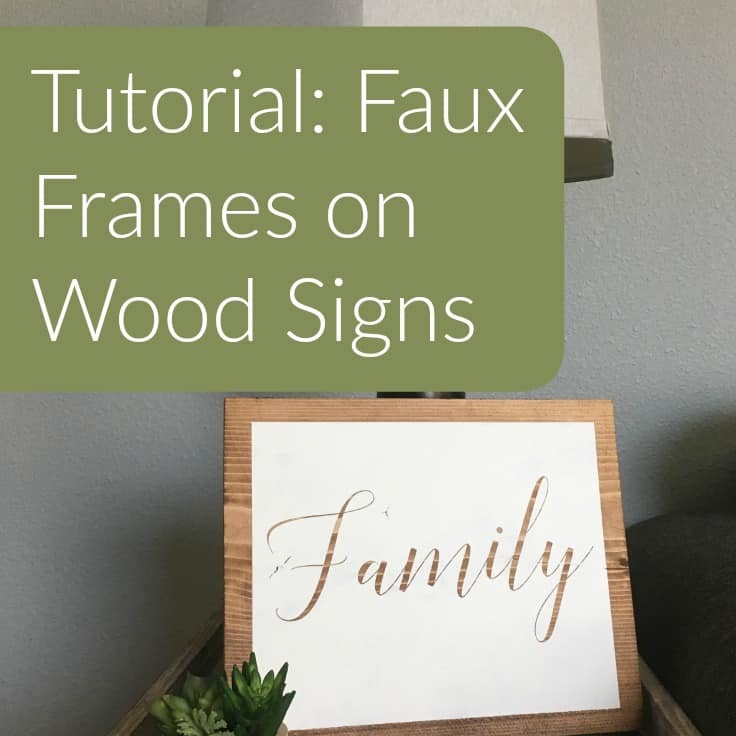
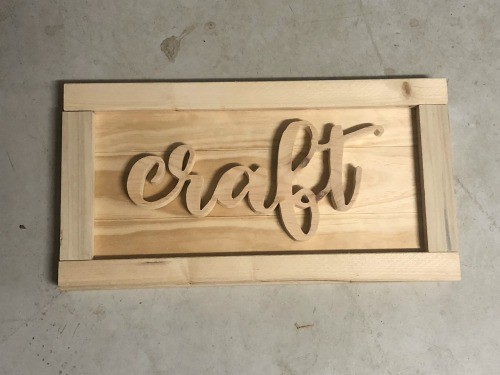
  6. I decided to mount my word onto a frame on made with some wood scraps laying around my garage. I used basic wood nails to nail everything together. Here’s a link to a tutorial on the blog if you’d like to make a frame, too. Oh! I painted the background white using this.
    Tutorial: How to Cut Out Wood Words & Shapes Using a Scroll Saw and Your Silhouette Portrait or Cameo and Cricut Explore or Maker - by cuttingforbusiness.com

Love this tutorial? Save the image below to Pinterest!

Tutorial: How to Cut Out Wood Words & Shapes Using a Scroll Saw and Your Silhouette Portrait or Cameo and Cricut Explore or Maker - by cuttingforbusiness.com

Related Posts

  • Wood Sign Making 101 – Everything You Need to Perfectly Paint SignsWood Sign Making 101 – Everything You Need to Perfectly Paint Signs
  • Wood Signs: How to Prevent Your Vinyl Stencil from Peeling Your Paint UpWood Signs: How to Prevent Your Vinyl Stencil from Peeling Your Paint Up
  • How to Properly Sand Wood for Painted Wooden SignsHow to Properly Sand Wood for Painted Wooden Signs
  • DIY Wood Sign Christmas Advent Calendar TutorialDIY Wood Sign Christmas Advent Calendar Tutorial
  • Why Does Paint Bleed When Using a Vinyl Stencil?Why Does Paint Bleed When Using a Vinyl Stencil?
  • Free Cha Ching Obsessed SVG Cut FileFree Cha Ching Obsessed SVG Cut File

Connect with Cutting for Business

  • Bloglovin
  • Facebook
  • Instagram
  • Pinterest

Get Cutting for Business in Your Inbox

Buy Books


Cutting for Business is a participant in the Amazon Services LLC Associates Program, an affiliate advertising program designed to provide a means for sites to earn advertising fees by advertising and linking to Amazon.com and affiliated sites. See the disclosures page for full disclosure information.


« What is an EIN Number? Do You Need One?
Free St. Patrick’s Day SVG Cut File »

Comments

  1. Eleanor says

    February 8, 2018 at 7:39 am

    Thank you so much for this tutorial! What type of blade do you use in the scroll saw?

    Reply
    • Christine says

      February 9, 2018 at 8:53 am

      I use a standard tooth blade most of the time, occasionally I use a skip tooth blade – it’s a little more forgiving!

      Reply
  2. Eleanor says

    February 8, 2018 at 7:40 am

    Also – where do you find 1/2″ Pine? Thank you!

    Reply
    • Christine says

      February 9, 2018 at 8:52 am

      My local lumbar yard has it!

      Reply
  3. Danna says

    February 11, 2018 at 11:55 am

    Thank you for the tutorial. My husband has a scroll saw and he gets frustrated when it comes time to do those cuttings. I’ll have show this to him. As for me and any tool that has a blade, no thank you. I’m the type of person who would probably manage to cut off a limb no matter what part of my body it belongs to lol.

    Reply
    • Christine says

      February 14, 2018 at 10:47 am

      Danna, Did you know you can get cut proof gloves? They are meant for kitchens, but I use them with my scroll saw, too: http://amzn.to/2CkEPzG

      Reply
  4. Michelle says

    February 15, 2018 at 6:50 pm

    I find it easier to cut the inside of the letter first…especially if you have single letters that aren’t connected. Cutting the inside first gives you more wood to manage instead of a small letter. Your fingers aren’t as close to the blades this way.
    Ultra Reverse blades from Flying Dutchman Scroll Saw Blades are awesome. Size 3 and 9.

    Reply
    • Christine says

      February 20, 2018 at 10:17 am

      Thanks for sharing!

      Reply
  5. Tracy says

    April 10, 2019 at 12:15 pm

    Thank you for the post. I have also done many projects like this. However instead of tracing the paper on the wood I use basting spray from the sewing department and the words or pictures peel off right after I am done with no sticky residue sand it and its awesome!! Just thought I’d leave my suggestion.

    Reply
    • Christine, Cutting for Business says

      May 18, 2019 at 8:39 am

      Interesting! I’ll have to try it!

      Reply
  6. Jeana says

    April 26, 2020 at 11:02 am

    What type of scroll saw do you have? I want to purchase to do wood craft shapes that I can paint and decorate.

    Thank you!

    Reply
    • Christine, Cutting for Business says

      May 6, 2020 at 10:21 am

      It’s listed in this post: https://cuttingforbusiness.com/scroll-saw-silhouette-cameo-or-cricut-wood-shape-tutorial/

      Reply
  7. Landon says

    October 6, 2020 at 1:51 pm

    Thank you so much for sharing this tutorial.

    Reply
    • Christine, Cutting for Business says

      November 1, 2020 at 9:51 pm

      Hope you found it helpful!

      Reply

Comments on Cutting for Business are moderated before posting. This ensures that this blog does not get overrun by spam or inappropriate comments. Please allow up to 7 days before you'll see your comment. Thanks, Christine

Leave a Reply Cancel reply

Your email address will not be published. Required fields are marked *

Make Money

Love to craft and ready to make some money? You're in the right place! Whether you own a Silhouette Cameo, a Cricut Maker, a Silhouette Curio, a Cricut Joy, or even a Glowforge, get tips and tricks to make an income with your machine.


Ready to Buy Craft Business Names


Free Fonts

Copyright © 2021 · Cutting for Business
Disclosures · Privacy Policy
This site is not affiliated with Silhouette America or Cricut (Provo Craft & Novelty, Inc.)

This website uses cookies to improve your experience. We'll assume you're ok with this, but you can opt-out if you wish. Cookie settingsACCEPT
Privacy & Cookies Policy

Privacy Overview

This website uses cookies to improve your experience while you navigate through the website. Out of these cookies, the cookies that are categorized as necessary are stored on your browser as they are essential for the working of basic functionalities of the website. We also use third-party cookies that help us analyze and understand how you use this website. These cookies will be stored in your browser only with your consent. You also have the option to opt-out of these cookies. But opting out of some of these cookies may have an effect on your browsing experience.
Necessary
Always Enabled

Necessary cookies are absolutely essential for the website to function properly. This category only includes cookies that ensures basic functionalities and security features of the website. These cookies do not store any personal information.

Non-necessary

Any cookies that may not be particularly necessary for the website to function and is used specifically to collect user personal data via analytics, ads, other embedded contents are termed as non-necessary cookies. It is mandatory to procure user consent prior to running these cookies on your website.

SAVE & ACCEPT