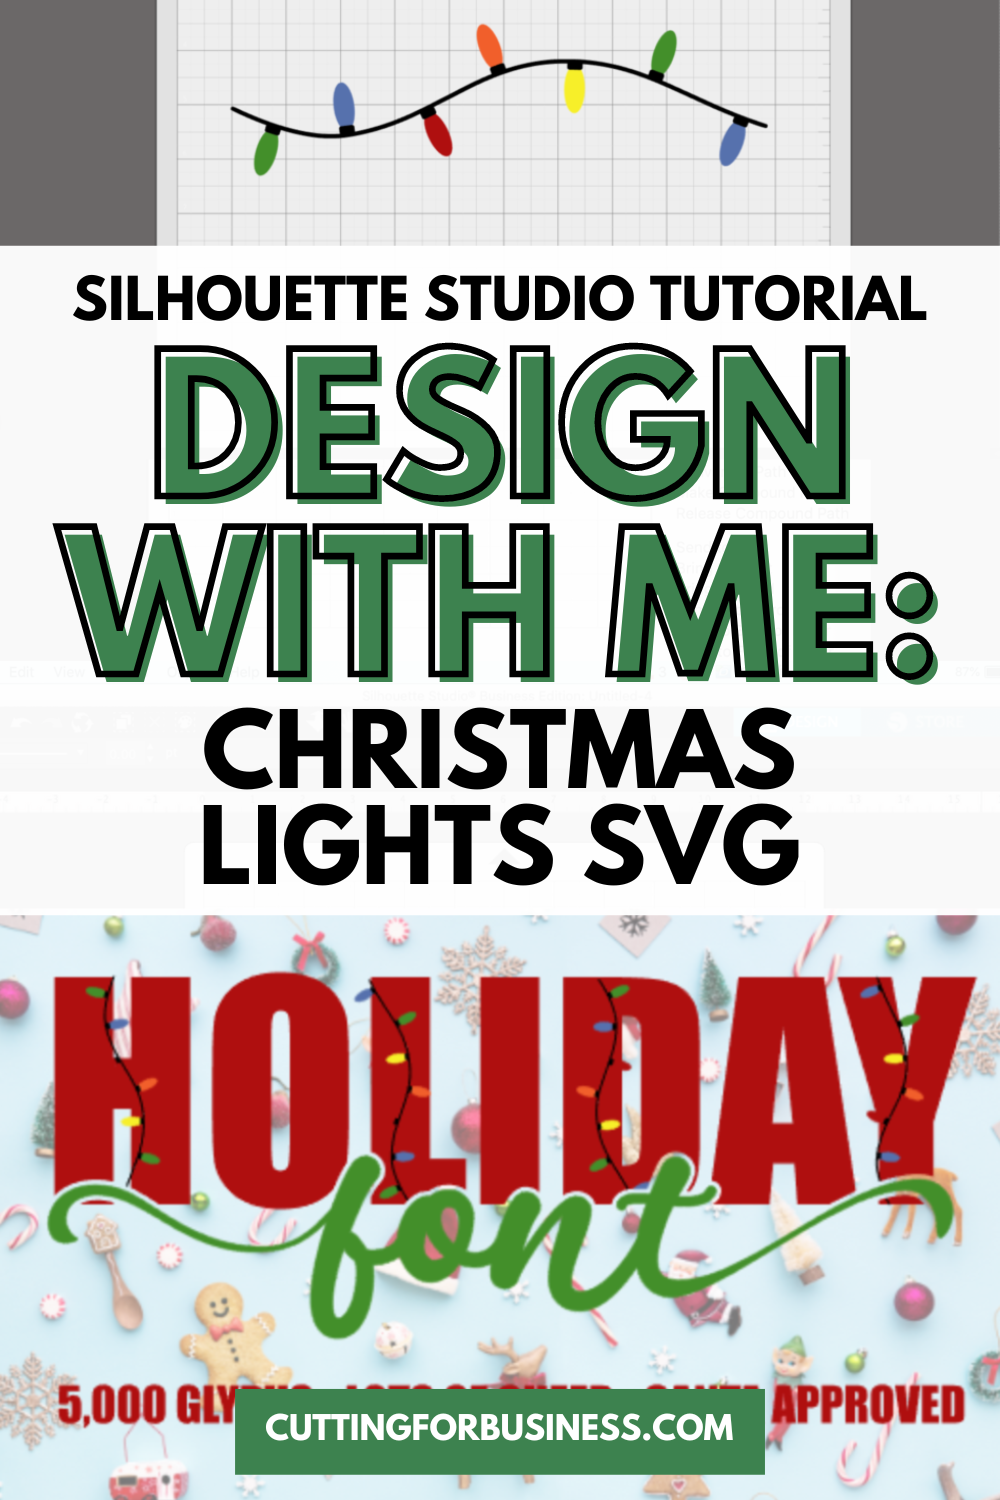
Silhouette Studio Tutorial: String of Christmas Lights SVG
Affiliate Disclosure: As an Amazon Associate I earn from qualifying purchases. Additionally, I may get commissions for purchases made through other affiliate links in this post.
Design with Me is a new regular feature on Cutting for Business! Each Friday, I’ll bring you a new Silhouette Studio tutorial featuring how to design an SVG.
‘Tis the season! Do you decorate the outside of your house? I’m sad to say that we don’t decorate the outside of our house. Unfortunately, our home sits so far off the road – our lights wouldn’t be seen.
So, let’s draw some Christmas lights.
About Design with Me Tutorials
Design with Me Tutorials are created with intermediate Silhouette Studio users in mind. It’s helpful to know the basics of designing in Silhouette Studio before starting the tutorials.
All Design with Me tutorials use Silhouette Studio Business Edition. If you do not have Silhouette Studio Business Edition, some tools may not be available in your Silhouette Studio Edition. Get Silhouette Studio Business Edition.
Silhouette Studio Tutorial: String of Christmas Lights SVG
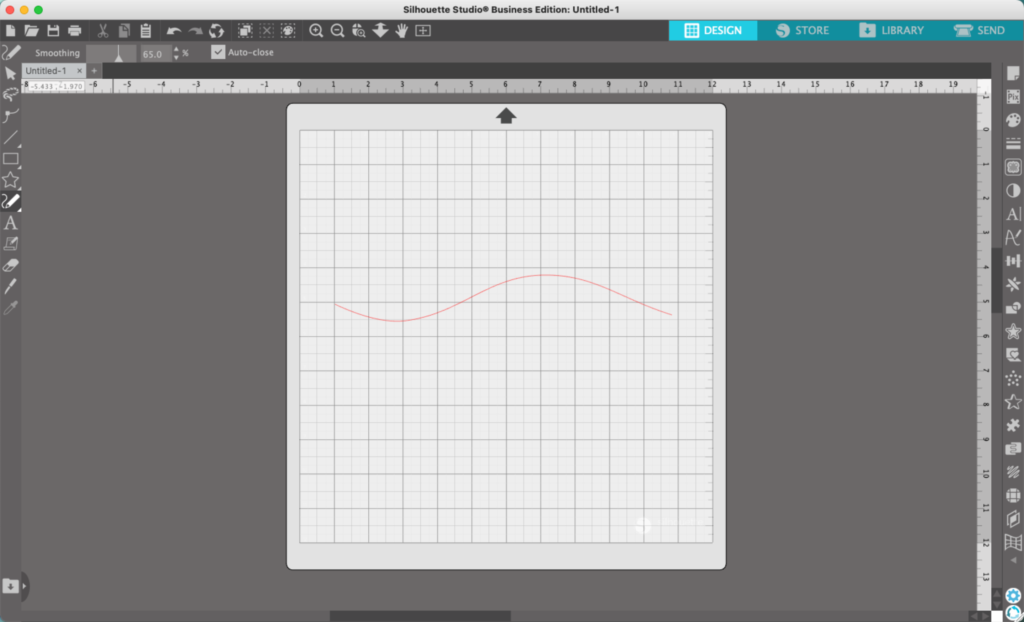
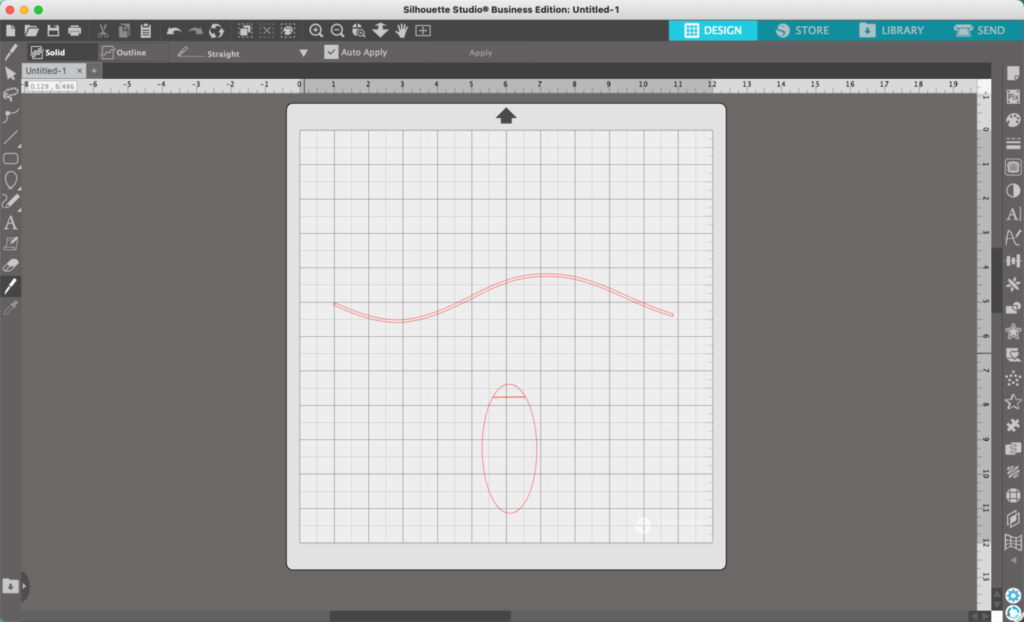
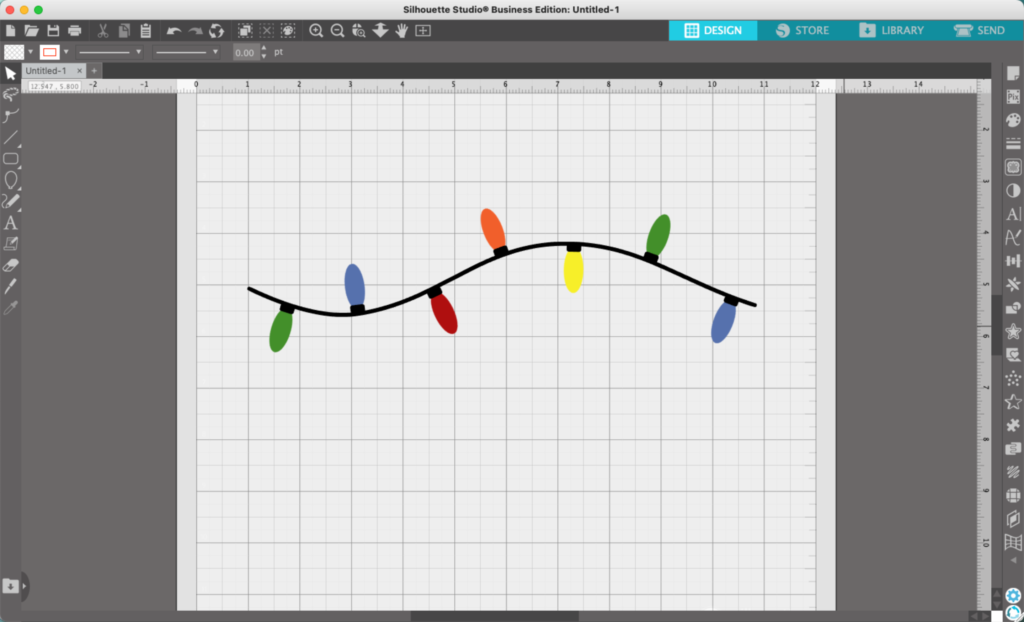
- In Silhouette Studio, draw a wavy line using the ‘Draw Smooth Freehand’ tool. If your line isn’t smooth, you can change the amount of smoothing in the toolbar. I keep mine set around 60% to 70%.
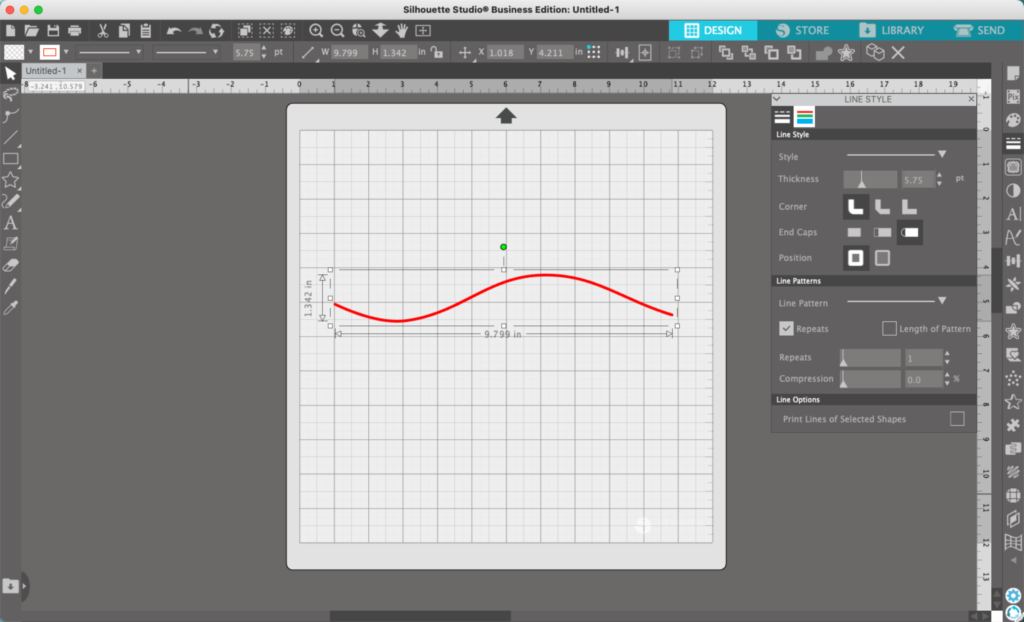
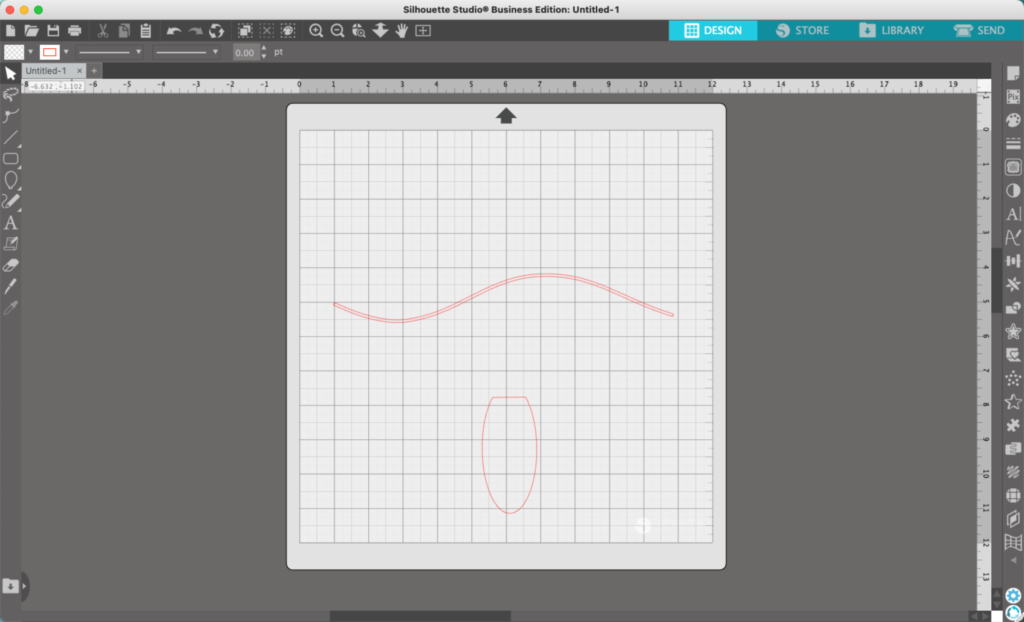
2. Navigate to ‘Panels’, ‘Line Style’. Thicken your line.
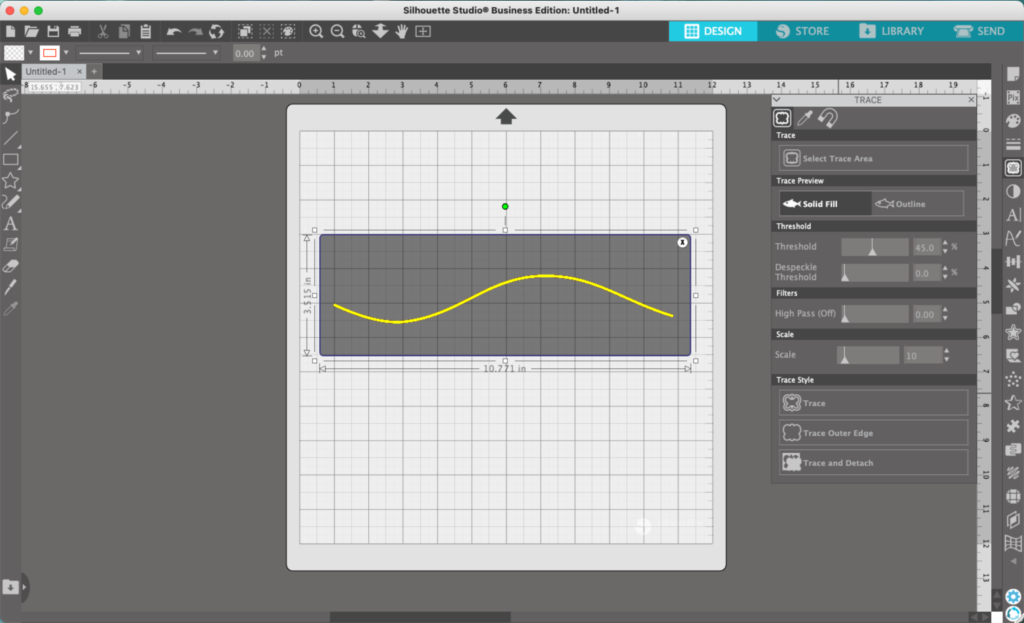
3. From ‘Panels’, navigate to ‘Trace’. Trace your thickened line and delete the original.

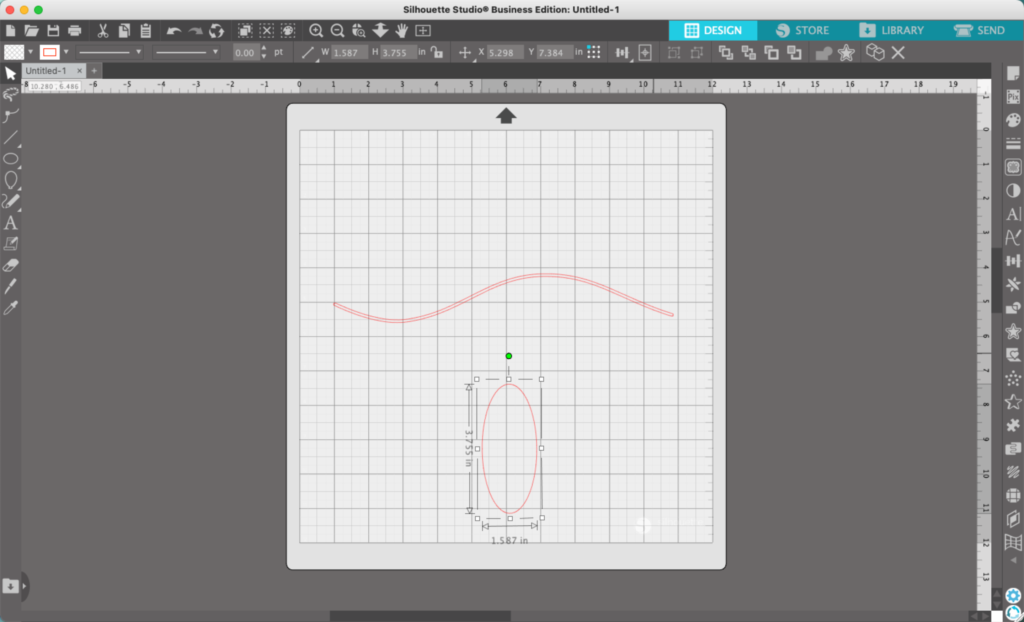
3. Use the ‘Draw an Ellipse’ tool to draw an oval, or choose from Flexishapes. In Flexishapes, the teardrop and the balloon will both probably work.
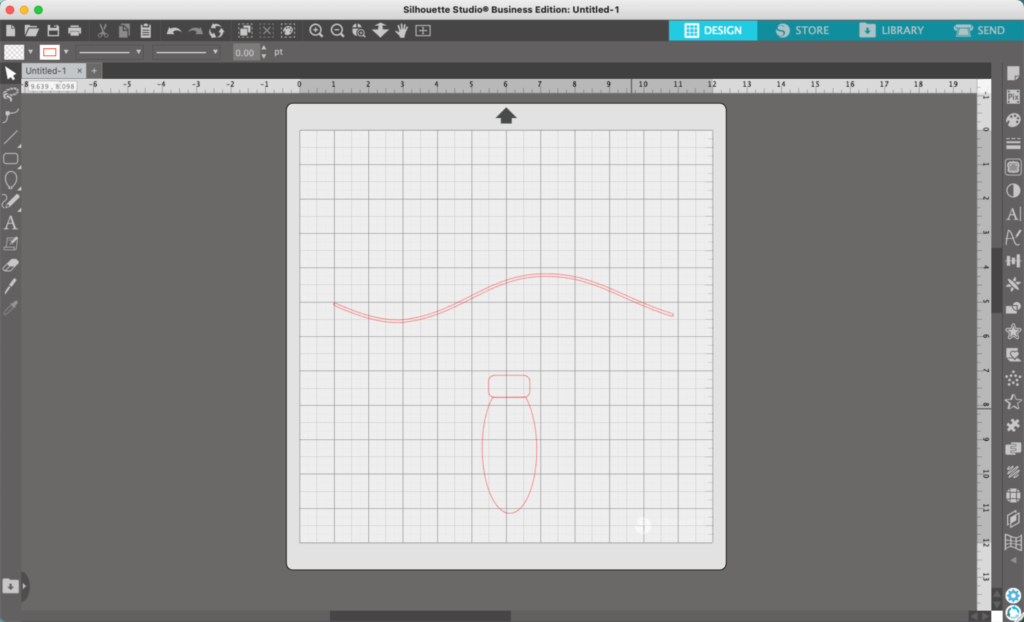
4. Use the knife tool to slice off a section of the oval. Then, delete it.
5. Draw a rectangle using the ‘Rounded Rectangle’ tool to use as the lightbulb base.
6. Select both parts of the light and move it into place on your string

7. Duplicate the bulb and place several copies along the string.
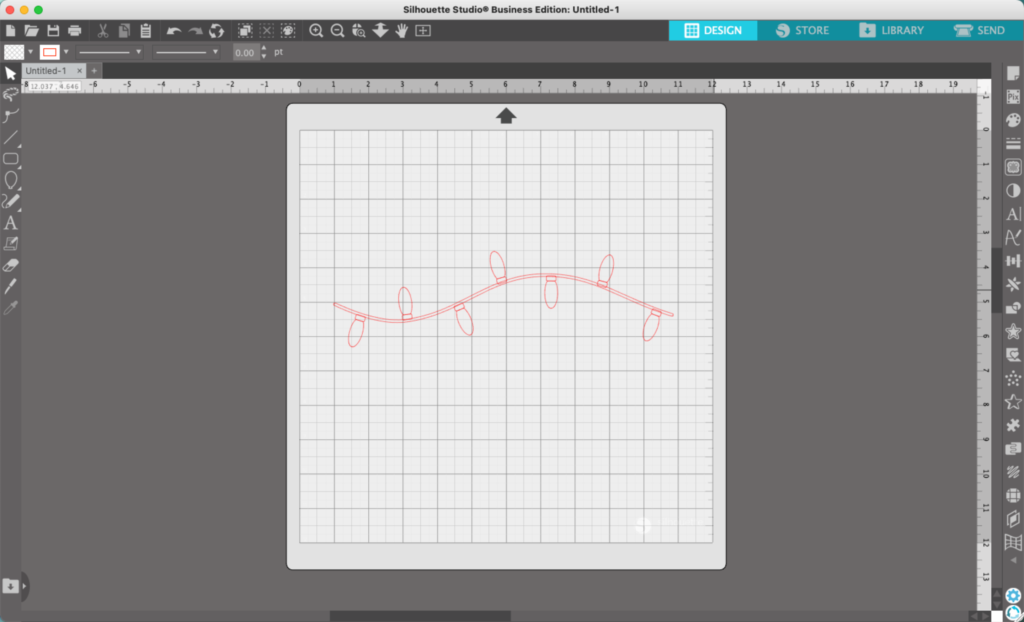
8. Add color to the design. You’ll likely want to weld the bulb bases to the string, unless you are cutting the design in paper – then you might not.
I used the lights in a sample font intro page:

That’s it! Your string of Christmas lights is ready to go!
Don’t Forget to Save!
To save your new SVG creation, head to ‘File’, ‘Save As’, ‘Save to Hard Drive’, name the file, then select ‘SVG’ from the dropdown menu.
Want More SVG Tutorials?
View more Design with Me SVG tutorials.
Since 2015, Christine Schinagl has been helping crafters start and run craft businesses through her blog, Cutting for Business. As a Silhouette and Cricut crafter herself, she has a unique take on what works and what doesn’t work in the craft business world. She also enjoys teaching other crafters how to create digital SVG designs, available through the Design with Me series.