Silhouette Studio Tutorial: Vintage Four Leaf Clover SVG
Affiliate Disclosure: As an Amazon Associate I earn from qualifying purchases. Additionally, I may get commissions for purchases made through other affiliate links in this post.
Design with Me is a new regular feature on Cutting for Business! Each Friday, I’ll bring you a new Silhouette Studio tutorial featuring how to design an SVG.
Before you pour the green beer and roll around in four leaf clovers for luck, let’s design a vintage four leaf clover SVG.

About Design with Me Tutorials
Design with Me Tutorials are created with intermediate Silhouette Studio users in mind. It’s helpful to know the basics of designing in Silhouette Studio before starting the tutorials.
All Design with Me tutorials use Silhouette Studio Business Edition. If you do not have Silhouette Studio Business Edition, some tools may not be available in your Silhouette Studio Edition. Get Silhouette Studio Business Edition.
Silhouette Studio Tutorial: Simple Floral SVG
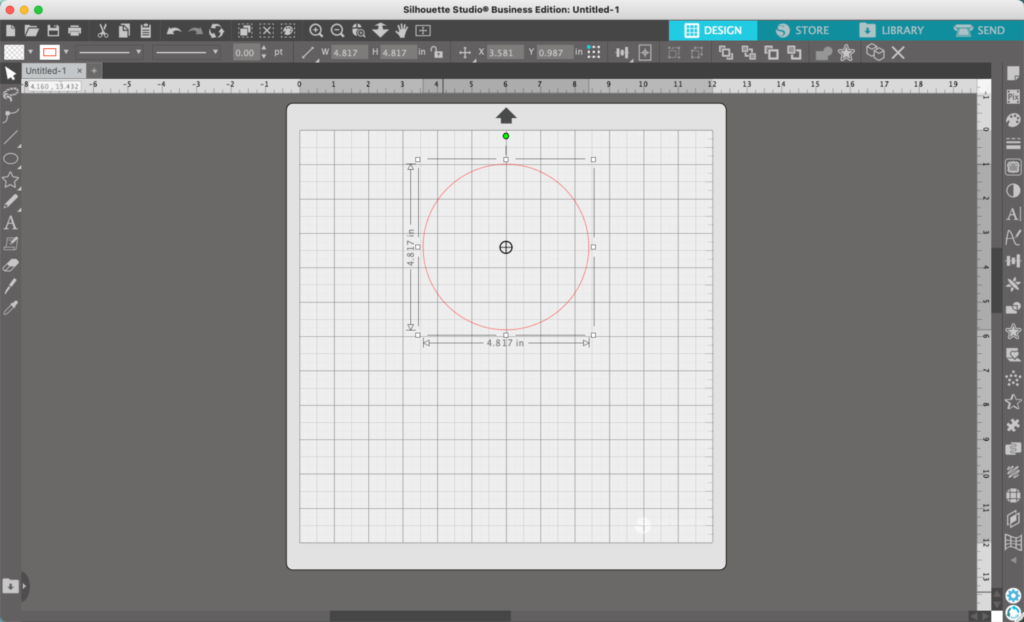
- In Silhouette Studio, draw a circle. Hold down the SHIFT key to make a perfect circle.
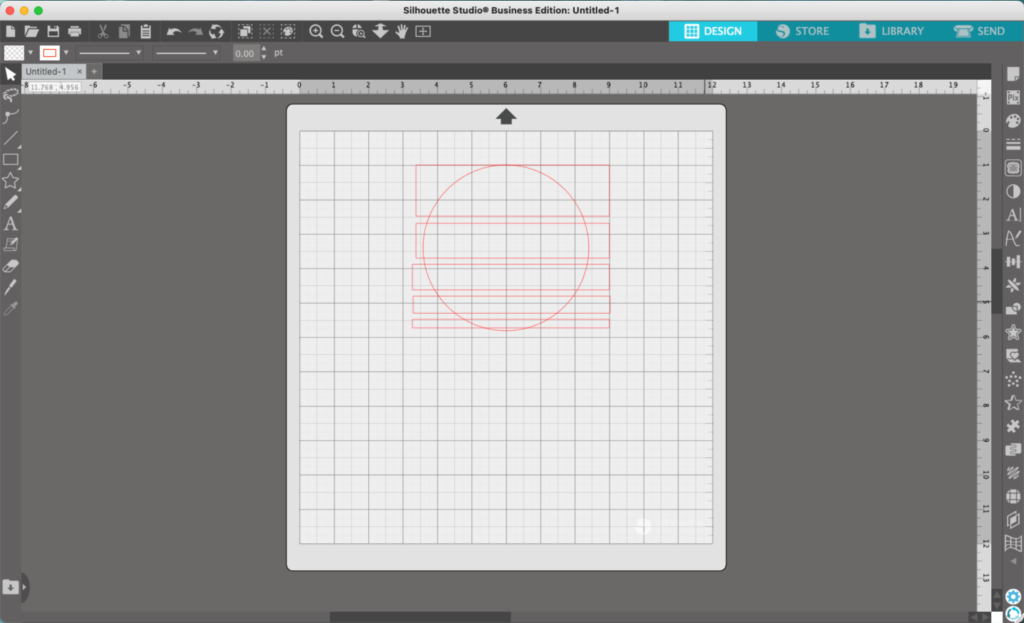
2. Draw rectangles across the circle. I made the rectangles largest at the top, and getting smaller as they go down the circle.
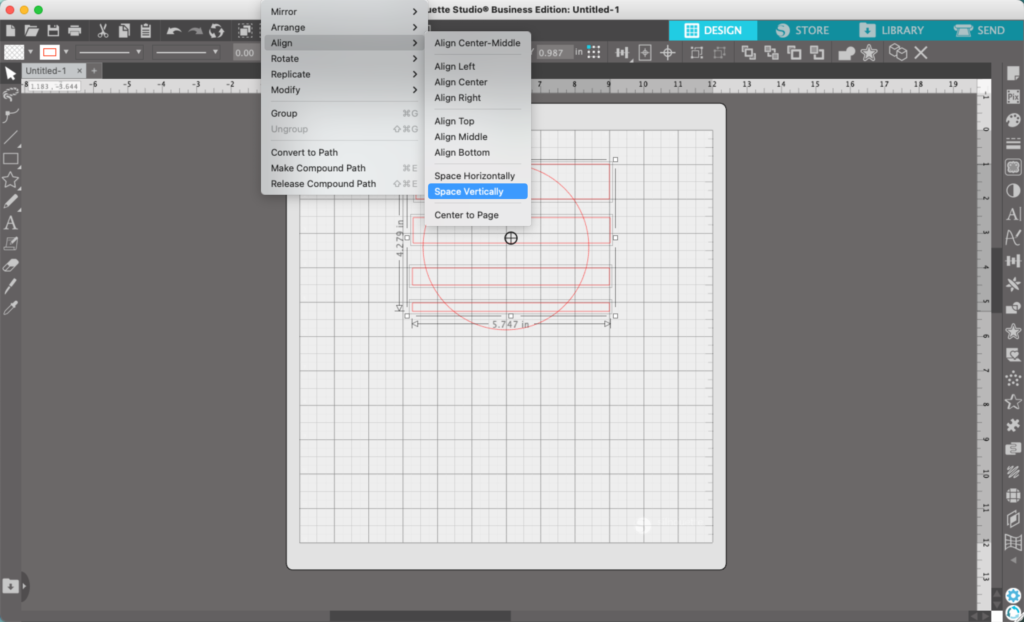
3. Select all the rectangles, then navigate to ‘Object’, ‘Align’, ‘Space vertically’.
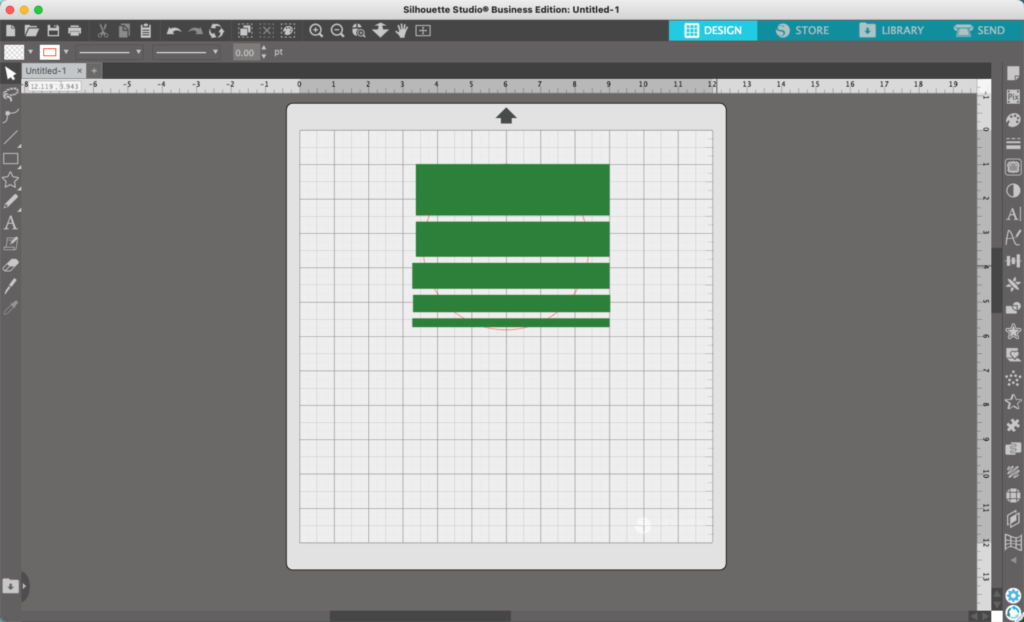
4. Add color to the rectangles.
5. Select the rectangles, right click, and ‘Group’ them together.
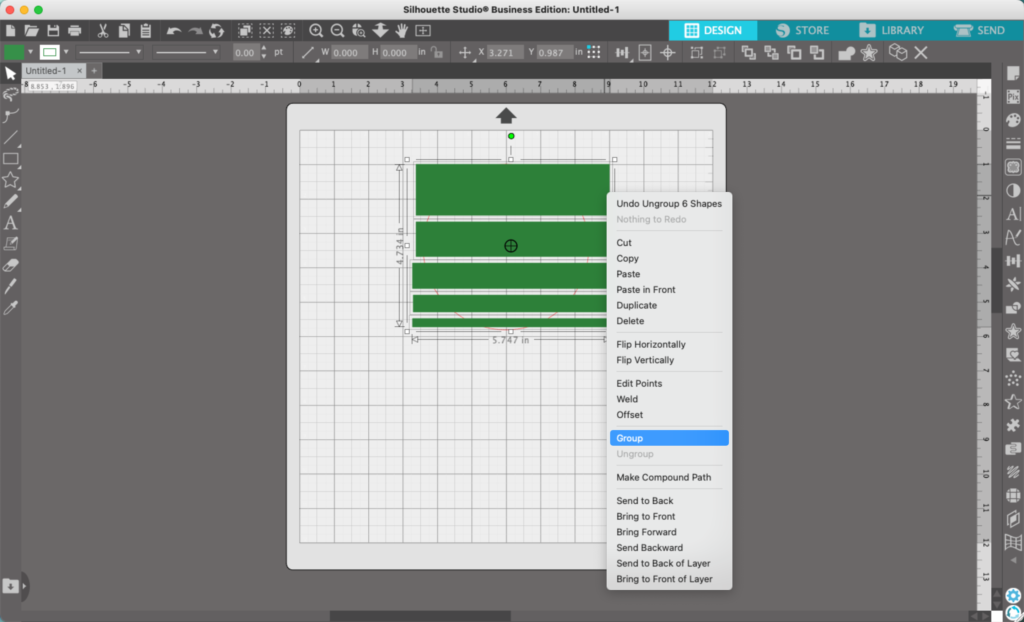
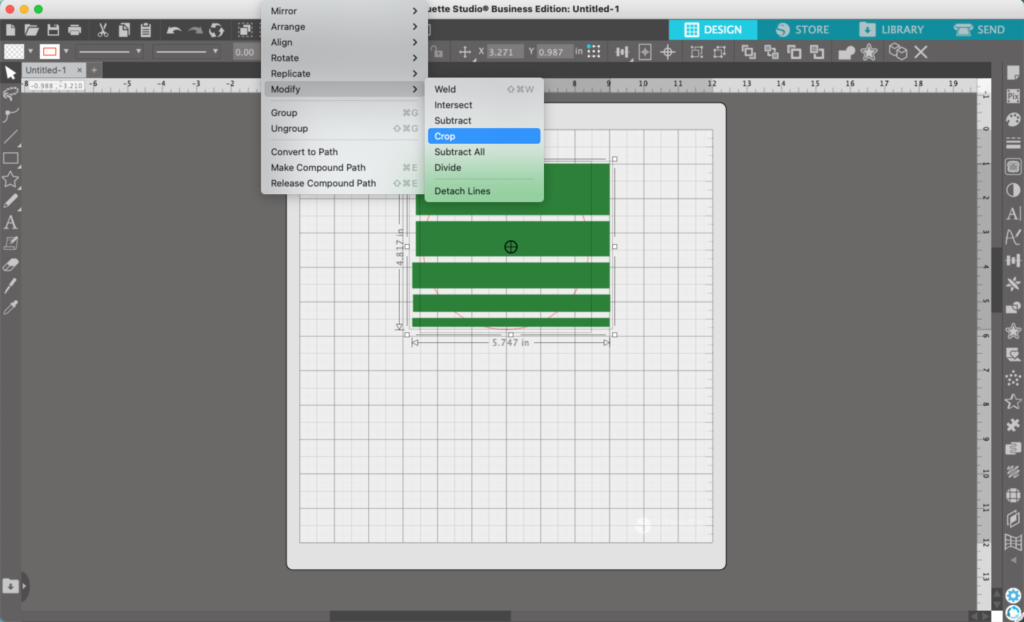
6. Select both the rectangles and the circle, then navigate to ‘Panels’, ‘Object’, then ‘Crop’.
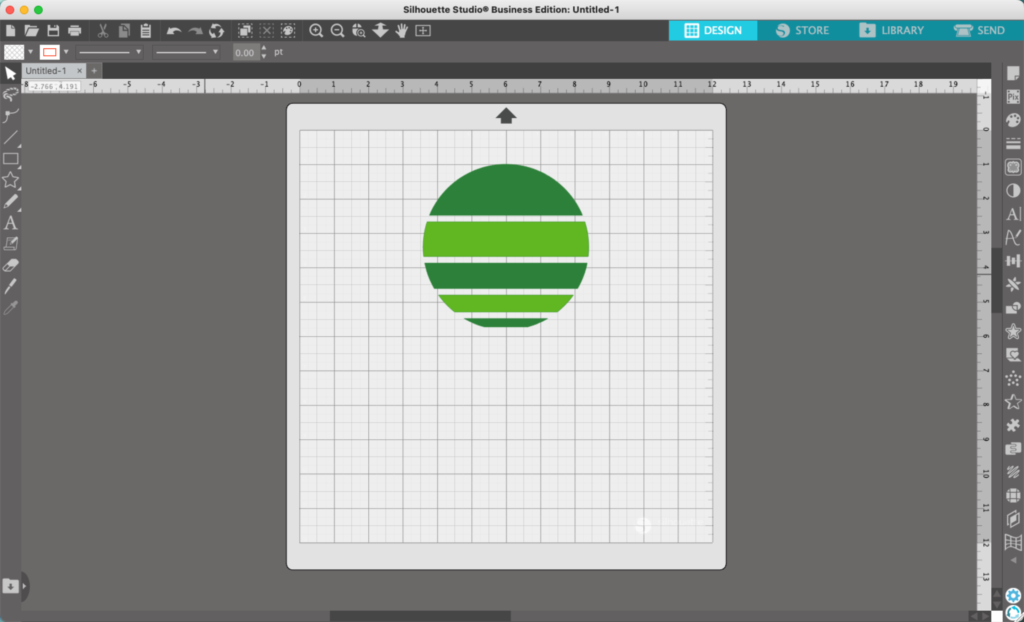
7. To add interest to the design, I colored two of the former rectangles a different shade of green.
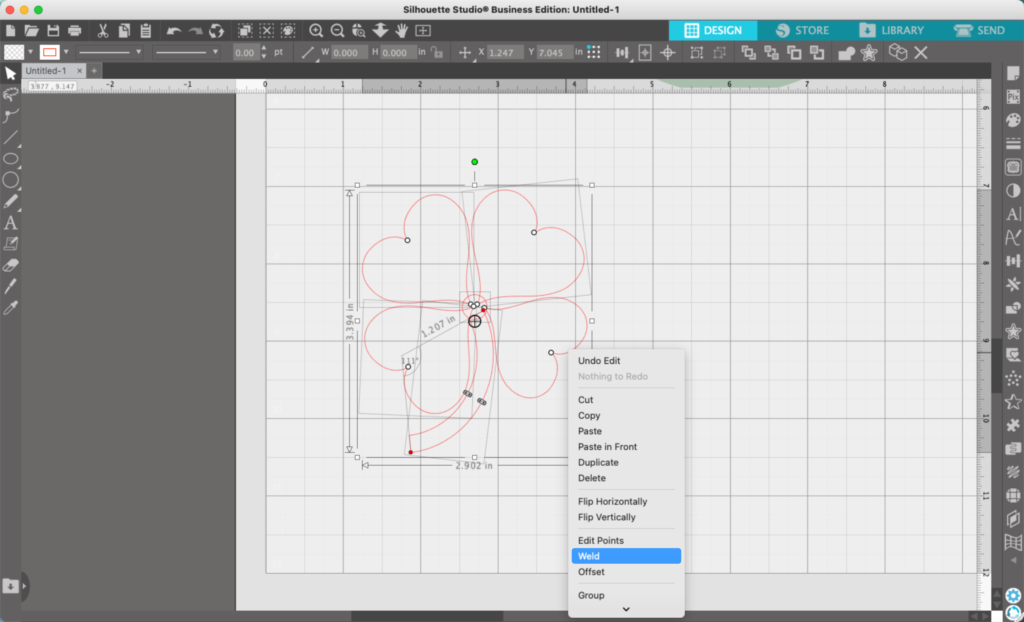
8. Off the side of the circle, use Flexishapes to create a four leaf clover. It’s four hearts, a stem that I crafted from the third Flexishape in the first row, and a circle in the middle.
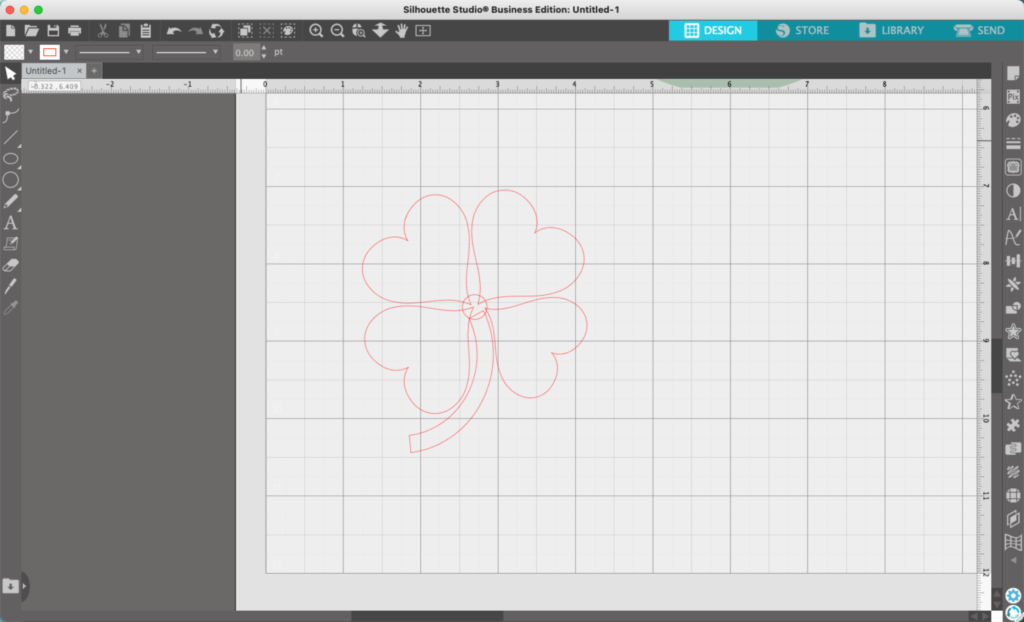
9. Right click and select ‘Weld’ to weld the clover together.
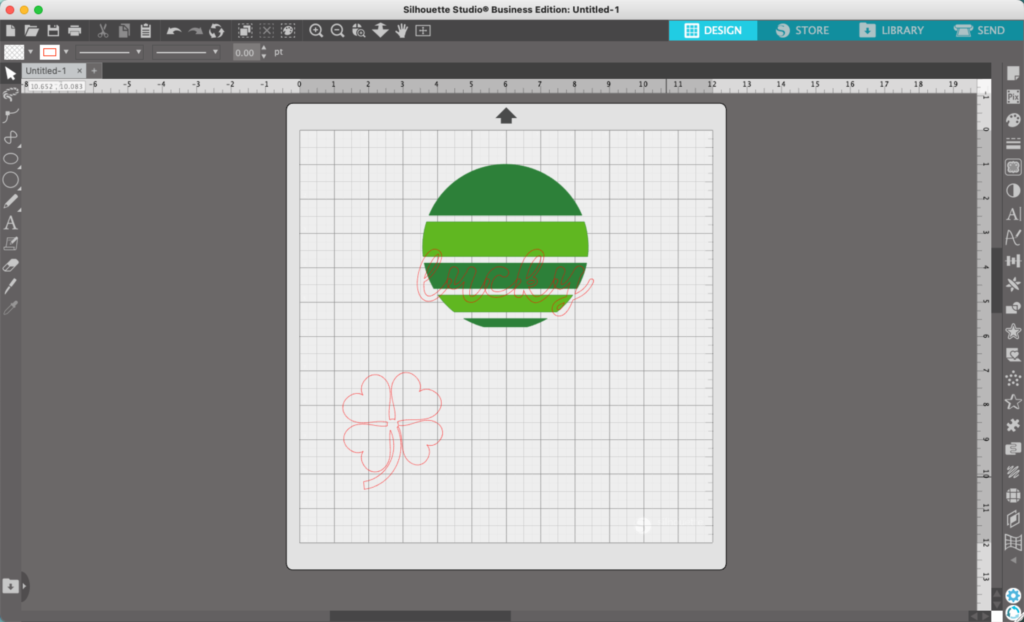
10. Go back to the circle design and add a St. Patrick’s Day word. I’m using the word ‘Lucky’ in Watershed font.
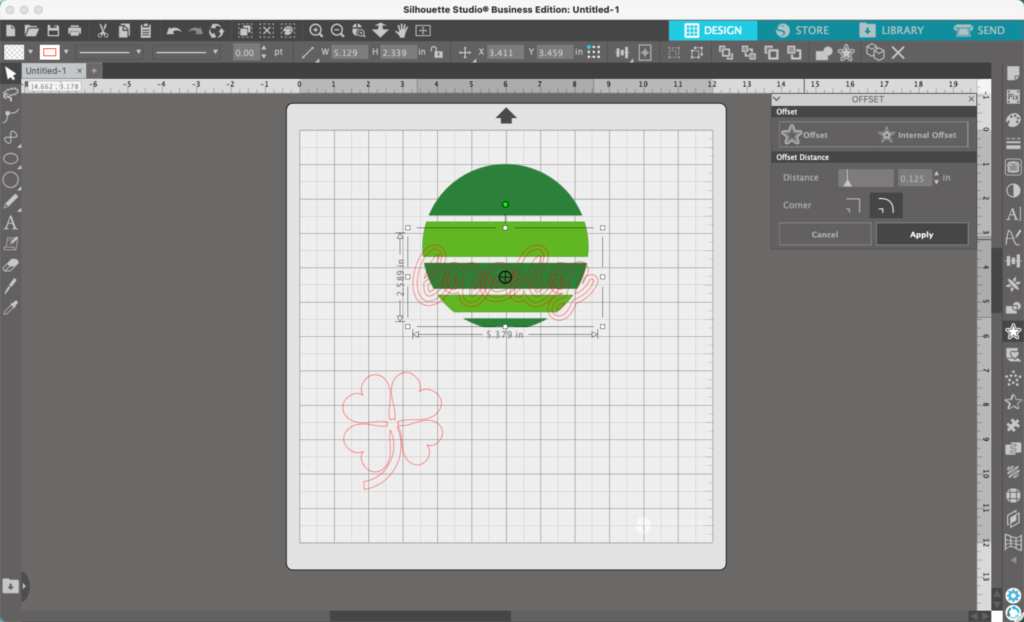
11. Navigate to ‘Panels’, ‘Offset’, and perform an offset on the word.
12. Select both the circle and the word’s offset. Then, navigate to ‘Modify’, ‘Subtract’.
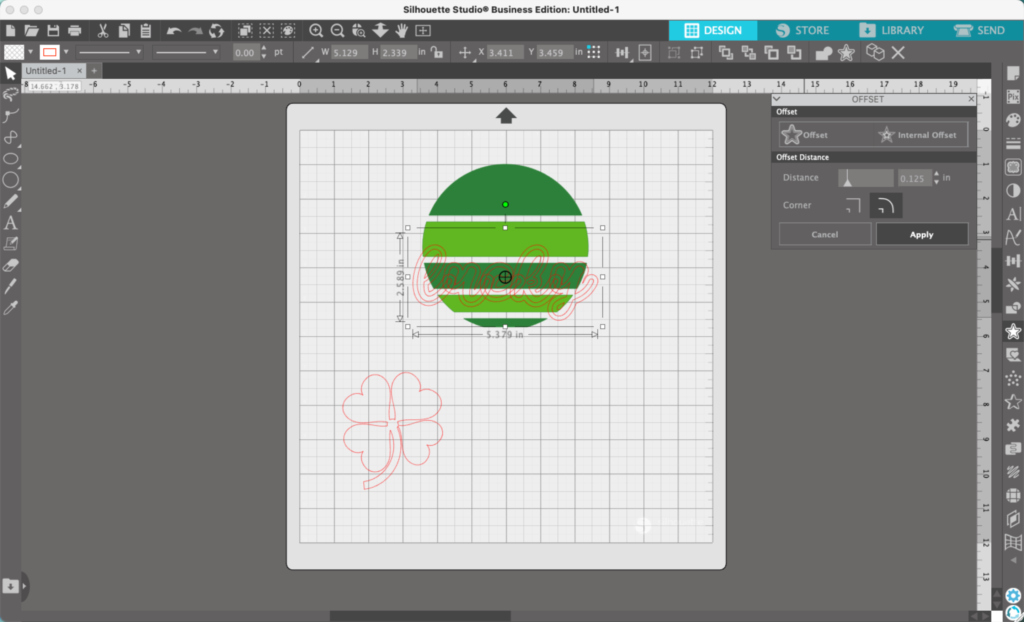
13. Move the four leaf clover on top of your circle.
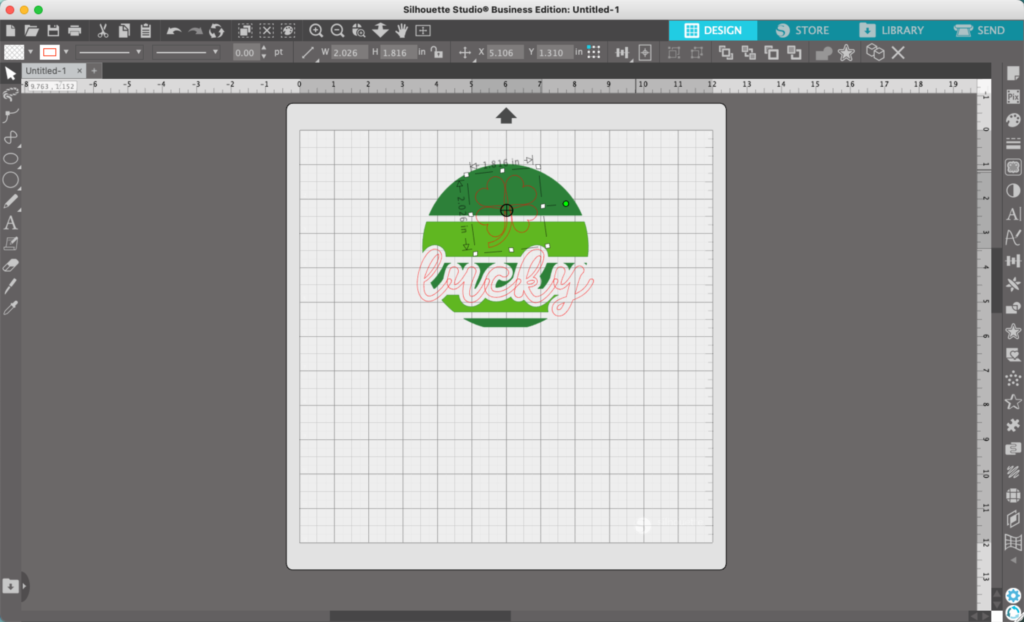
14. Perform an offset on the four leaf clover.
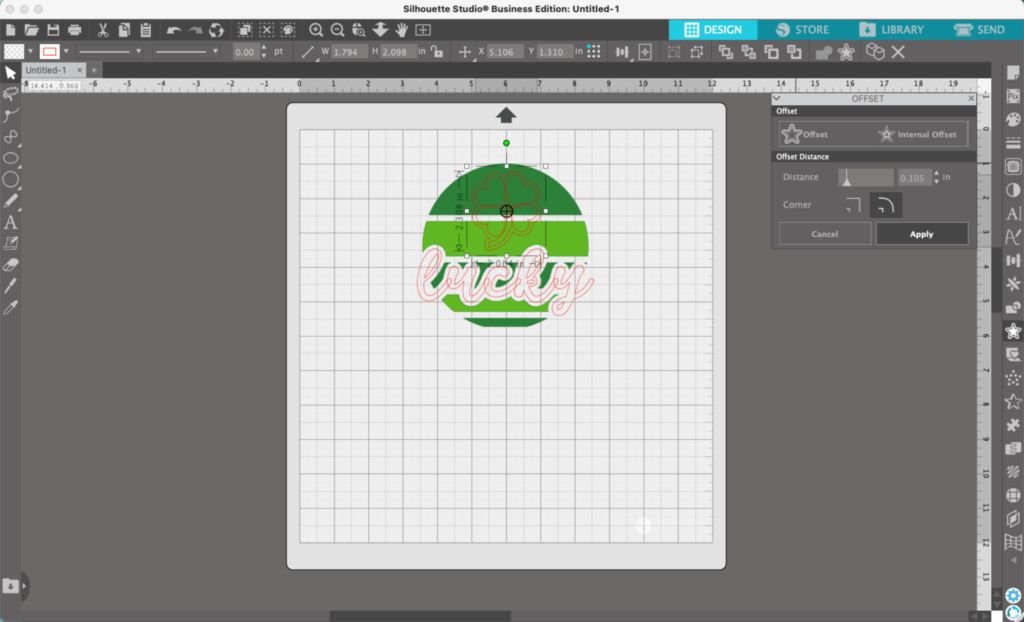
15. Then, select the circle and the offset of the clover. Navigate to ‘Object’, ‘Modify’, and ‘Subtract’.
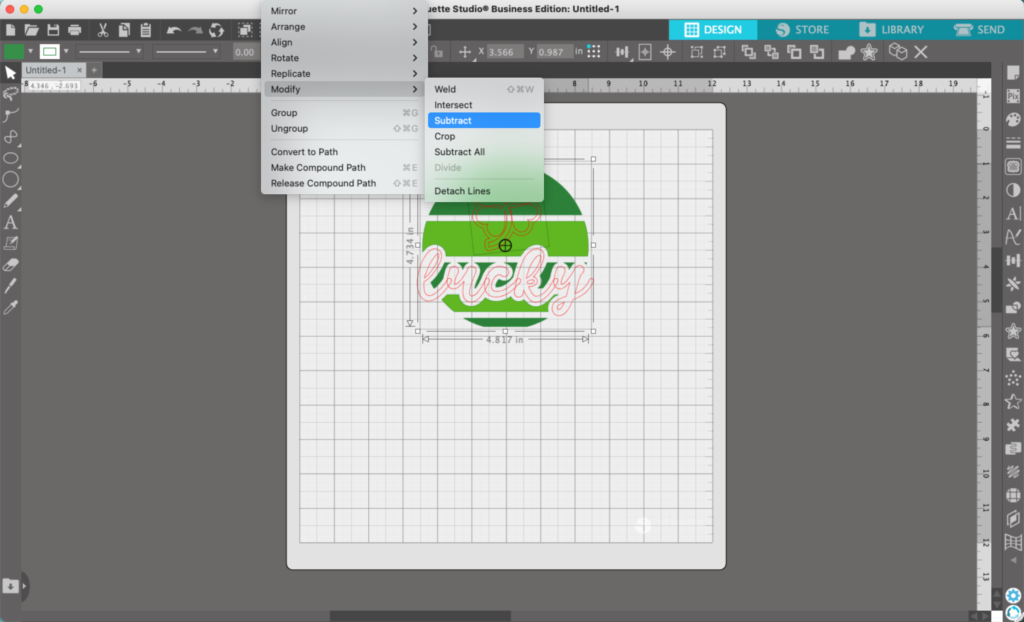
16. Finishing touches. Weld the text together. Then, add the final colors.
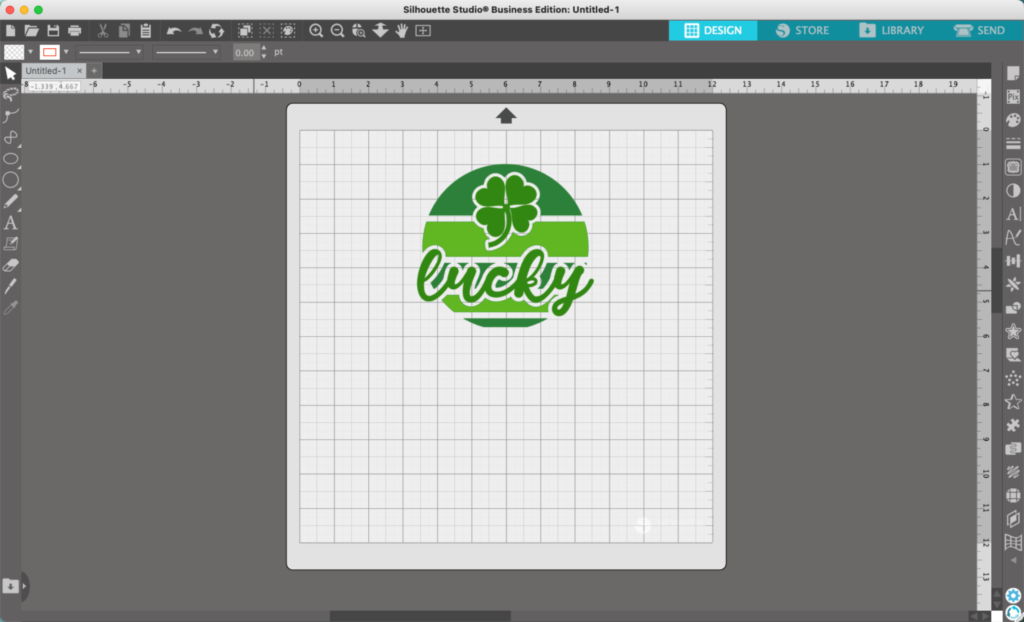

That’s it! Your design is ready to go!
Don’t Forget to Save!
To save your new SVG creation, head to ‘File’, ‘Save As’, ‘Save to Hard Drive’, name the file, then select ‘SVG’ from the dropdown menu.
Want More SVG Tutorials?
View more Design with Me SVG tutorials.
Since 2015, Christine Schinagl has been helping crafters start and run craft businesses through her blog, Cutting for Business. As a Silhouette and Cricut crafter herself, she has a unique take on what works and what doesn’t work in the craft business world. She also enjoys teaching other crafters how to create digital SVG designs, available through the Design with Me series.


