• Home
  • Work with CfB
  • Contact
    • Bloglovin
    • Facebook
    • Instagram
    • Pinterest

Cutting for Business

  • New? Start Here!
  • Visit the Shop
    • Ebooks
    • Business Names
    • Craft Business Consultations
    • Order Forms
    • SVG Files
    • Etsy Shop
  • Join Craft Business Help
  • Must Have Products
  • Etsy Shop
  • Free Cut Files
  • Free Etsy Listings


Affiliate links may be present in the following article. For my full disclosure policy, see this link.
Additionally, as an Amazon Associate I earn from qualifying purchases.

How to Properly Sand Wood for Painted Wooden Signs

Filed Under: Project Tutorials

This post is a bit of a followup to a popular post on Cutting for Business: Why Does Paint Bleed when Using a Vinyl Stencil. I’ve had some readers read that post and email me stating that they are still experiencing bleeding – even after following my tips. Through a little detective work, I emailed several of those readers and found a common cause in every single case: they didn’t know how to properly sand the wood before painting or staining it. Today, let’s look at how to properly sand wood before making a wood sign with your Silhouette or Cricut cutting machine.

Before we start, let’s look at what you’ll need:

  • A wood blank – Need tips to picking great wood? Head to this post.
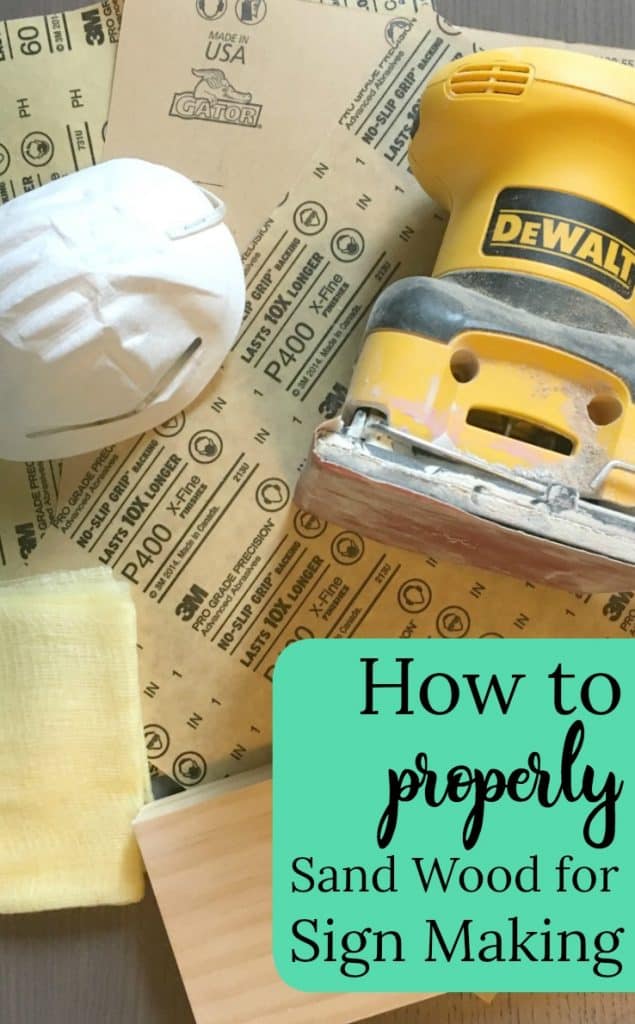
  • Sandpaper – You’ll need a couple of different grits of sandpaper. The grit refers to how coarse the paper is and is determined by the number of sand granules per square inch of paper. The lower the number, the coarser the paper; the higher the number, the more finer the sandpaper.
  • A palm sander – I use (and love!) my DeWalt palm sander. You can buy it here, or read more about power tools in this blog post.
  • Tack cloth – Tack cloth is used to clean up the particles of dust after sanding. Pick up a multi pack at this link.
  • Safety goggles and a mask – Safety first! Protect your eyes, nose, and mouth from sawdust. Amazon has cheap goggles here and masks here.

How to Properly Sand Wood for Painted Wood Signs

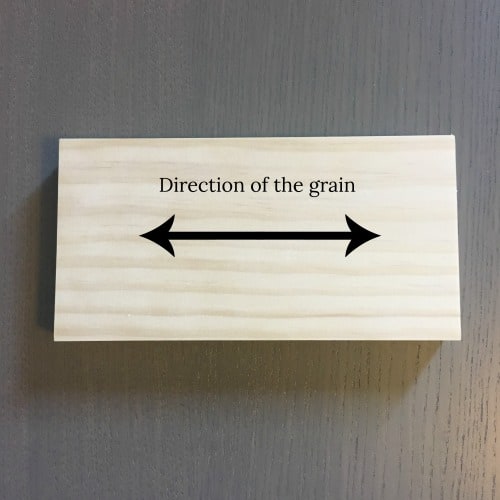
  1. Determine which direction the grain runs on your wood blank. The grain simply refers to the pattern of the wood. You never want to sand against the grain. How to Properly Sand Wood for Painted Wooden Signs - A must read for Silhouette Cameo or Cricut Explore or Maker Crafters - by cuttingforbusiness.com
  2. Starting with a medium coarseness sandpaper, sand in the direction of the wood grain until the surface is smooth to the touch. When making wood signs, I generally use 120 grit or 150 grit sandpaper. (The grit number is printed on the back of the sheet.) Be cautious to make sure that you apply even pressure. It doesn’t matter whether you are sanding by hand or using a palm sander.How to Properly Sand Wood for Painted Wooden Signs - A must read for Silhouette Cameo or Cricut Explore or Maker Crafters - by cuttingforbusiness.com
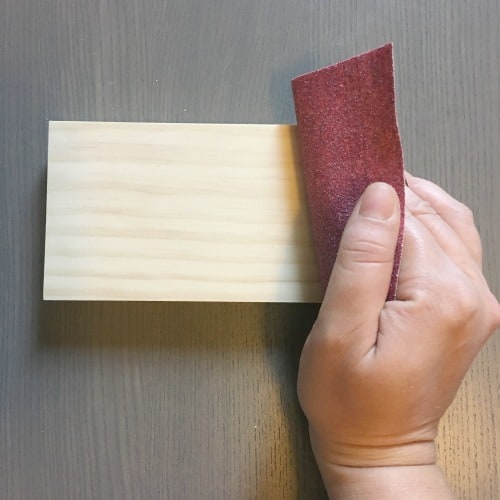
  3. After your surface is smooth, sand it again with a higher grit sandpaper. This removes fine imperfections that you may not be able to see. For this step, I usually use 220 grit sandpaper. Again, be sure to use even pressure with your sandpaper or palm sander. How to Properly Sand Wood for Painted Wooden Signs - A must read for Silhouette Cameo or Cricut Explore or Maker Crafters - by cuttingforbusiness.com
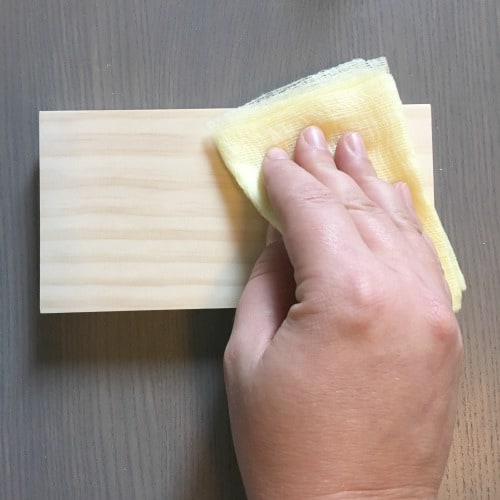
  4. When you’ve sanded the entire wood blank with your fine sandpaper, use a tack cloth to remove the dust. Keep the tack cloth folded. Use the exposed side to remove the dust from the wood blank. Once that side is full of dust, fold it over to a clean side, and so on. You should get many uses from a single tack cloth. How to Properly Sand Wood for Painted Wooden Signs - A must read for Silhouette Cameo or Cricut Explore or Maker Crafters - by cuttingforbusiness.com

That’s it! Once the dust has been removed, your wood sign blank is ready for staining or painting.

Help out another crafter – save this post to Pinterest:

How to Properly Sand Wood for Painted Wooden Signs - A must read for Silhouette Cameo or Cricut Explore or Maker Crafters - by cuttingforbusiness.com

Related Posts

  • Wood Sign Making 101 – Everything You Need to Perfectly Paint SignsWood Sign Making 101 – Everything You Need to Perfectly Paint Signs
  • Tutorial: How to Cut Out Wood Words & Shapes Using a Scroll SawTutorial: How to Cut Out Wood Words & Shapes Using a Scroll Saw
  • Wood Signs: How to Prevent Your Vinyl Stencil from Peeling Your Paint UpWood Signs: How to Prevent Your Vinyl Stencil from Peeling Your Paint Up
  • DIY Wood Sign Christmas Advent Calendar TutorialDIY Wood Sign Christmas Advent Calendar Tutorial
  • Why Does Paint Bleed When Using a Vinyl Stencil?Why Does Paint Bleed When Using a Vinyl Stencil?
  • Retiring Forever: The Ultimate Cancer SVG Cut File BundleRetiring Forever: The Ultimate Cancer SVG Cut File Bundle

Connect with Cutting for Business

  • Bloglovin
  • Facebook
  • Instagram
  • Pinterest

Get Cutting for Business in Your Inbox

Buy Books


Cutting for Business is a participant in the Amazon Services LLC Associates Program, an affiliate advertising program designed to provide a means for sites to earn advertising fees by advertising and linking to Amazon.com and affiliated sites. See the disclosures page for full disclosure information.


« 50+ Dog, Cat, and Pet Sayings for Crafters
Free Halloween Witch SVG Cut File »

Comments

  1. Michelle Maynard says

    October 19, 2017 at 8:35 am

    Hi Christine! I have followed these steps you outlined above when sanding my pine select boards, however, I don’t have bleeding issues but when I remove the vinyl stencil the paint or stain pulls up like little wood splinters. Any thoughts as to why this happens?

    Thanks!
    Michelle

    Reply
    • Christine says

      October 22, 2017 at 8:03 pm

      Hello! Have you tried a stencil film over a vinyl? They are less sticky than vinyl so they don’t pull up paint as easily. Here’s what I like: Oramask.

      Reply
      • Michelle Maynard says

        October 23, 2017 at 10:38 pm

        Yes! I have tried the Oramask stencil film, but didn’t notice any difference 🙁 Thanks so much for the suggestion. I will keep trying different things.

        Reply
        • Christine says

          October 24, 2017 at 11:11 am

          Good luck!

          Reply
      • Jen says

        November 8, 2017 at 9:03 am

        I find my Oramask stencil is great for less paint bleed but pulls up small, fine strips of wood which then pulls right through one of my painted letters, no matter how much I sand my board smooth with 220 grit. It’s very frustrating if I’m not going for the distressed look and have to do touch-ups all the time.

        Reply
        • Nicole Jernigan says

          November 17, 2017 at 9:47 am

          Any better luck? I’m curious to know what your drying time is before you apply the stencil? I’ve been making signs for a few years and have not had this happen until my first paint party last Sunday! 2 of 9 signs did this! I stained the Signs before the party. One had dried for days the other only 24hrs but still very dry to the touch, thanks to this cool breezy Florida weather! I applied all the stencils the night before and thought maybe this was why but the other 7 signs had no problems! (Next party I’m having them put their own stencils on-less work for me!) I’ve seen local paint parties do their staining or painting at the party and with oil based stain, applying a stencil 30min after staining-maybe this is helping to not pull up the wood as it has to still be a little oily to the touch? I just want to figure out it, it was awful having it happen to 2 guests, wondering why theirs signs are splintering! (I did the same sanding for all, no bleeding issues and the 9 signs came from the same 2 boards!)

          Reply
    • Kallie says

      October 26, 2017 at 10:14 pm

      I have this issue as well, even when I use a less tacky vinyl! eek!

      Reply
      • Shontel Begley says

        December 10, 2017 at 9:43 am

        Hello,
        I’m hoping someone has shared a solution to the splintering issue we’ve all been having.

        Reply
        • Christine says

          December 11, 2017 at 11:02 am

          https://cuttingforbusiness.com/2017/12/11/wood-signs-how-to-prevent-your-vinyl-stencil-from-peeling-your-paint-up/

          Reply
  2. John in Philly says

    October 19, 2017 at 10:34 am

    Good post!
    Give some thought to upgrading your dust mask to something like this.
    3M 6502QL Rugged Comfort Quick Latch Half Facepiece Reusable Respirator
    The cost at Amazon is around eighteen dollars, the fit is much better than the disposable, and the exhaust keeps my glasses from fogging.
    Also you can change the filters to match what you are doing.

    Reply
    • Christine says

      October 22, 2017 at 8:02 pm

      Thanks for sharing!

      Reply

Comments on Cutting for Business are moderated before posting. This ensures that this blog does not get overrun by spam or inappropriate comments. Please allow up to 7 days before you'll see your comment. Thanks, Christine

Leave a Reply Cancel reply

Your email address will not be published. Required fields are marked *

Make Money

Love to craft and ready to make some money? You're in the right place! Whether you own a Silhouette Cameo, a Cricut Maker, a Silhouette Curio, a Cricut Joy, or even a Glowforge, get tips and tricks to make an income with your machine.


Ready to Buy Craft Business Names


Free Fonts

Copyright © 2021 · Cutting for Business
Disclosures · Privacy Policy
This site is not affiliated with Silhouette America or Cricut (Provo Craft & Novelty, Inc.)

This website uses cookies to improve your experience. We'll assume you're ok with this, but you can opt-out if you wish. Cookie settingsACCEPT
Privacy & Cookies Policy

Privacy Overview

This website uses cookies to improve your experience while you navigate through the website. Out of these cookies, the cookies that are categorized as necessary are stored on your browser as they are essential for the working of basic functionalities of the website. We also use third-party cookies that help us analyze and understand how you use this website. These cookies will be stored in your browser only with your consent. You also have the option to opt-out of these cookies. But opting out of some of these cookies may have an effect on your browsing experience.
Necessary
Always Enabled

Necessary cookies are absolutely essential for the website to function properly. This category only includes cookies that ensures basic functionalities and security features of the website. These cookies do not store any personal information.

Non-necessary

Any cookies that may not be particularly necessary for the website to function and is used specifically to collect user personal data via analytics, ads, other embedded contents are termed as non-necessary cookies. It is mandatory to procure user consent prior to running these cookies on your website.

SAVE & ACCEPT