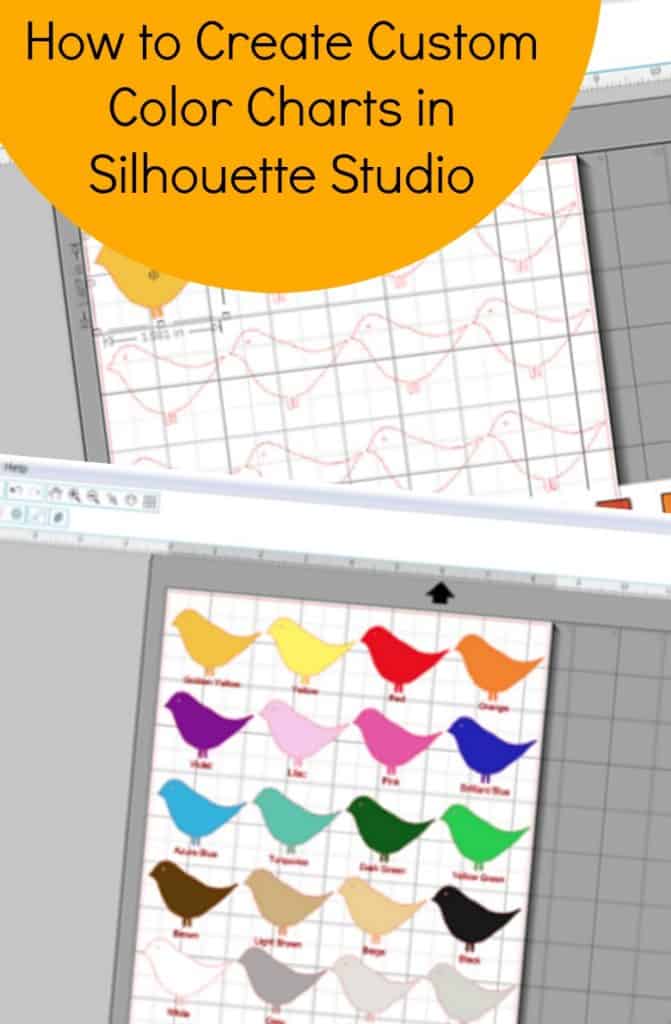
How to Create Custom Color Charts in Silhouette Studio
Affiliate Disclosure: As an Amazon Associate I earn from qualifying purchases. Additionally, I may get commissions for purchases made through other affiliate links in this post.
Do you carry every color vinyl, paint, or paper color that your supplier offers? Most businesses don’t, so it is helpful to have a color chart to reference and also share with customers. Custom color charts are not difficult to create in Silhouette Studio. Here’s how:
1) Open a new file in Silhouette Studio. I plan to print this color chart and place it in a binder, so I set the size to 8.5″ by 11″.
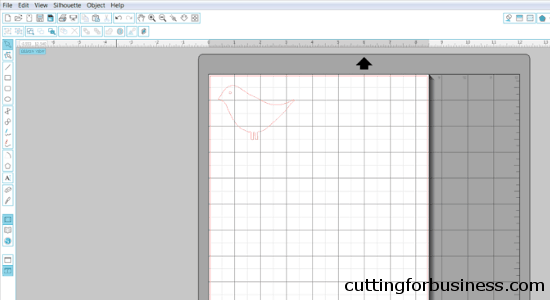
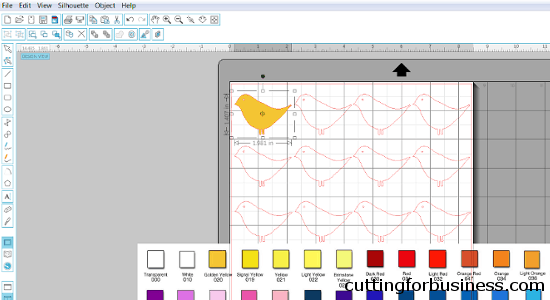
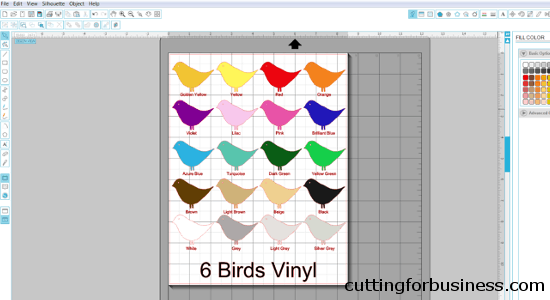
2) Find an image that you’d like to use for your custom shape and open it. Many businesses use circles or squares, but you can use any shape you’d like. When choosing a custom shape, be sure it is large enough that a potential customer can see the color. For a simple square or circle, draw one using the tools within Silhouette Studio. For this example, I’ve chosen a bird.
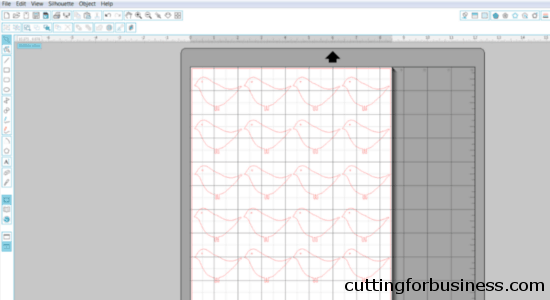
3) Next, you’ll click “Object”, “Replicate”, and “Fill Page”. (Tip: If you don’t want to fill the page, you can choose a different replicate setting – Column of Three – Column of Four – Row of Three – Row of Four.)
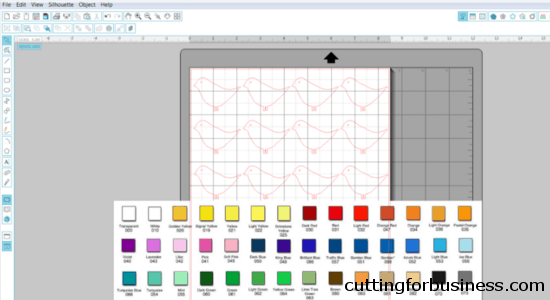
4) Open your color chart within Silhouette Studio. If you don’t have a color chart on your computer, you can use Google or Google Images to find one.
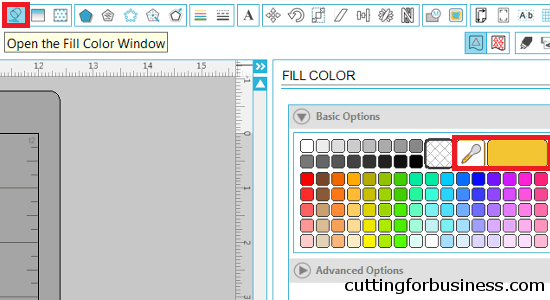
5) Select your first shape. From the Fill Color window, use the dropper tool to choose a color in your color chart by clicking on it with the tool. I’ve highlighted the Fill Color icon and the dropper tool in red in the image below. Your first shape will fill in with your chosen color.
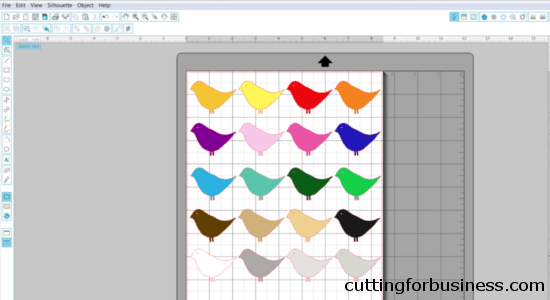
6) Repeat step 5 to fill in the remaining shapes with colors from your color chart.
7) Using the text tool, add the names of each color below your shapes. I recommend keeping the names the same as the supplier names, this will make it easier for you when ordering supplies. You can also add your business name, watermarks, or other details.
8) Now you’ll need to get your color chart out of Silhouette Studio. To save them as a .jpg or .png file, you can use a virtual printer, like Bullzip. There are a lot tutorials online for Bullzip, but quickly: 1) Install Bullzip 2) From Silhouette Studio, click “File”, “Print”, and select “Bullzip PDF Printer”. Create a file name and select the file format and Bullzip will virtually print it to your computer. Depending on your computer, you can also take a screenshot (CNTL + ALT + PRTSCN) or use the snipping tool.
Besides simplifying the ordering process, custom color charts can also help your business in a few more ways:
- You can charge a special order materials charge if a customer requests something made in a color you don’t normally stock.
- You can reduce your turnaround times by keeping all the colors on your custom color chart in stock at all times.
- You will save time not having to constantly order more and more colors of materials.
- When selling with a limited number of colors, you’ll be more likely to receive multiple customers requesting the same colors. This will allow you to use more of your scrap materials.
Save this post to Pinterest:
Since 2015, Christine Schinagl has been helping crafters start and run craft businesses through her blog, Cutting for Business. As a Silhouette and Cricut crafter herself, she has a unique take on what works and what doesn’t work in the craft business world. She also enjoys teaching other crafters how to create digital SVG designs, available through the Design with Me series.