Tutorial: Paper Portraits with Silhouette Cameo
Affiliate Disclosure: As an Amazon Associate I earn from qualifying purchases. Additionally, I may get commissions for purchases made through other affiliate links in this post.
I’m always racking my brain for creative products for Silhouette and Cricut users to make and sell in their small business. Today, I’m showing you how to make paper portraits using your Silhouette Cameo. What I love about paper portraits is that they are cheap to make, and will sell for a high profit.
Supplies
- Cardstock – You’ll want to choose several shades in the same color to create a cohesive look for your paper portrait. I had to search up and down for reasonably priced cardstock sold in color family packs. Here’s a link to the cardstock packs I used.
- Repositionable spray adhesive – It’s important that you buy repositionable adhesive so you have a few minutes to move pieces around. It’ll say right on the can if it is repositionable or permanent.
- Pick Me Up Tool
- Silhouette Cameo
Paper Portrait Tutorial
- First, choose a photo.
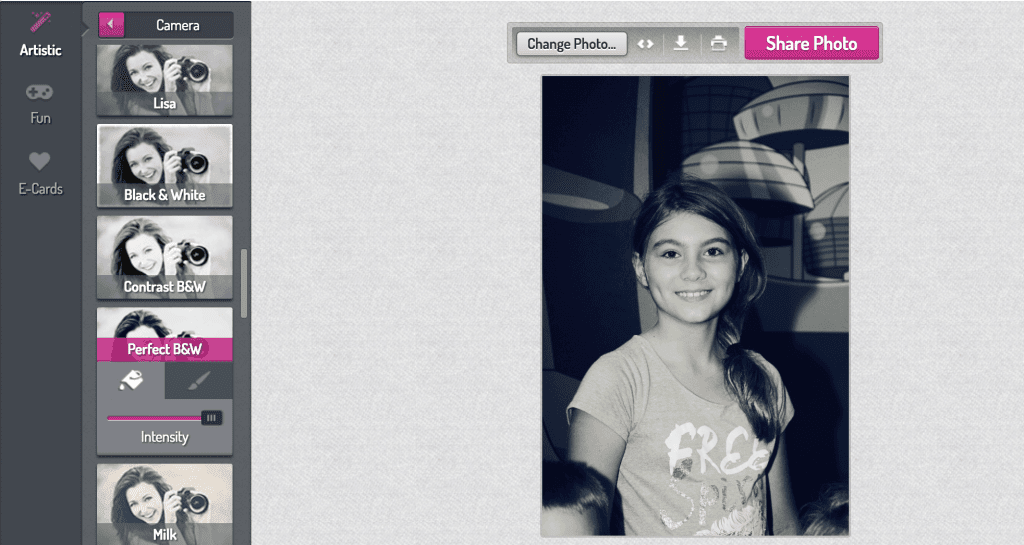
- Next, you’ll want to use a photo editor to change the photo to black and white. I used Photomania, which is free, however feel free to use whatever photo editor you’d like. Once in Photomania, choose “Artistic”, “Camera”, and “Black and White”. Save your photo and download it.
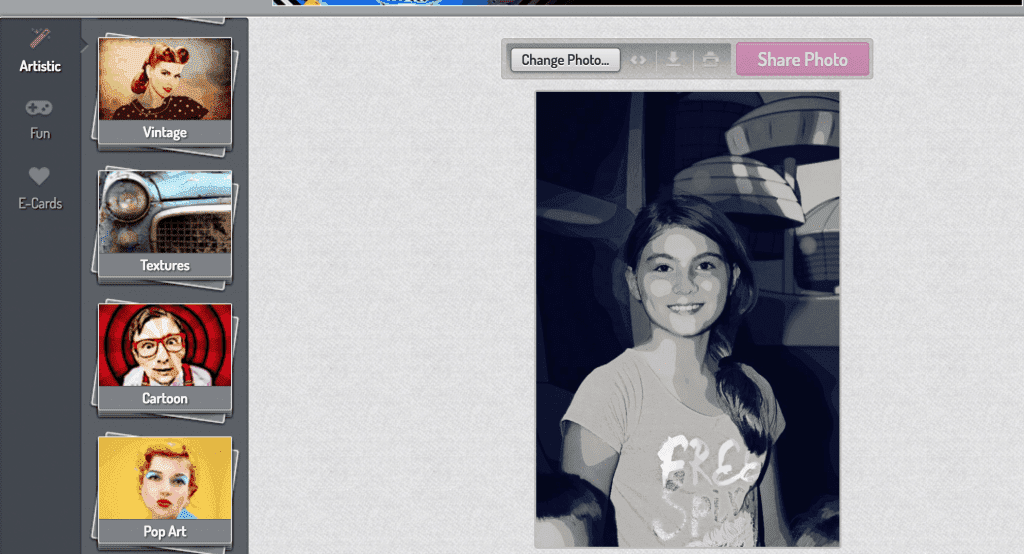
- Using Photomania, reopen your black and white photo and posterize it. In Photomania, choose “Artistic”, “Pop Art”, “Posterize”. Save your photo and download it.
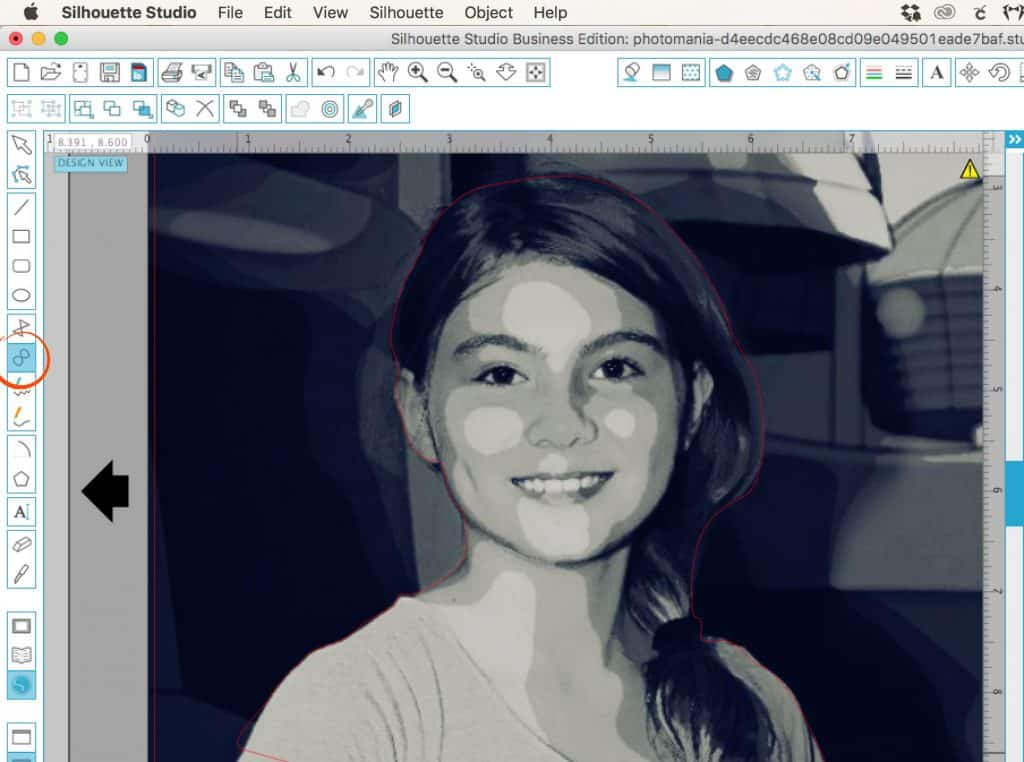
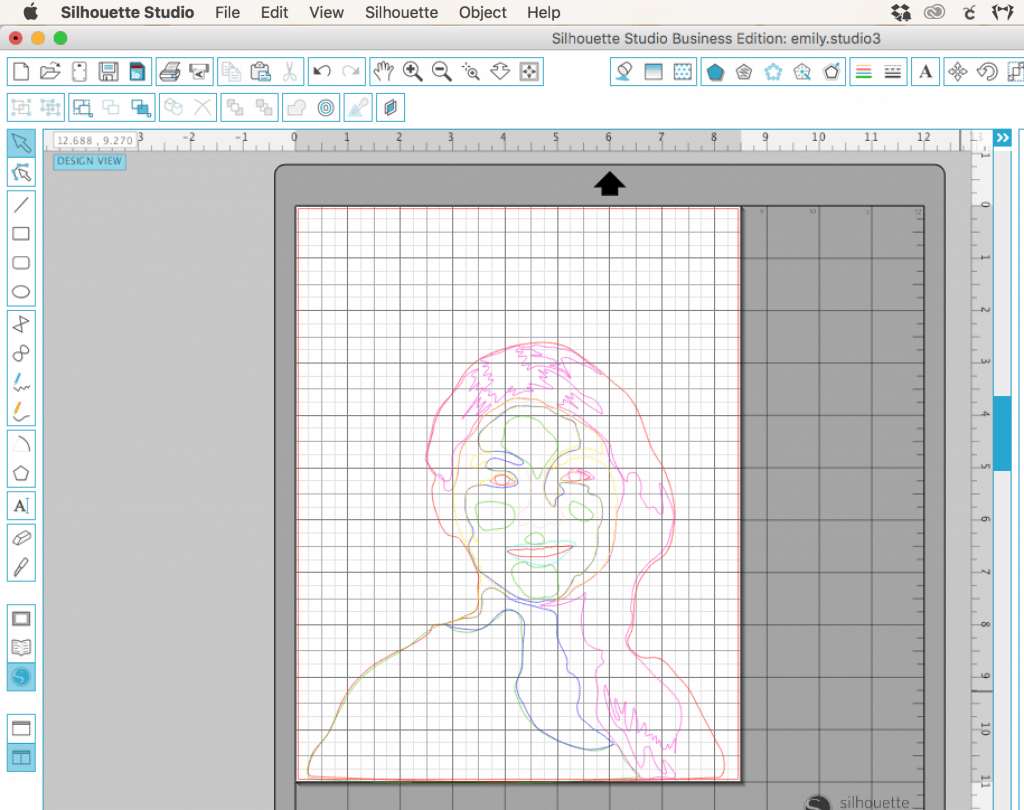
- Open your photo in Silhouette Studio. (“File”, “Open”.) Using the “Draw a Curve Tool” (I circled it in the photo below) you will manually trace around each color in the photo, starting with the outline of your subject. You can see my outline in red in the image below.
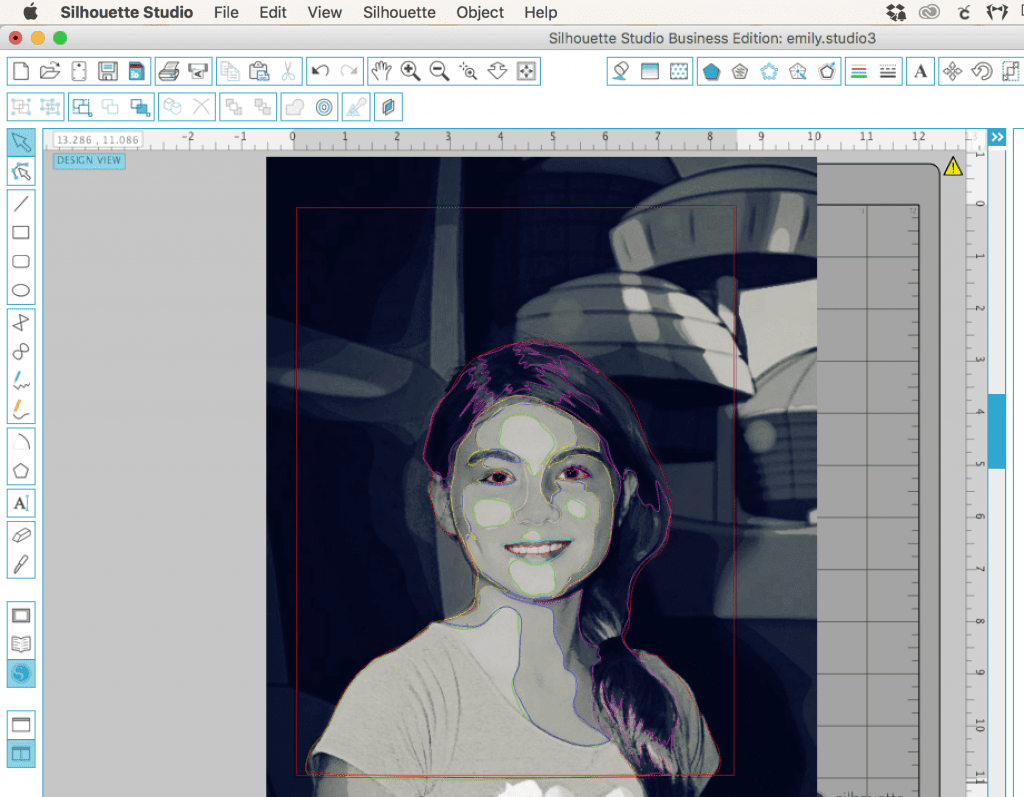
- Repeat step 4 and manually trace each color in your photo, starting at the darkest color. In my photo above, I first traced the hair, then the eyes, then the shadows on the outside edges of her face, and so on. For each color, you’ll want to change your line color. Here’s what my photo looks like after tracing each color:
- Once you’ve traced everything, it’s time to cut. It’s easiest to use the advanced cut settings and cut by line color. When setting up your cut, choose “Advanced”, then “Line Color”. For your first cut, cut the outline of your subject from the darkest color cardstock you have.
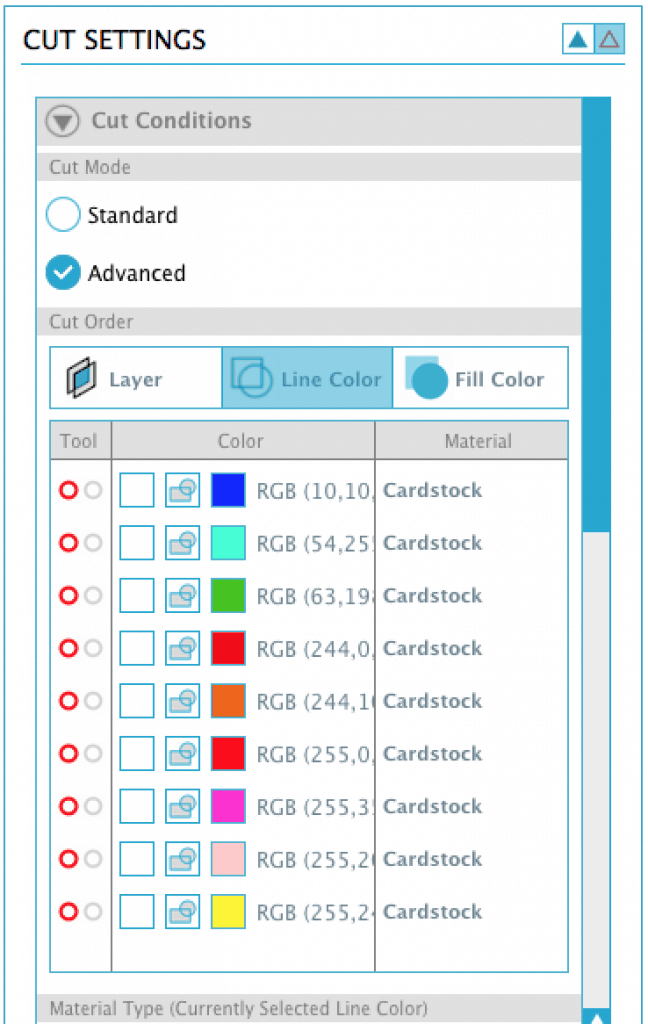
- Repeat step 6 to cut out all of your traced shapes. Remember to go from darkest color in your photo to lightest color in your photo using first the darker cardstock and ending with the lightest cardstock.
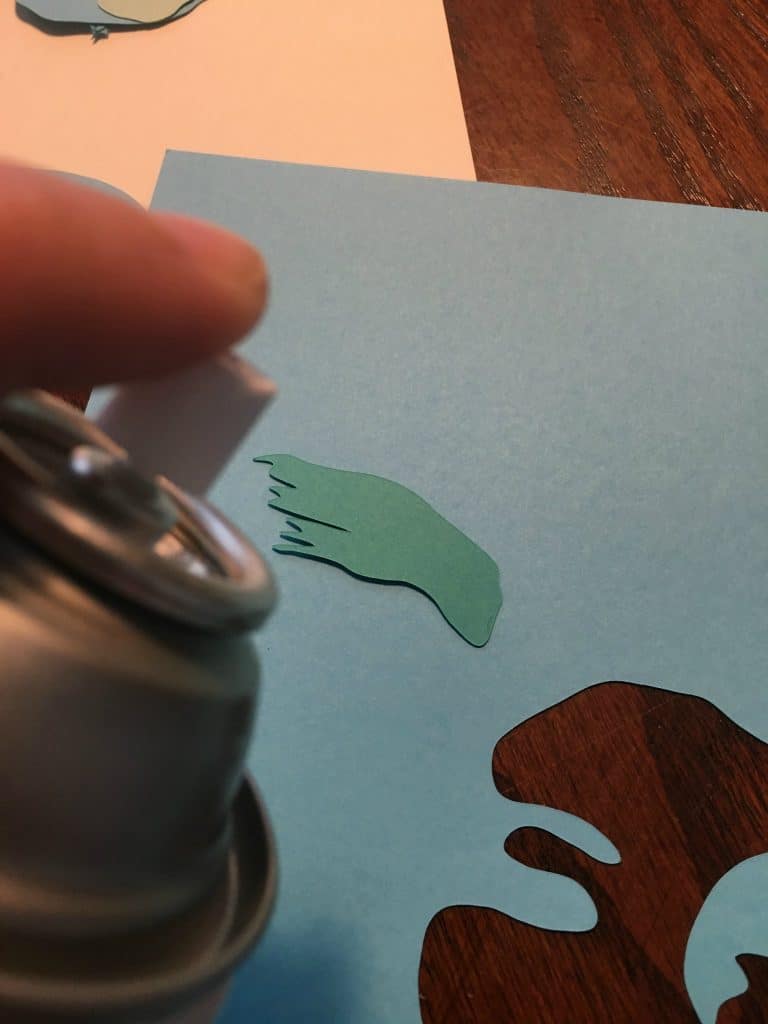
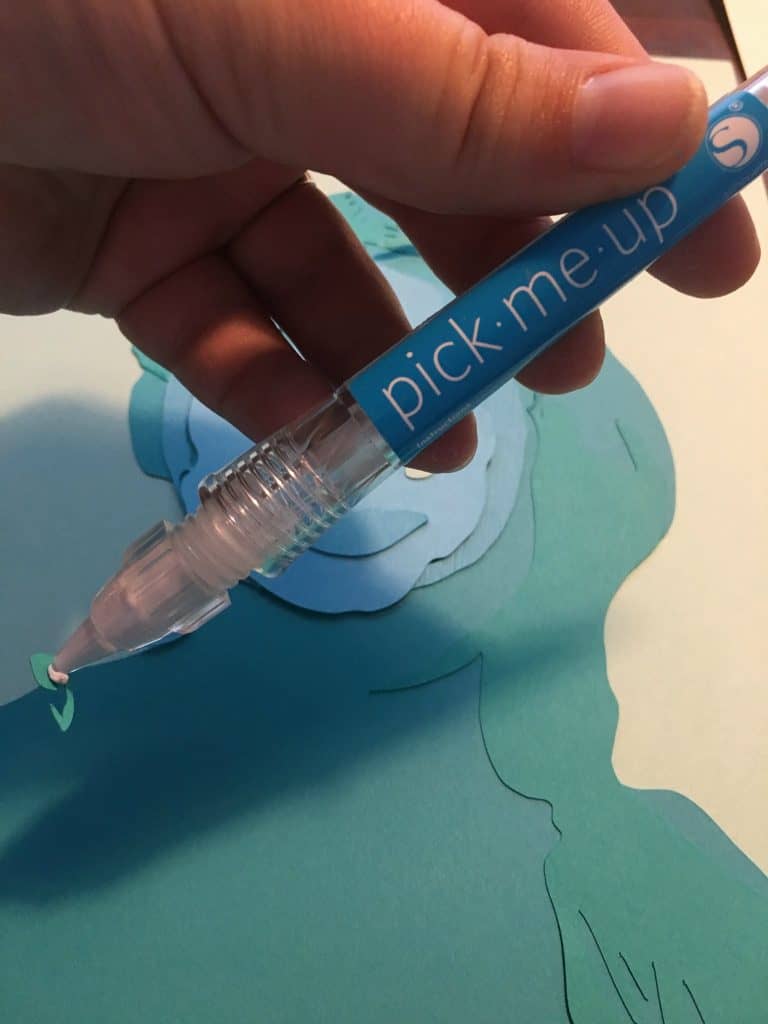
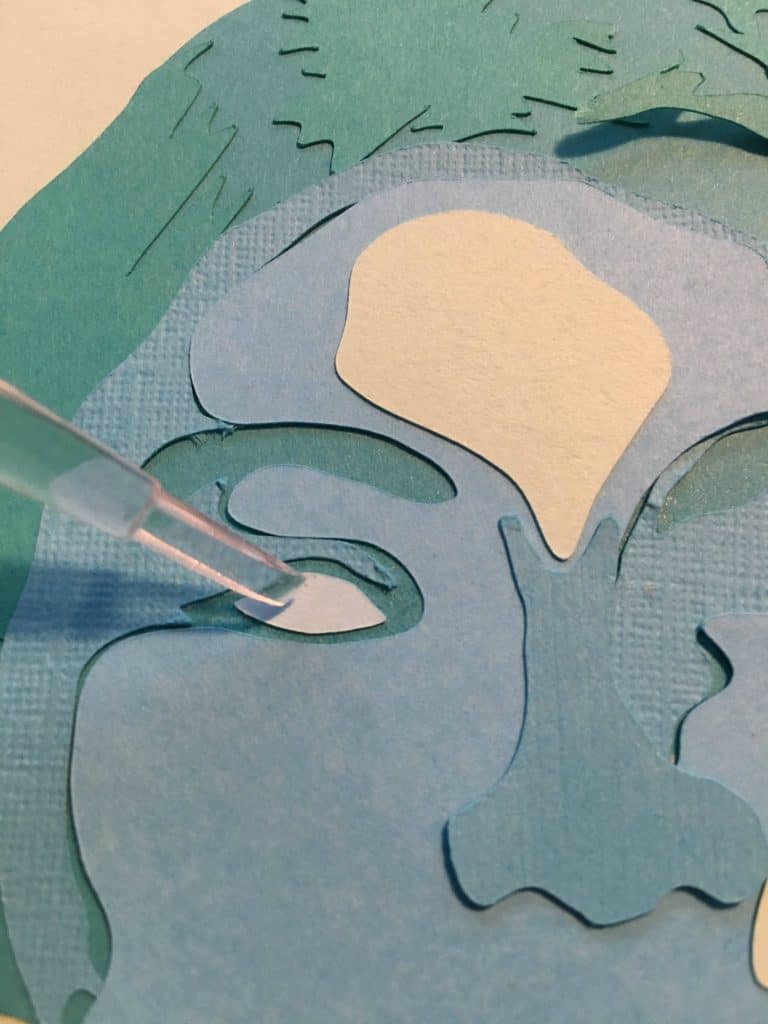
- Use repositionable adhesive spray to assemble your paper portrait from the bottom up. A few notes: 1) A little spray adhesive goes a long way. 2) Spray adhesive is sticky. I found the Pick Me Up tool to be invaluable when assembling the picture.
- Once you’ve assembled everything, frame it and you are all set! Below is a side by side of my original photo and my paper portrait:
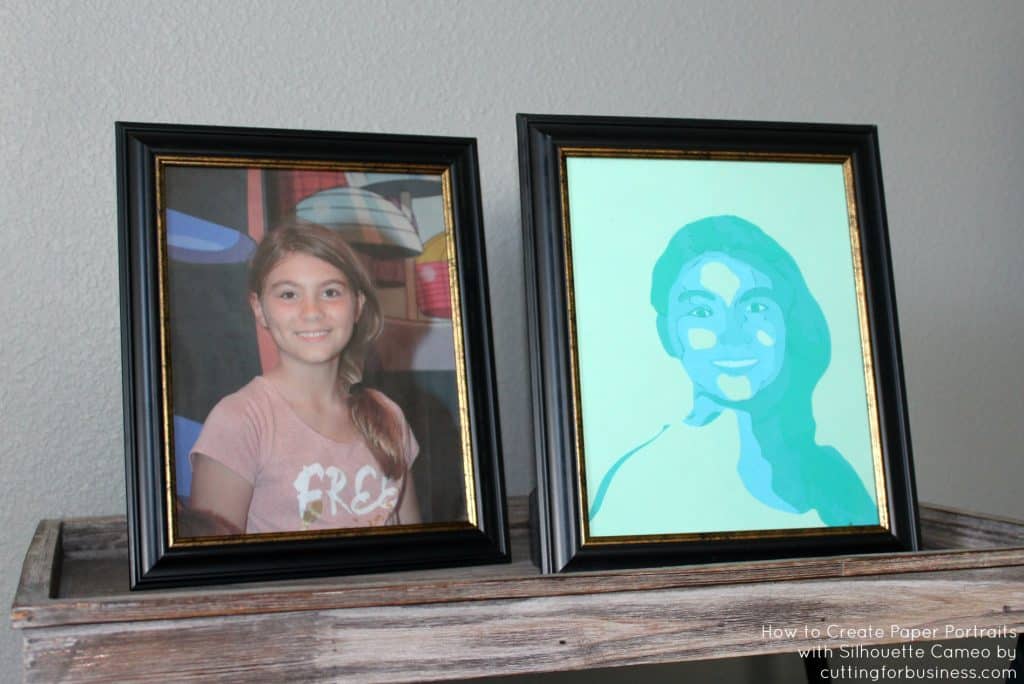
If you plan to make and sell paper portraits with your Silhouette Cameo, consider the mood that is conveyed through different color schemes. For example, black, white, and grays convey sophistication, while reds and pinks set a feminine mood and so on.
Love this tutorial? Save it to Pinterest:
Since 2015, Christine Schinagl has been helping crafters start and run craft businesses through her blog, Cutting for Business. As a Silhouette and Cricut crafter herself, she has a unique take on what works and what doesn’t work in the craft business world. She also enjoys teaching other crafters how to create digital SVG designs, available through the Design with Me series.
