The Secret to Photographing Glitter and Holographic Material
Affiliate Disclosure: As an Amazon Associate I earn from qualifying purchases. Additionally, I may get commissions for purchases made through other affiliate links in this post.
I’ve been there so many times: I’ve made the absolute most beautiful, wonderful, gorgeous creation known to anyone in this world using glitter or holographic materials and when I take a photo of it – it doesn’t sparkle! Instead, it looks flat, and usually pretty dark compared to the rest of the photo. Have you experienced this, too? If so, read on for my trick.
Super, secret trick: Add more light! What I usually do is hold a flashlight off camera (an non-LED flashlight works best) pointed directly at the specialty material while taking the photograph.
Examples
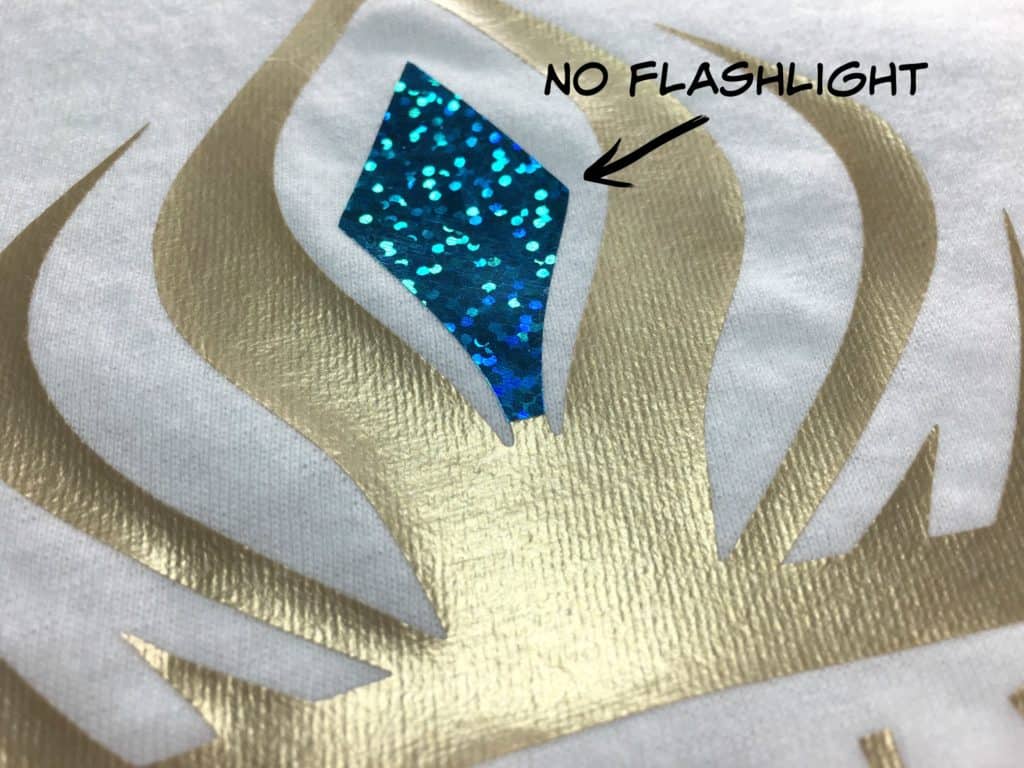
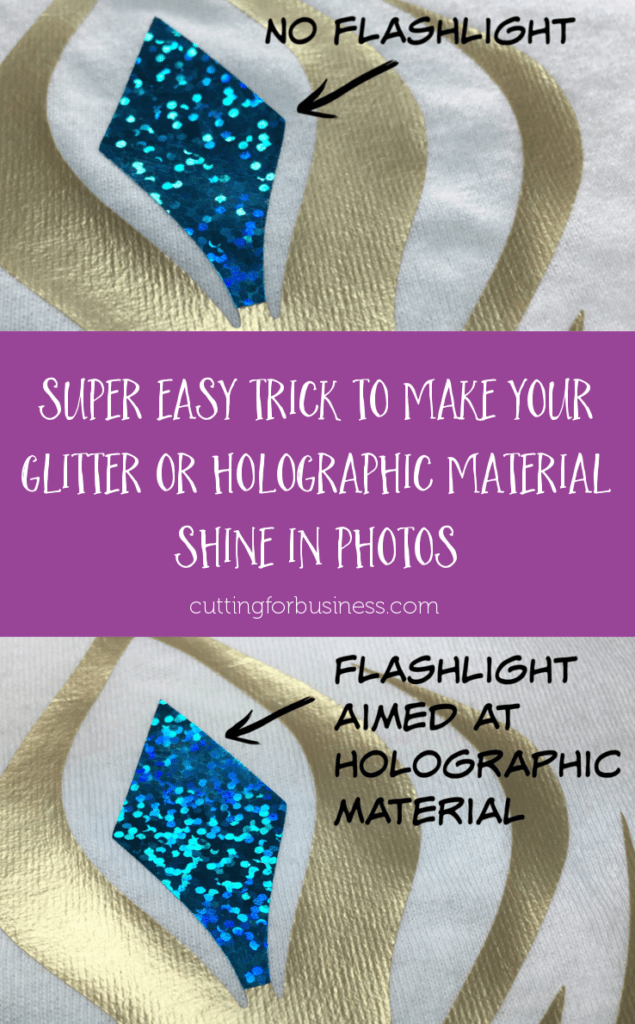
In this first picture, you can clearly see the holographic material (it’s Siser’s holographic aqua heat transfer material), but it’s got several sections that are dark and dull.
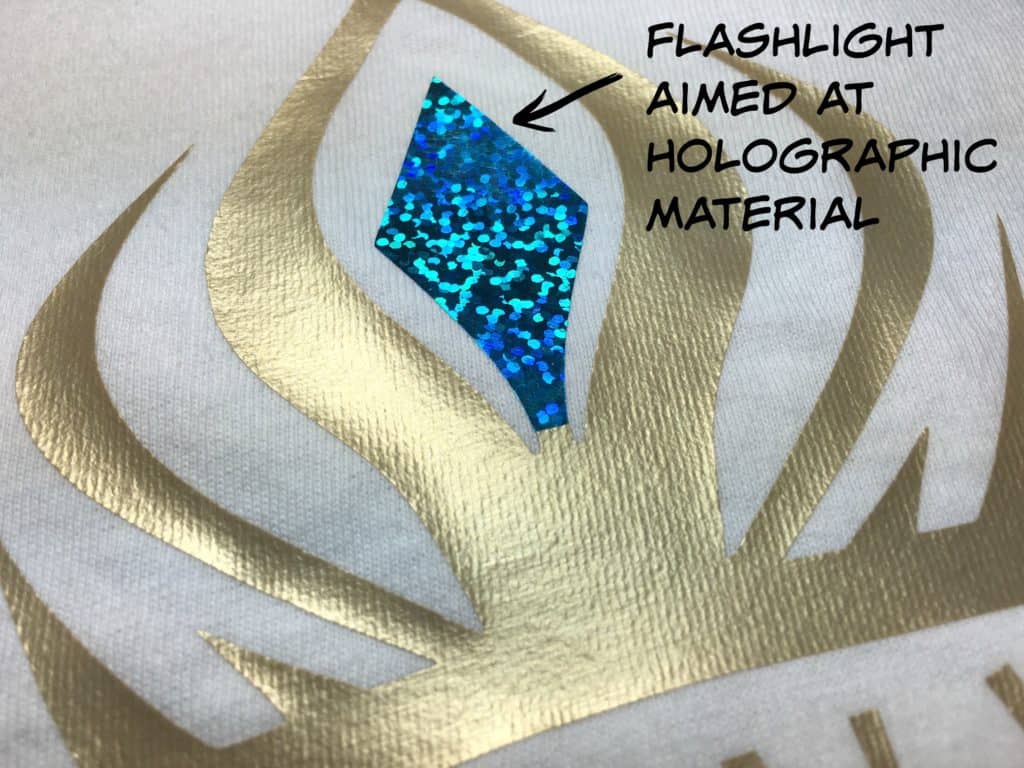
When I shine a flashlight onto the material, it brightens and the dark, dull sections shine! Pretty neat, huh?
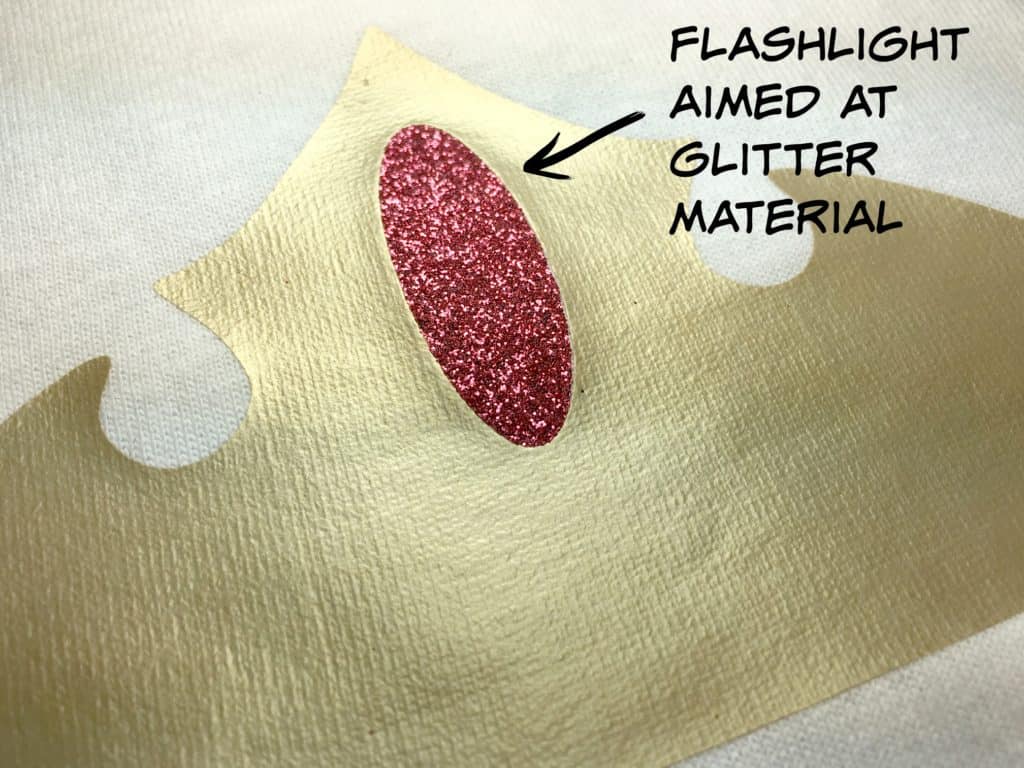
You can see the same thing happen below in this photo of glitter heat transfer vinyl (it’s Siser’s blush glitter heat transfer material). The glitter appearance is overall dull and dark in sections.
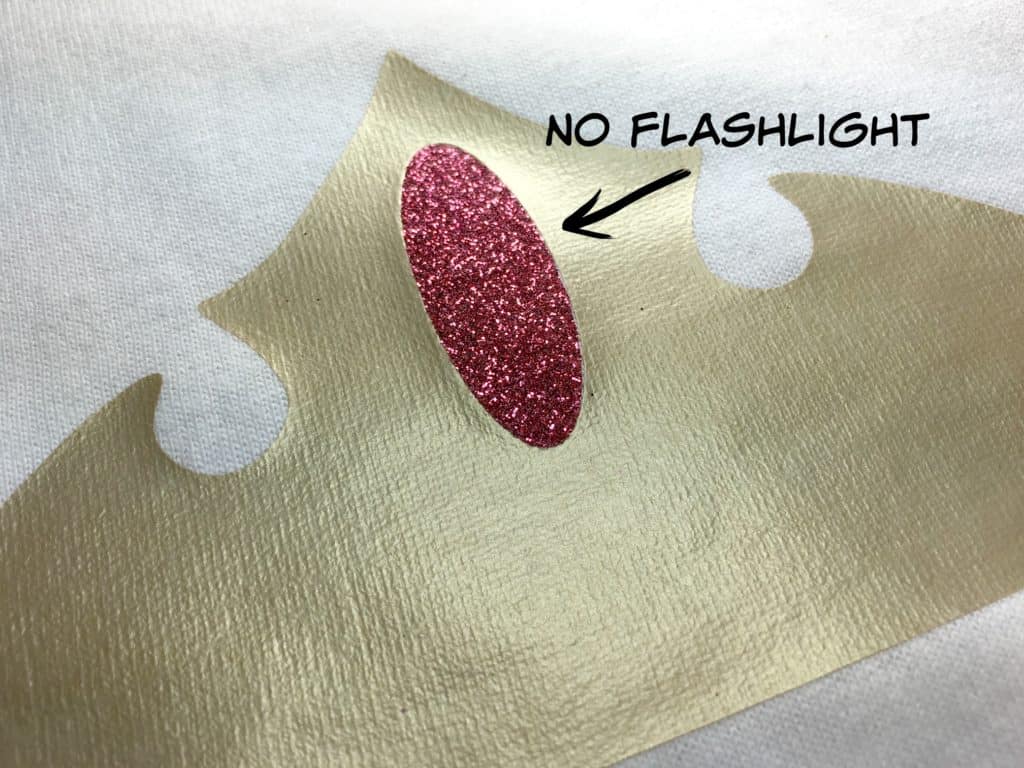
When I shine a flashlight onto the glitter, it brightens up the glitter and you can see each of the glitter specks!
Photographing a larger product? Grab a garage worklight, a photography spotlight, or a larger lamp to shine on the specialty material. Just an easy way to brighten up your up photos with holographic or glitter designs!
Save this post to Pinterest and then try it out:
Since 2015, Christine Schinagl has been helping crafters start and run craft businesses through her blog, Cutting for Business. As a Silhouette and Cricut crafter herself, she has a unique take on what works and what doesn’t work in the craft business world. She also enjoys teaching other crafters how to create digital SVG designs, available through the Design with Me series.