Tutorial: How to Send a Paypal Invoice
Affiliate Disclosure: As an Amazon Associate I earn from qualifying purchases. Additionally, I may get commissions for purchases made through other affiliate links in this post.
Yesterday, I compared credit card readers to help you decide which credit card reader worked best of your small business. But, how can you accept payments from customers that are not ordering through an online marketplace and they are not local? Besides having the customer mail you a check, you can also use online invoicing. Online invoicing means that a customer is emailed an invoice with links for them to pay with their credit card. After paying the invoice, they will be emailed a receipt and you will be notified. Depending on which invoicing system you use, the money is either deposited to your bank account or into your account.
If you are using an accounting program like Quickbooks, Xero, or Wave, an online invoicing tool is usually built into the program. Similarly, if you are using a credit card reader, many of those services also have online invoicing available.
If you already use Paypal to accept payments, you can also use it to send customer invoices. Your customer does not have to have a Paypal account to pay the invoice.
How to Send a Paypal Invoice
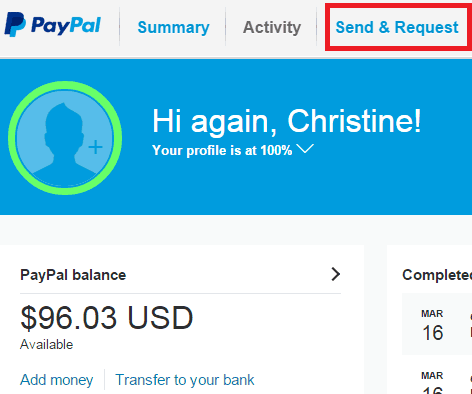
1) Log into your Paypal account.
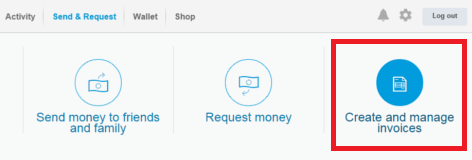
2) Click “Send & Request” from the choices across the top.
3) Choose “Create and manage invoices” from the next screen.
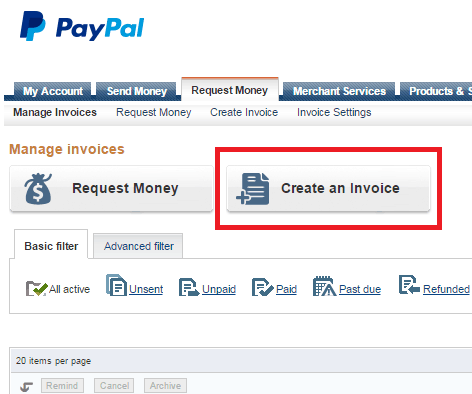
4) Click “Create an Invoice”.
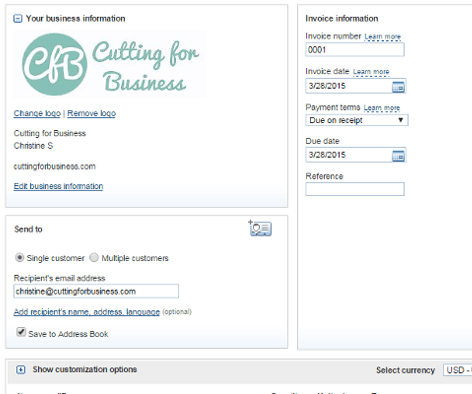
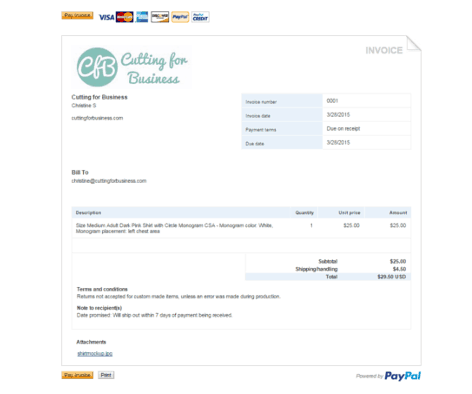
5) Enter your business information and your customer information. You can give your invoice any number you want, and set the due date for whenever. I chose to leave mine, “Due on Receipt”.
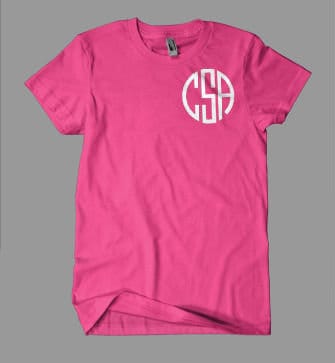
6) Pay close attention to the description of the item, and be as specific as possible when writing the description. In this example my customer is buying a pink shirt with a white monogram on the chest area. My description states “Size Medium Adult Dark Pink Shirt with Circle Monogram CSA, Monogram color: White, Monogram placement: left chest area”. In the event there is a problem with the transaction, a thorough description may prevent you from having to refund a customer.
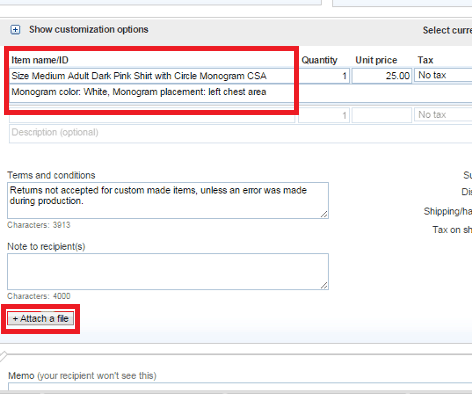
Near the bottom of the Paypal invoice, you can also attach a file. This is a great place to attach a mockup of the item or a sample photo of the item if you have one available. I attached a simple mockup of the shirt design.
7) Once you are satisfied with the invoice, click “Preview” to see it. If you will be selling a similar item, you can also choose to save the invoice as a template. Here is what my completed invoice looks like when it is sent to my customer:
8) After previewing the invoice, click “Send” to email it to your customer. Once the customer pays, you will receive a notification that payment has been made, and you’ll be ready to start creating!
Again, it is a wise business move to always get your customer to pay for your item before you begin making it. No seller ever wants to put the supplies and time into an item, especially a custom item that you might not be able to resell, and then have the customer not follow through with the sale.
Save this post to Pinterest:
Since 2015, Christine Schinagl has been helping crafters start and run craft businesses through her blog, Cutting for Business. As a Silhouette and Cricut crafter herself, she has a unique take on what works and what doesn’t work in the craft business world. She also enjoys teaching other crafters how to create digital SVG designs, available through the Design with Me series.