Tutorial: Stained Glass Look Tulip Window Cling Using Transparent Vinyl
Affiliate Disclosure: As an Amazon Associate I earn from qualifying purchases. Additionally, I may get commissions for purchases made through other affiliate links in this post.
When Adele from Homesteader Chic asked about sharing a tutorial using window cling material, I couldn’t say yes fast enough! Adele and her daughter Sarah sell commercial use digital cut files featuring country-themed and farmhouse sign designs. Homesteader Chic is a mom-daughters-granddaughters business–each household in the family has at least one cutting machine, and several family members design cut files. Adele’s granddaughters (and grandsons!) are busy makers too! I’ll turn it over to Adele for the tutorial:
When Sarah was young, our family lived in Germany, where hand-snipped paper crafts were enjoyed by all ages. We learned to make Fensterbilder, stained glass-like window hangings made with colored transparent paper. Three decades later and back in the US, Sarah applies the same principles to make beautiful designs for glass and clear plastic projects using transparent vinyl.
Stained Glass Window Cling Tutorial
Supplies:
- Clear cling vinyl
- Transparent outdoor vinyl (such as Oracal 8300) in colors of your choice
- Opaque outdoor vinyl (such as Oracal 651) in black or other color for the outlines. Either glossy or matte will work. We use matte black.
- Clear transfer tape or paper (low-tack is best with cling vinyl)
- Scrap piece of vinyl backing sheet slightly larger than cling vinyl shape
- Free commercial use Stained Glass Look Tulip cut file
Steps:
- Download the design file and save to your computer. Open the file in your cutting machine design software. Select all and group (this is important so all pieces will nest well). With the design grouped, adjust size of design so the gray circle is the size you’d like the finished window cling to be. For more tips, see the layout guide included in your zip file.
- Ungroup design. Separate the design elements on your design screen.
- Cut the design elements from vinyl and weed. If you are new to cling vinyl or transparent vinyl, test cut to check settings. We use a slighter higher blade setting than we do for Oracal 651.
- Large gray circle = clear cling vinyl solid circle
- Outline piece = dark opaque vinyl (keep outlines)
- Colored pieces = colored transparent vinyl (keep cutout shapes)
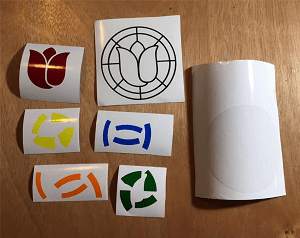
- Leave the clear cling vinyl circle on its backing and lay vinyl-side up on table. Press out any wrinkles or bubbles.
- Apply transfer tape to the outline piece.
- Prepare to apply outline vinyl carefully to the cling vinyl. Cling vinyl may stretch if the adhesive vinyl is removed, so we try to get it placed correctly the first time to avoid this.
- First lay the outline piece, with unsticky transfer tape side down, over the cling vinyl circle and center it to get an idea of the width of the cling vinyl margin. Lift the outline piece off.
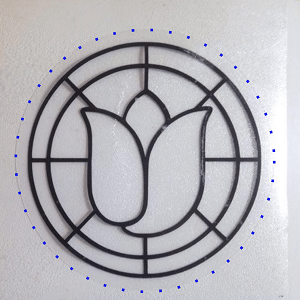
- Place the scrap backing sheet, shiny side up, over most of the cling vinyl, leaving an inch or two of the circle exposed at the top. Hold the top of the outline piece, adhesive side down, just above the top of the cling vinyl and center it, allowing for a cling vinyl margin. Gently lay the outline piece in place on the small exposed part of the cling vinyl circle and press to adhere.
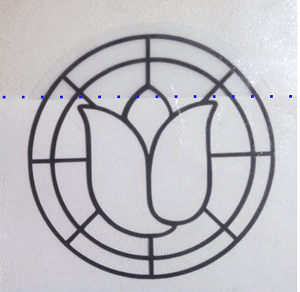
- Gradually pull the backing sheet down and smooth the outline piece farther downward until the entire outline is adhered to the cling vinyl.
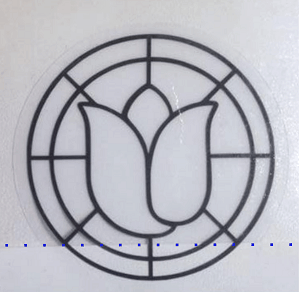
- Remove transfer tape, again with a gentle touch. Instead of pulling the tape up, peel the tape backwards flat over itself, while holding the adhesive vinyl in place.
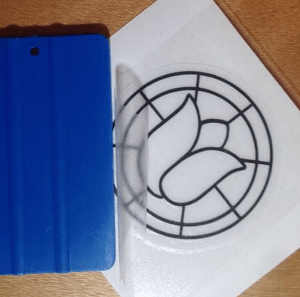
- Using small pieces of transfer tape, your fingers, or tweezers, add the colored pieces one at a time, fitting them into the outline piece like a puzzle. If you need to adjust pieces, remember to peel instead of pulling. Press to set in place.
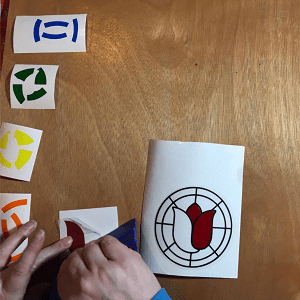
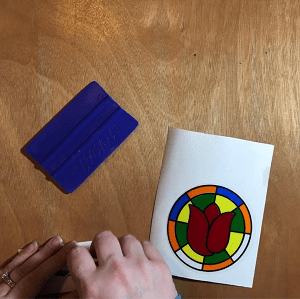
- Lay the vinyl backing sheet over the design and go over the design with a scraper or a brayer to secure all pieces. Voila! It’s finished!
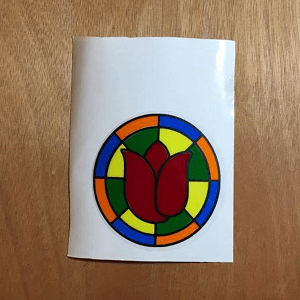
- Remove window cling from backing. Moisten cling vinyl side and attach to window or other surface. The cling vinyl will be on the window side, the colored vinyl towards you.
View more stained glass cut files (plus a whole lot more!) at Homesteader Chic. Love this tutorial? Save it to Pinterest:
Since 2015, Christine Schinagl has been helping crafters start and run craft businesses through her blog, Cutting for Business. As a Silhouette and Cricut crafter herself, she has a unique take on what works and what doesn’t work in the craft business world. She also enjoys teaching other crafters how to create digital SVG designs, available through the Design with Me series.
