• Home
  • Work with CfB
  • Contact
    • Bloglovin
    • Facebook
    • Instagram
    • Pinterest

Cutting for Business

  • New? Start Here!
  • Visit the Shop
    • Ebooks
    • Business Names
    • Craft Business Consultations
    • Order Forms
    • SVG Files
    • Etsy Shop
  • Join Craft Business Help
  • Must Have Products
  • Etsy Shop
  • Free Cut Files
  • Free Etsy Listings


Affiliate links may be present in the following article. For my full disclosure policy, see this link.
Additionally, as an Amazon Associate I earn from qualifying purchases.

Tutorial: How to Etch Acrylic with your Silhouette Curio

Filed Under: Project Tutorials

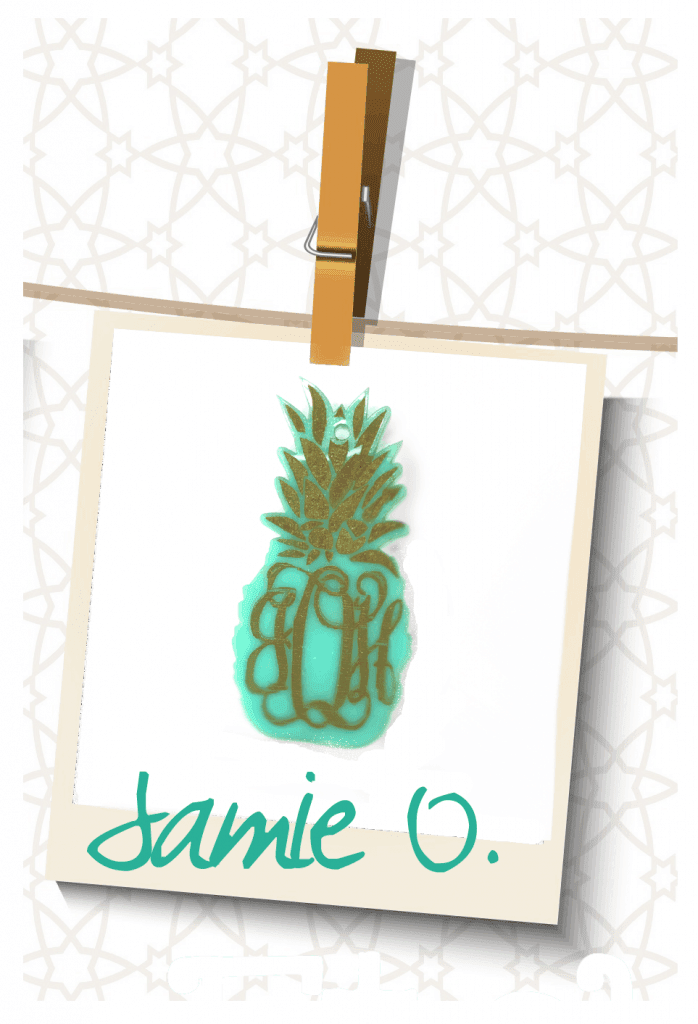
In the crafting small business world, I think that the Silhouette Curio is underutilized! To inspire you to try out a Silhouette Curio in your business  – I’ve invited Jamie from Craft Chameleon over to show us how to etch with the Curio. I’m turning it over to Jamie now:
Up your game and etch your customer’s acrylic items for a value added product with your Silhouette
Curio. This tutorial assumes you have a working knowledge of your curio machine. Let’s get started!

Supplies Needed

Silhouette Curio
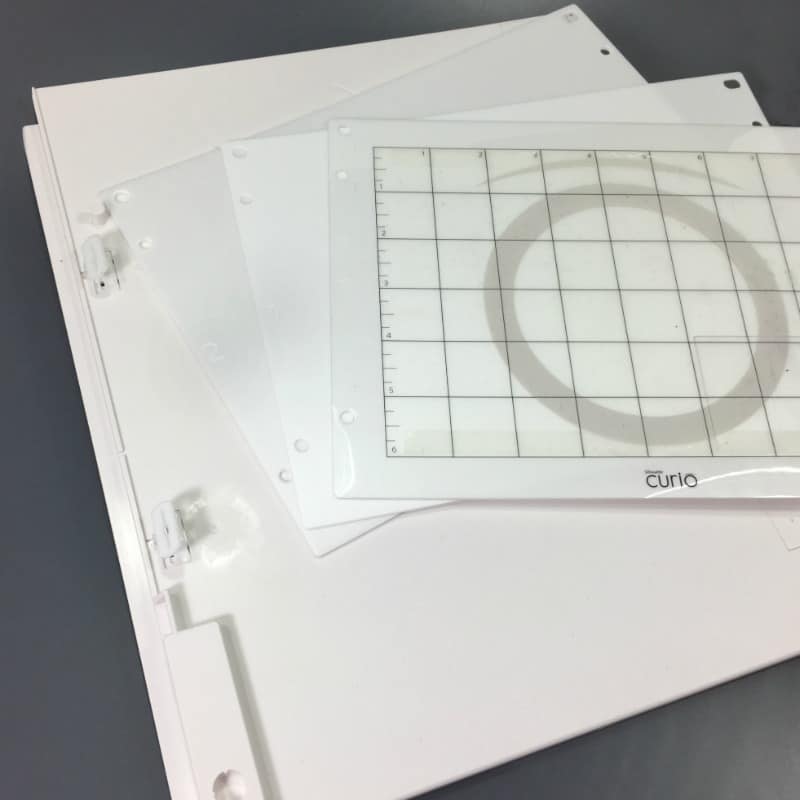
Small platform and mats 2, 1 and top mat (1)
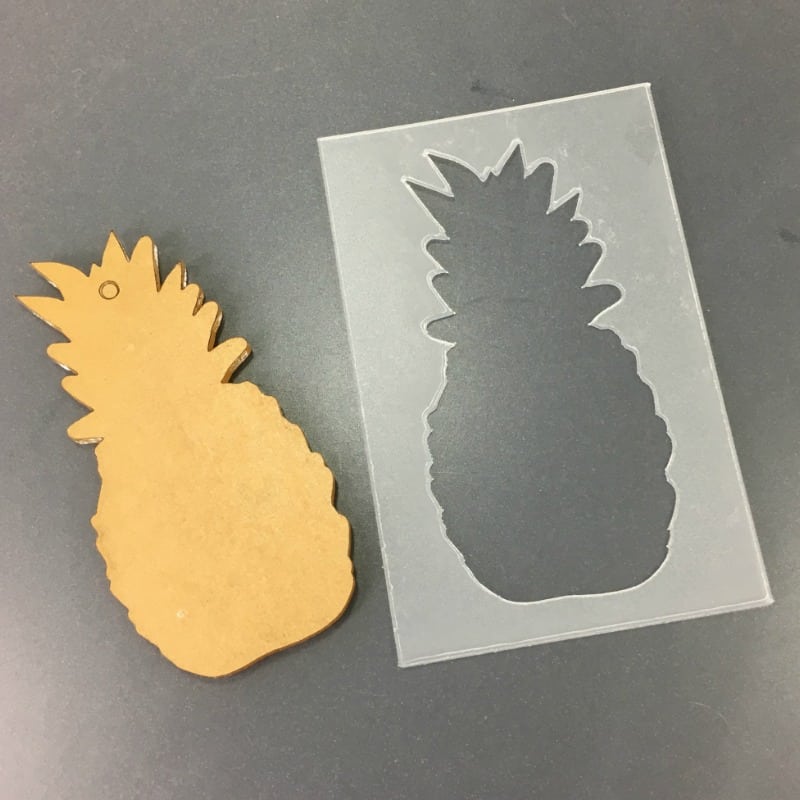
Etching Tool
Acrylic Shape
Plastic or cardboard template
Tutorial: Etch Acrylic with your Silhouette Curio - by cuttingforbusiness.com Tutorial: Etch Acrylic with your Silhouette Curio - by cuttingforbusiness.com Tutorial: Etch Acrylic with your Silhouette Curio - by cuttingforbusiness.com

Tutorial: How to Etch Acrylic with a Silhouette Curio

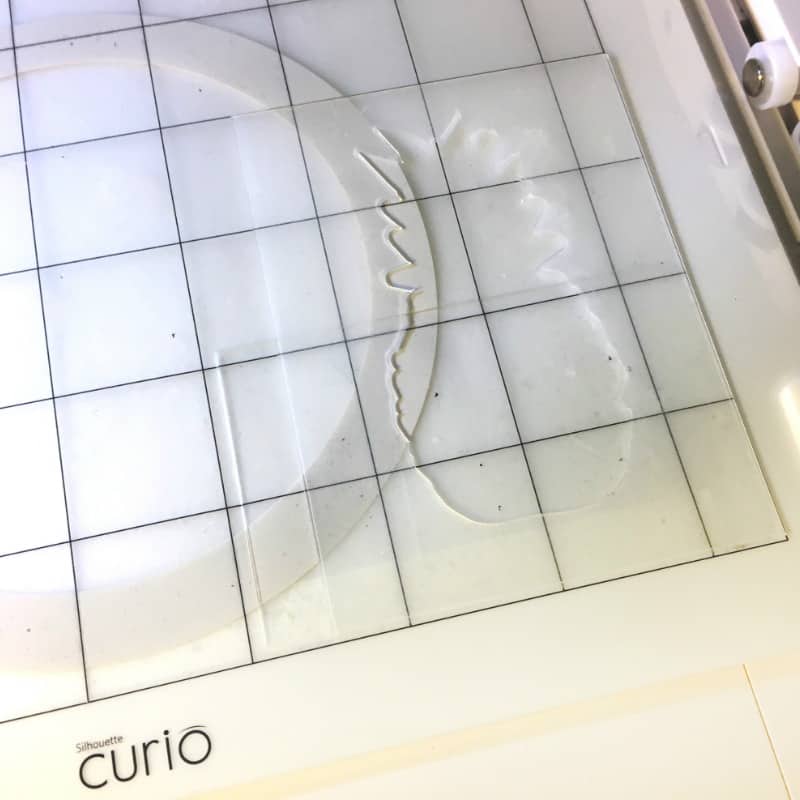
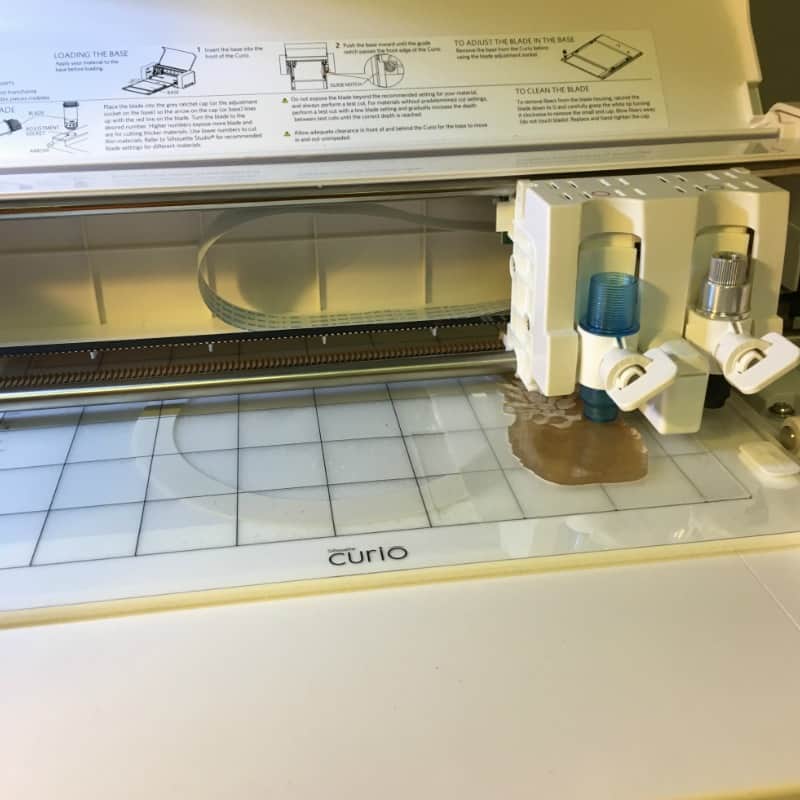
First set up your small platform with mats 2, 1 and the top cutting mat. This will give you a platform of 4.
Next take your acrylics template and determine where to put it on your mat. This needs to be a precise
location. I used the lower right hand corner. Make sure your mat is very sticky. If the mat is not sticky
your template and acrylic will move which will cause a failure in etching your acrylic. Press the template
down firmly.
Tutorial: Etch Acrylic with your Silhouette Curio - by cuttingforbusiness.com
Remove the protective coverings on top and bottom of acrylics. If the bottom covering is paper it can be
left on, your option.
Tutorial: Etch Acrylic with your Silhouette Curio - by cuttingforbusiness.com
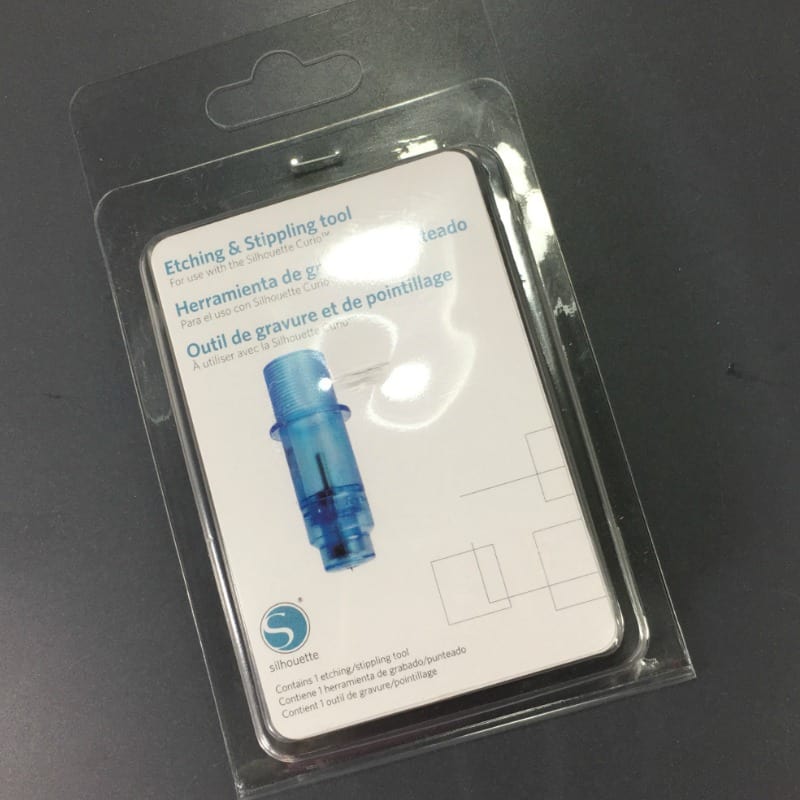
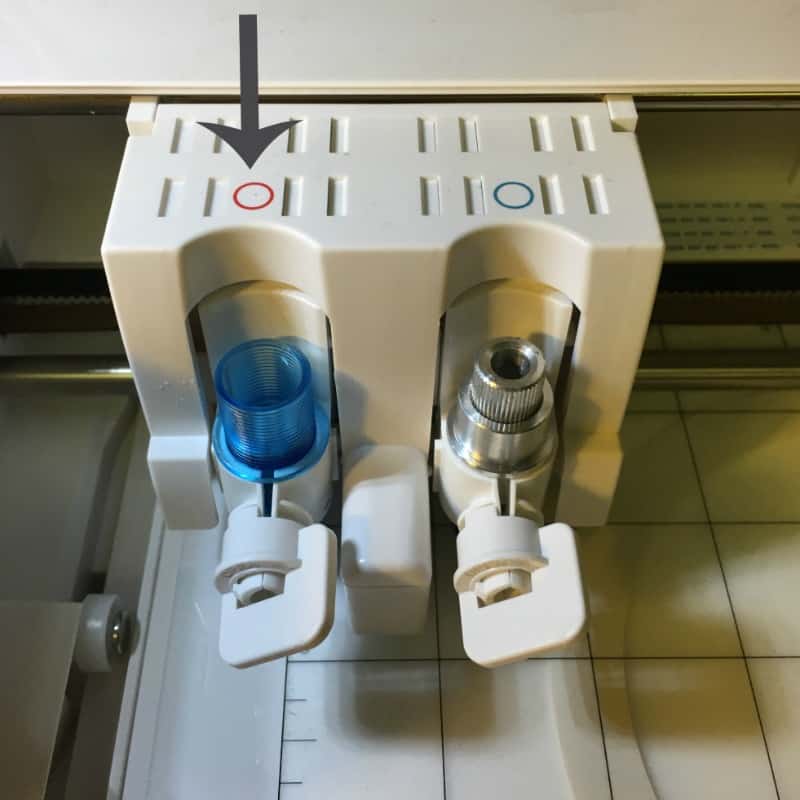
Load the platform into the curio and add the etching tool into the first or red section of the cutting head.
Tutorial: Etch Acrylic with your Silhouette Curio - by cuttingforbusiness.com
Place your acrylic inside the template. Press firmly. Then open your file on the curio software. Tutorial: Etch Acrylic with your Silhouette Curio - by cuttingforbusiness.com
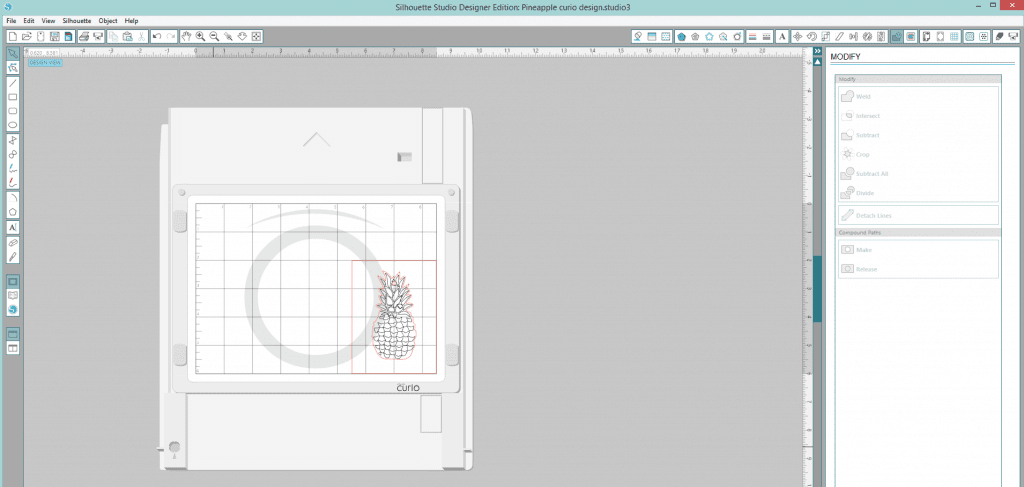
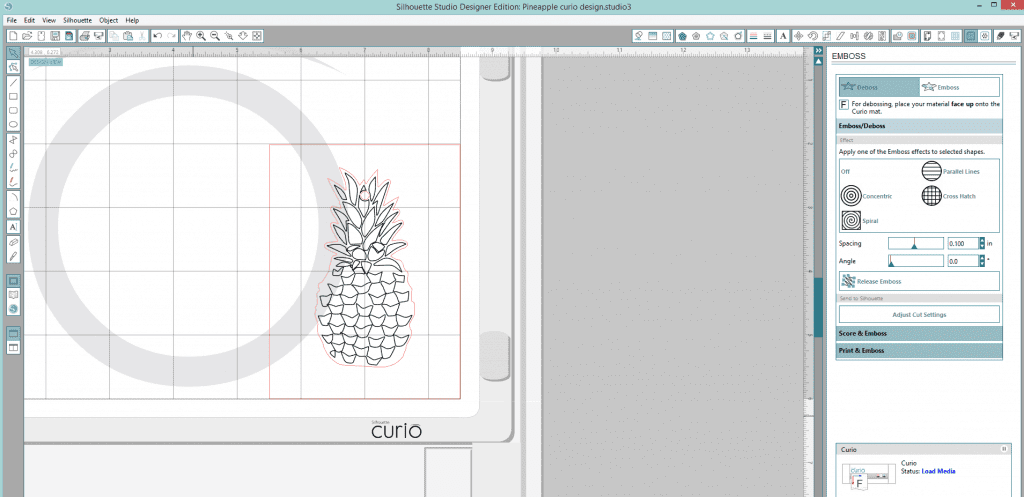
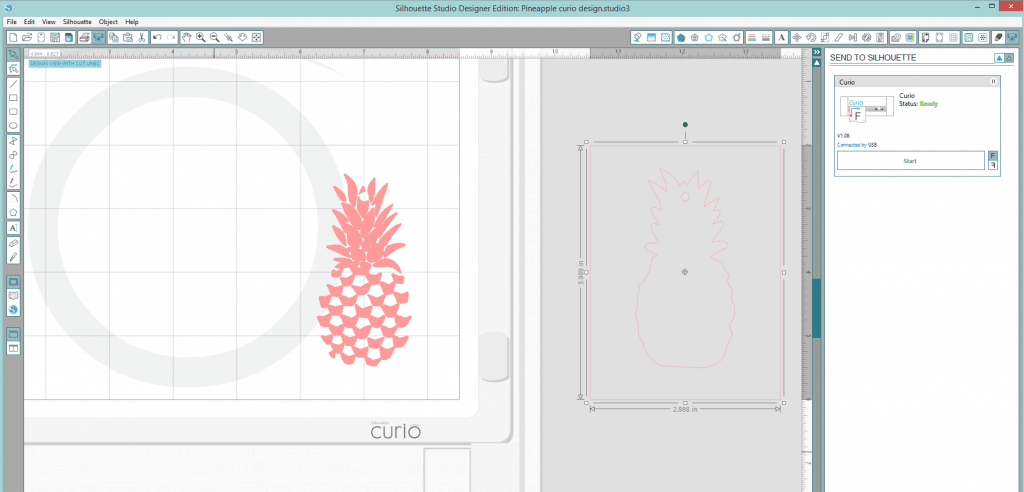
Set up your template and acrylic cut file in your software to match the exact layout on the machine. Remember your rule is your friend in this step. Precision is key!
Tutorial: Etch Acrylic with your Silhouette Curio - by cuttingforbusiness.com
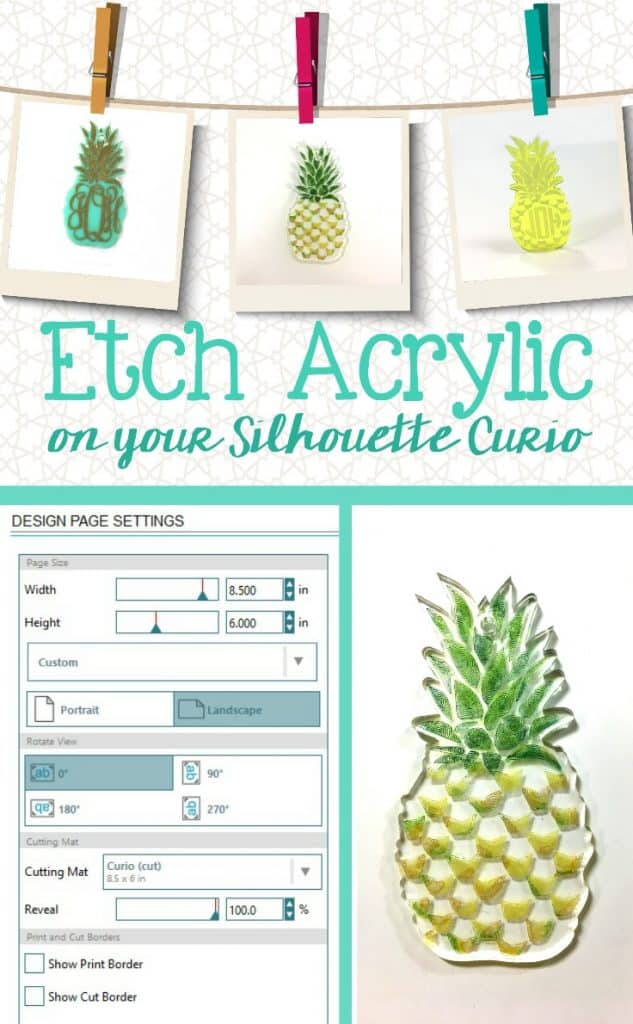
Open the Design Page Settings tab. Using the settings shown in the photo below to set up your page. Tutorial: Etch Acrylic with your Silhouette Curio - by cuttingforbusiness.com
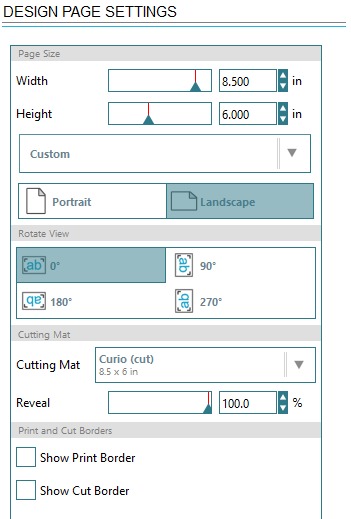
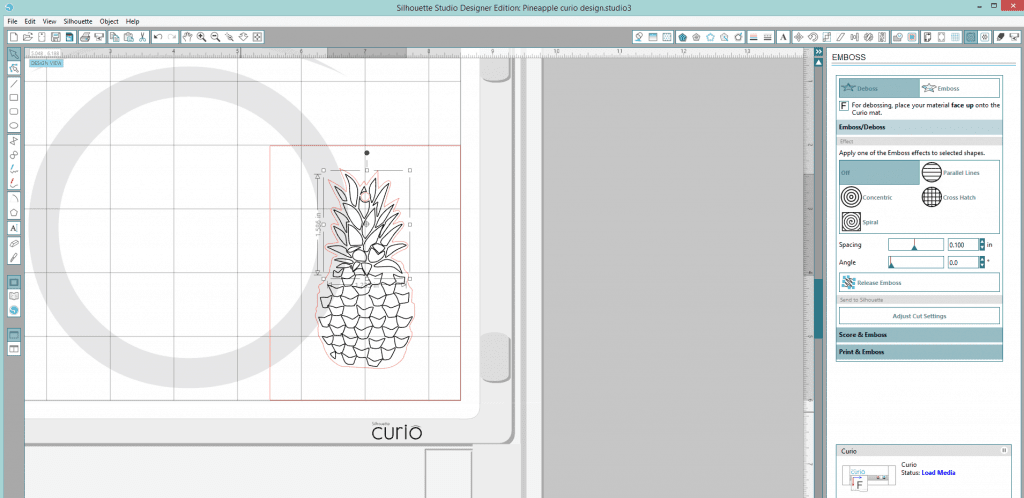
Next open the Emboss/Deboss tab.
Tutorial: Etch Acrylic with your Silhouette Curio - by cuttingforbusiness.com
Select the area to deboss or emboss. I use deboss as my setting.
Tutorial: Etch Acrylic with your Silhouette Curio - by cuttingforbusiness.com
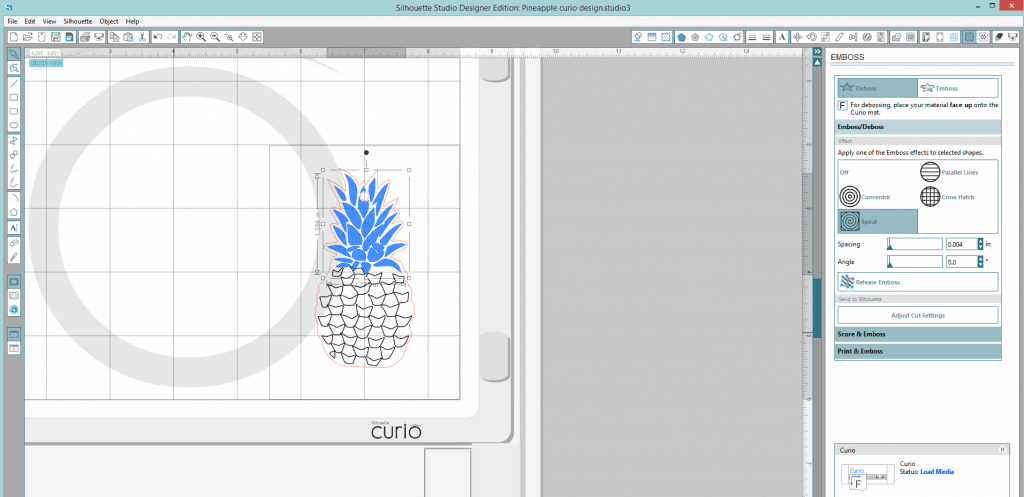
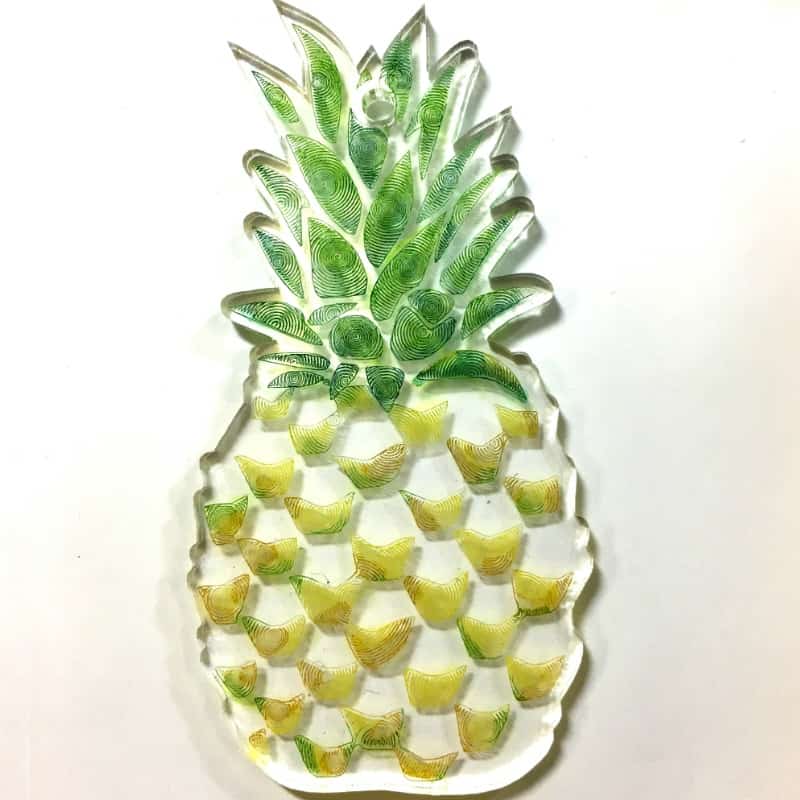
Now choose the effect you want for that section. I choose the spiral for the leaves. Next you will set the
spacing, the smallest spacing is .004 and will need to be typed into the box. The slider and arrows will
not allow you to go this low.
Tutorial: Etch Acrylic with your Silhouette Curio - by cuttingforbusiness.com
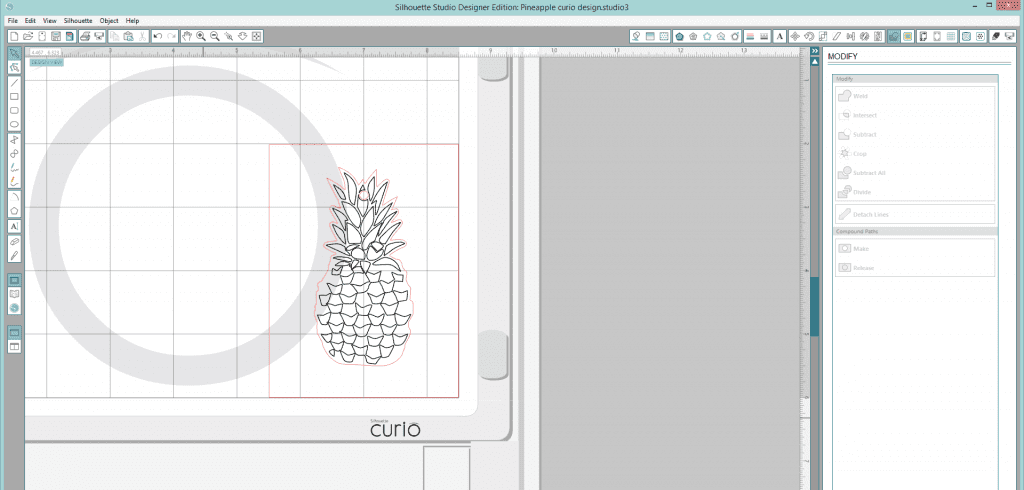
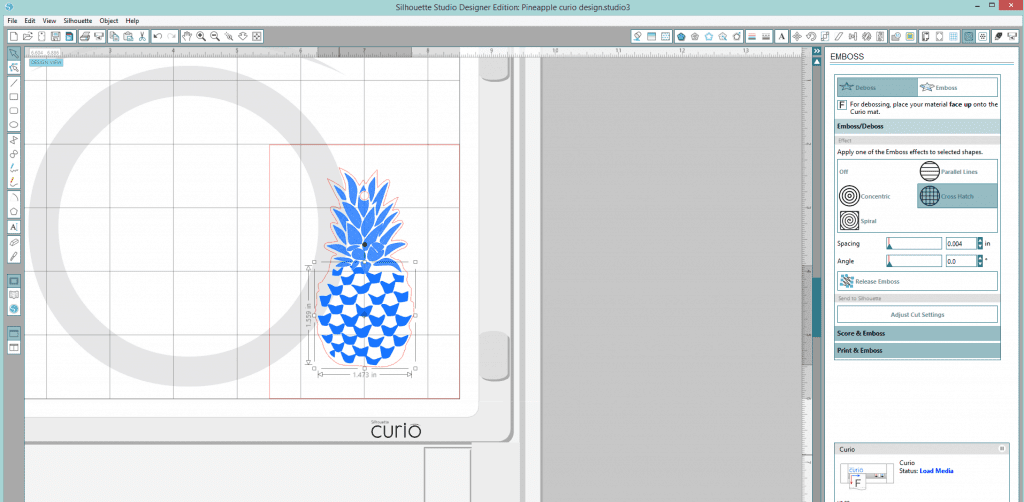
Continue selecting the various sections you want to etch and the effects. Shown below is the cross hatch
for the lower section of the acrylic.
Tutorial: Etch Acrylic with your Silhouette Curio - by cuttingforbusiness.com
Move over to the Cut Settings tab. Select the Cut setting followed by the Red Tool 1. Next we will
select the material type for the Red Tool 1.
Tutorial: Etch Acrylic with your Silhouette Curio - by cuttingforbusiness.com
Choose the metal etch settings for the Red Tool 1. We will modify the settings below to accommodate
the acrylic. Our platform is set to 4, the speed is 6 and the thickness is 17.
Tutorial: Etch Acrylic with your Silhouette Curio - by cuttingforbusiness.com
Prior to etching, you will want to cut off the cut lines for your template or move it so it will not be etched. Then send your etching job to your curio.
Tutorial: Etch Acrylic with your Silhouette Curio - by cuttingforbusiness.com
Tutorial: Etch Acrylic with your Silhouette Curio - by cuttingforbusiness.comNow watch the magic happen!
Tutorial: Etch Acrylic with your Silhouette Curio - by cuttingforbusiness.comTutorial: Etch Acrylic with your Silhouette Curio - by cuttingforbusiness.com
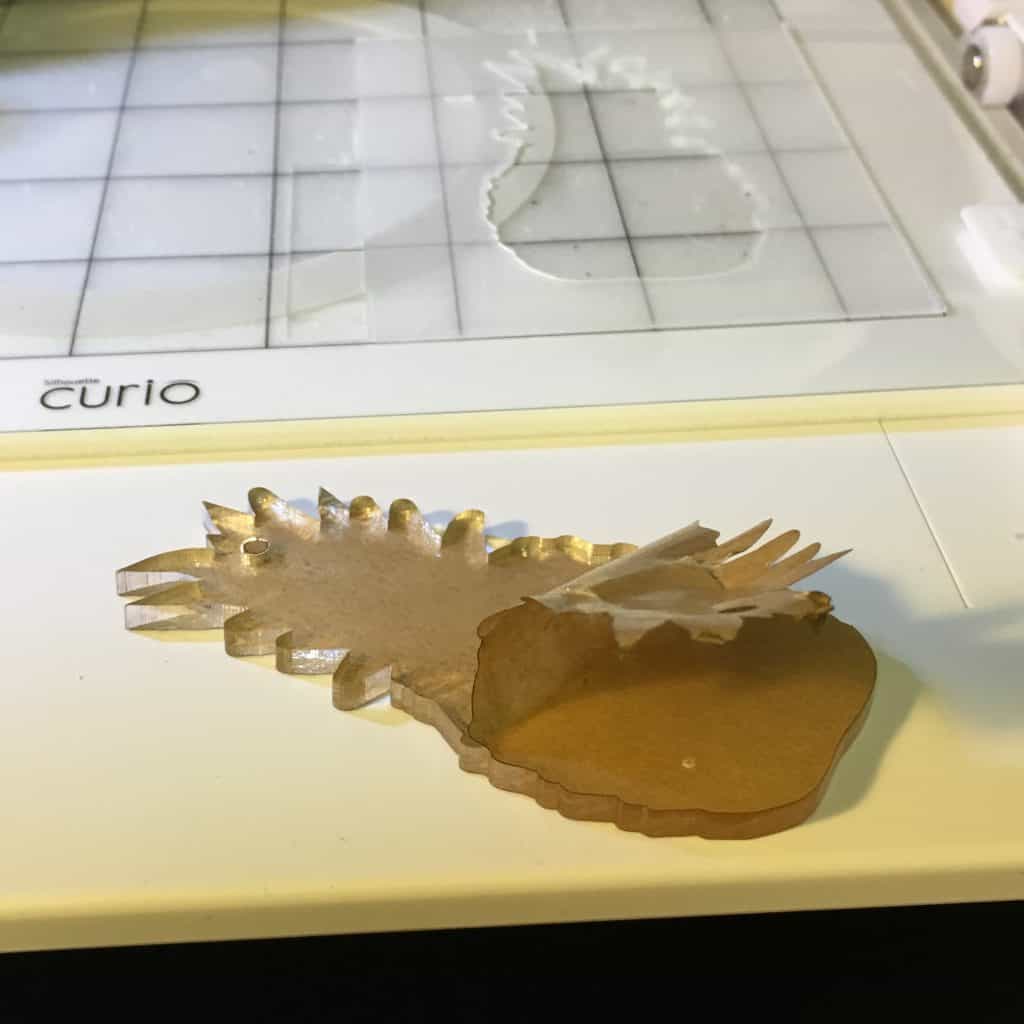
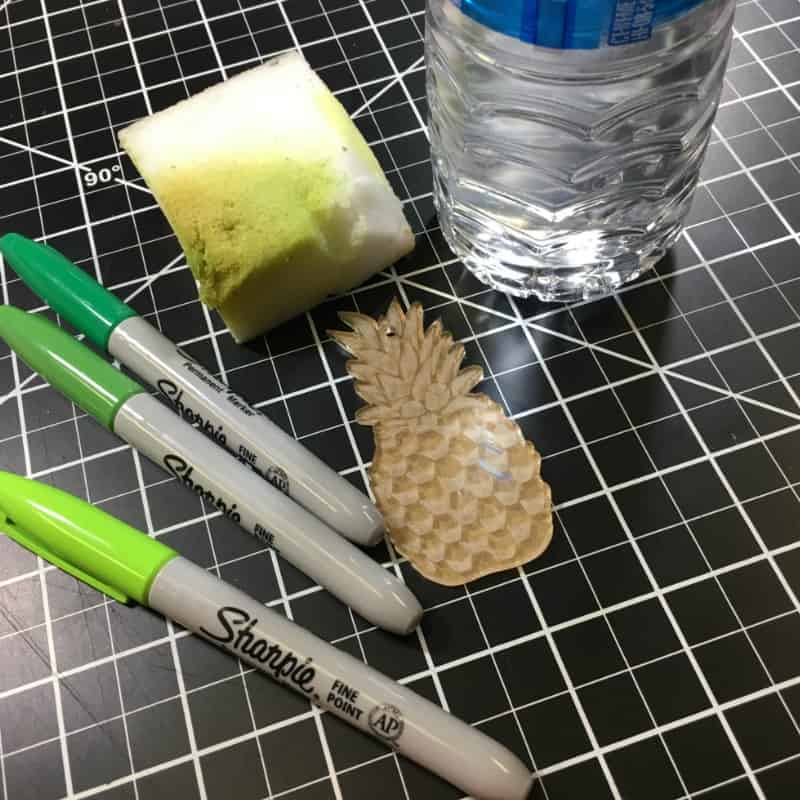
When the item is etched carefully remove from the template with debris in place. You do not want that
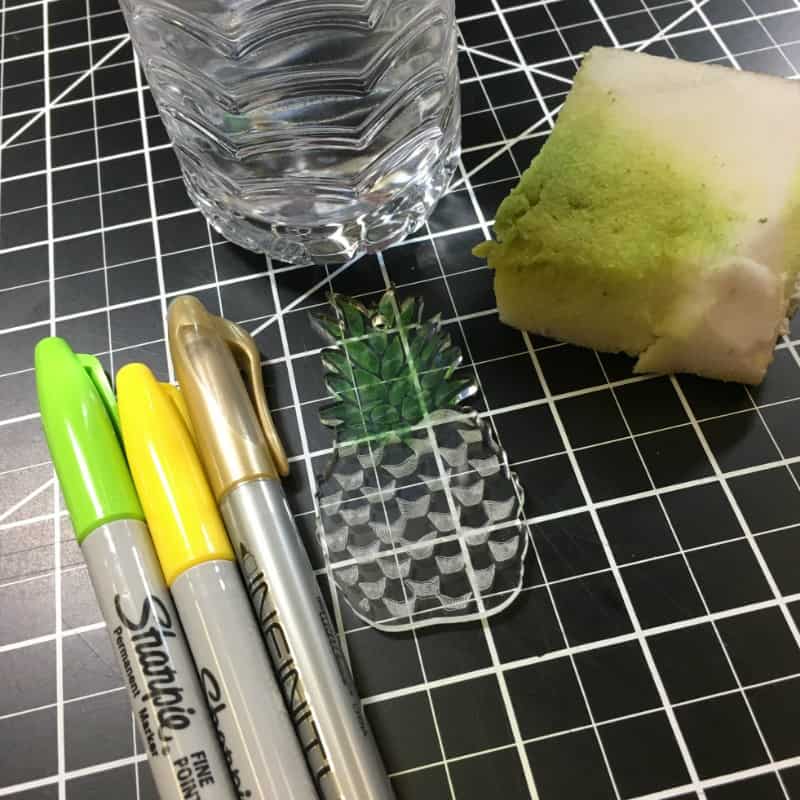
to get on your mat as it will affect the mat’s stickiness. Once removed from the Curio, clean the surface of the acrylic with water and a soft rag. Now it is complete or ready to embellish. Shown here we used sharpies and a wet magic eraser to add color.
Tutorial: Etch Acrylic with your Silhouette Curio - by cuttingforbusiness.com
Now let’s see what you create for your customers using your Silhouette Curio!
Jamie
Craft Chameleon
For more information on purchasing acrylics with etching cut files and coordinating plastic templates please join the Craft Chameleon Blanks Facebook group.
Craft Chameleon
Thanks so much Jamie for stopping in today – I can’t wait to try out etching with my Curio!
Save this post to Pinterest:
Tutorial: Etch Acrylic with your Silhouette Curio - by cuttingforbusiness.com

Related Posts

  • Coir Doormats – A Profitable Spring Silhouette or Cricut ProductCoir Doormats – A Profitable Spring Silhouette or Cricut Product
  • Tutorial: How to Use Chemica DuoFlex® Heat Transfer MaterialTutorial: How to Use Chemica DuoFlex® Heat Transfer Material
  • Hot Fall Product: Customized NFL Clear Stadium BagsHot Fall Product: Customized NFL Clear Stadium Bags
  • Painted Rocks – A Good Craft Show Impulse ProductPainted Rocks – A Good Craft Show Impulse Product
  • Tutorial: Custom Buttons with Silhouette Cameo and Button MakerTutorial: Custom Buttons with Silhouette Cameo and Button Maker
  • Tutorial: Craft Perfect Heat Transfer Vinyl on LeatherTutorial: Craft Perfect Heat Transfer Vinyl on Leather

Connect with Cutting for Business

  • Bloglovin
  • Facebook
  • Instagram
  • Pinterest

Get Cutting for Business in Your Inbox

Buy Books


Cutting for Business is a participant in the Amazon Services LLC Associates Program, an affiliate advertising program designed to provide a means for sites to earn advertising fees by advertising and linking to Amazon.com and affiliated sites. See the disclosures page for full disclosure information.


« Custom Naming Contests for Small Business by Squadhelp
Free Bloom SVG for Silhouette or Cricut »

Comments

  1. Lea says

    April 5, 2017 at 9:40 am

    So cool! Can this be done on my cricut?

    Reply
    • Christine says

      April 7, 2017 at 10:40 am

      This is a Silhouette Curio tutorial. The Curio has a higher cutting force than the Cricut.

      Reply
  2. Sarah says

    April 5, 2017 at 9:57 am

    Sorry if this is a “duh” kind of question, but I’m a etching newbie….you made your own plastic template? Or it can be cardboard? Like from an old box?

    Reply
    • Christine says

      April 7, 2017 at 10:40 am

      You can use cardboard, or Craft Chameleon sells the template with the shape.

      Reply
  3. Kathleen Fraser says

    April 5, 2017 at 10:12 am

    Hi Christine, I watched your video on Etching Acrylic. I am new at SIL software and I am new to all of SIL products. I purchased the Curio and hope to do acrylic shapes. I have a question, The other day i started to set up my Curio to do my first project and it was a bust. I have SIL Studio Basic and then I got the upgrade to Designer Edition. I want to be able to pull in a file or design that are SVG’s. Ok, so I start setting up and I get to the ” Material” I want to use and at that time it was the SIL sheets of metal. So I scroll down and i have no” Metal Sheets”
    There is nothing for metal sheets or anything like it. in my scroll I have up to “Kraft” and then it skips over to “P”. Is there something wrong with my software? Should I uninstall my software and start again, or is there another way to override that step. I am disabled and I do not work and I am doing this as a hobby, possible as a small business. I am confused and I am hoping you can set me in the right direction. I have 2 other cutting machine (no a SIL) and over a years time I bought over 600 pieces of acrylic shapes and the purpose was to add vinyl to them. I rather do the etching on them but I need to make sure I have my Curio set up right. I rather it take a few more days for that then just guess and make a mess and loose alot of acrylic shapes. Before this machine was brought to my attention I read alot of your post and back in my head I was hoping I could get a SIL just to follow your post and tutorials. Once I get this machine set up and running I am going to sell my other machines and all my vinyl. I no longer am interested in doing the vinyl or using my other machines. If anything I would buy another Curio. I want the etching. Back in 2003-2006 I had a etching machine and I was able to etch on items that were not flat and i had alot of fun doing it. IN 2006 I had a woman approach me and asked if i would be willing to sell my machine. She offered alot of money and paid for the shipping which was expensive as i live on the east coast and she lived in CA on the west coast and shipping was expensive. I then went and up dated my embroidery machine. I purchased my first embroidery machine in 1992 and i have seen it all go from alot of work just to make your own design until Dec 20014 when i sold everything and at that time I had 4 embroidery machine. That is when I decided I needed a change. I sold everything and got into a vinyl cutting machine. At that time i bought a commercial type sewing machine, and because of my health it sat for over a year. I turned in the sewing machine and got a new version of my vinyl cutting machine. I really like doing everything you can do with these machines, but I rather be doing etching.
    I am hoping there are more videos coming. I have to confess, I am a little disappointed about the software. I was told you can bring in SVG’s if you get the upgrade, I was not told about the steps you need to do to get it to cut or etch. I was told you could do a jpeg and turn that into a SIL, but i was not told you need to trace and then how to do the trace. i am new to the software all together so i think if you have time or others that know the software well should do a video on how to trace a jpeg on the silhouette and end up with either a SIL or a svg.
    Sorry this is so long but i have no idea how to get to the proper channels to express my thoughts and concerns. Show me where to go for these tutorials and i will gladly check them out.
    Your tutorial on the acrylic was awesome and i learned alot. Thank you and hope to see some more on the software for the Curio and the acrylic.
    Take care
    Kathy

    Reply
    • Christine says

      April 7, 2017 at 10:32 am

      Kathy, I don’t have all the answers for your Curio questions – as I am not a big user of mine. Feel free to reach directly out to Jamie at Craft Chameleon.

      Reply
    • Jamie Omahen says

      May 10, 2017 at 4:42 pm

      Kathy join us in our craftchameleon blanks facebook group! We are are learning and growing together! Also Cindy Pope gives classes on using the Curio.
      Jamie

      Reply
  4. Diane says

    April 6, 2017 at 9:07 am

    Love the idea, but the sharpies won’t stay on long if you wash they come off. I know have tried them on other items, I would suggest paint pens instead, maybe can’t get the same effect.
    Next could you etch without cutting it out? Like would be cool for coasters.

    Reply
    • Christine says

      April 7, 2017 at 10:31 am

      Thanks for sharing!

      Reply
    • Jamie Omahen says

      May 10, 2017 at 4:46 pm

      Diane,

      Ink markers will remain in the grooves unless reactivated by some type of alcohol or solvent. But you can seal the item if it would be used or worn around solvents, ie bartender, hairstylist, chemist, etc.

      Thanks!
      Jamie

      Reply
  5. Sheila says

    May 24, 2017 at 9:18 pm

    The does curio cut acrylic.

    Reply
    • Christine says

      May 25, 2017 at 7:47 am

      I think you are asking if the Curio will cut acrylic? If so, no, it will not. It can etch it though.

      Reply
      • Sha says

        August 13, 2017 at 2:21 pm

        How do you cut the acrylic?

        Reply
        • Christine says

          August 15, 2017 at 8:47 am

          Hello! You’d buy the acrylic precut (or cut it with a laser cutter). I’d recommend Craft Chameleon for the precut shapes.

          Reply
  6. debbie says

    June 14, 2017 at 3:24 am

    Hi Jamie!
    So, how do you make the template? Did I miss it? That seems like the most important step?

    Reply
  7. Aubrey says

    July 7, 2017 at 12:53 pm

    Would etching cream work on acrylics?

    Reply
    • Christine says

      July 9, 2017 at 9:12 pm

      No, etching cream doesn’t work on plastics.

      Reply
  8. Hadassah says

    January 10, 2018 at 6:35 am

    Hi. Thank you for this tutorial; I used the instructions to etch my own designs onto acrylic, and made a couple of beautiful projects. Then it stopped etching properly. It seems to me that the blade gets clogged up with acrylic shavings. Either that or it is blunt already, but I think it’s the former. Is there a correct way to clean it? I poked at it with a fairly soft wooden toothpick, and it definitely worked somewhat better then, but still didn’t finish the project properly. Any advice? And thank you again!!

    Reply
    • Christine says

      January 13, 2018 at 9:03 am

      I keep a small can of pressurized air in my craft room for this reason.

      Reply
      • Hadassah says

        January 14, 2018 at 11:27 am

        Cool. Would never have thought of that. Thank you!!

        Reply

Comments on Cutting for Business are moderated before posting. This ensures that this blog does not get overrun by spam or inappropriate comments. Please allow up to 7 days before you'll see your comment. Thanks, Christine

Leave a Reply Cancel reply

Your email address will not be published. Required fields are marked *

Make Money

Love to craft and ready to make some money? You're in the right place! Whether you own a Silhouette Cameo, a Cricut Maker, a Silhouette Curio, a Cricut Joy, or even a Glowforge, get tips and tricks to make an income with your machine.


Ready to Buy Craft Business Names


Free Fonts

Copyright © 2021 · Cutting for Business
Disclosures · Privacy Policy
This site is not affiliated with Silhouette America or Cricut (Provo Craft & Novelty, Inc.)

This website uses cookies to improve your experience. We'll assume you're ok with this, but you can opt-out if you wish. Cookie settingsACCEPT
Privacy & Cookies Policy

Privacy Overview

This website uses cookies to improve your experience while you navigate through the website. Out of these cookies, the cookies that are categorized as necessary are stored on your browser as they are essential for the working of basic functionalities of the website. We also use third-party cookies that help us analyze and understand how you use this website. These cookies will be stored in your browser only with your consent. You also have the option to opt-out of these cookies. But opting out of some of these cookies may have an effect on your browsing experience.
Necessary
Always Enabled

Necessary cookies are absolutely essential for the website to function properly. This category only includes cookies that ensures basic functionalities and security features of the website. These cookies do not store any personal information.

Non-necessary

Any cookies that may not be particularly necessary for the website to function and is used specifically to collect user personal data via analytics, ads, other embedded contents are termed as non-necessary cookies. It is mandatory to procure user consent prior to running these cookies on your website.

SAVE & ACCEPT