How to Use OpenType Fonts in Silhouette Studio or Cricut Design Space
Affiliate Disclosure: As an Amazon Associate I earn from qualifying purchases. Additionally, I may get commissions for purchases made through other affiliate links in this post.
Update: This is the Windows based tutorial. To use OpenType Fonts in Mac follow these instructions. Mac users, check the last paragraph of this article to find out how to get the popular Samantha font for cheap!
Today, let’s look at how to access some of the additional features of OpenType fonts in Silhouette Studio or Cricut Design Space. To remind you, we looked at several features of OpenType fonts in yesterday’s post TTF vs. OTF – What’s the Difference. To use the tutorial below, you’ll need an OpenType font and a character map or viewer. You can find a character map on your Windows operating system in the Accessories folder or use Font Book on a Mac. Additionally, if you installed NexusFont earlier in the week, you can use the built in character map.
How to Use the Character Map with OpenType Fonts
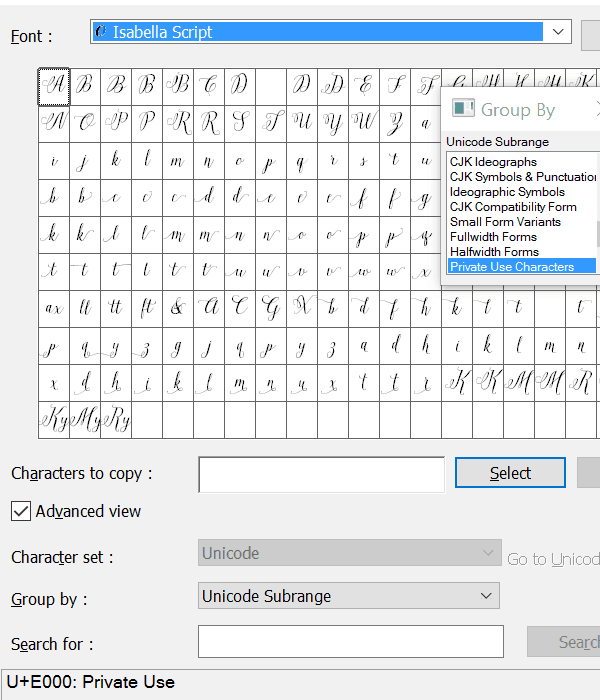
For this tutorial, I’m using the standard Windows character map and Isabella Script font.
- Open Silhouette Studio (or Cricut Design Space) and type in text in the font your want to use in your project.
- Open your character map and find the OpenType font you chose in Silhouette Studio (or Cricut Design Space). OpenType fonts appear with an O next to them in the font list. After selecting your font you will see a window with a bunch of tiny characters. For the Isabella Script font, you’ll want to choose Character Set “Advanced View” and Group by “Unicode Subrange”. From the small popup window that appears, select “Private Use Characters”.
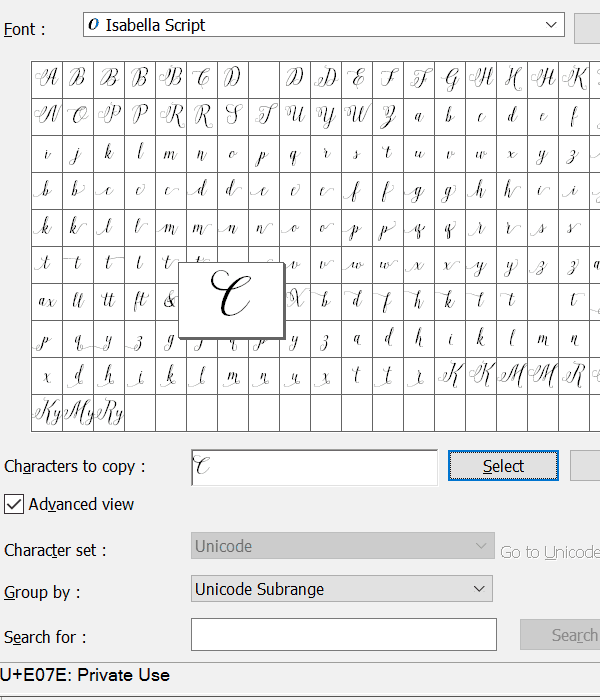
- Next, select the letter you want to use by clicking on it. You’ll see that a larger character pops up. Then, click “Select”. Now the character has been copied to the box labeled “Characters to Copy”. Click the “Copy” button.
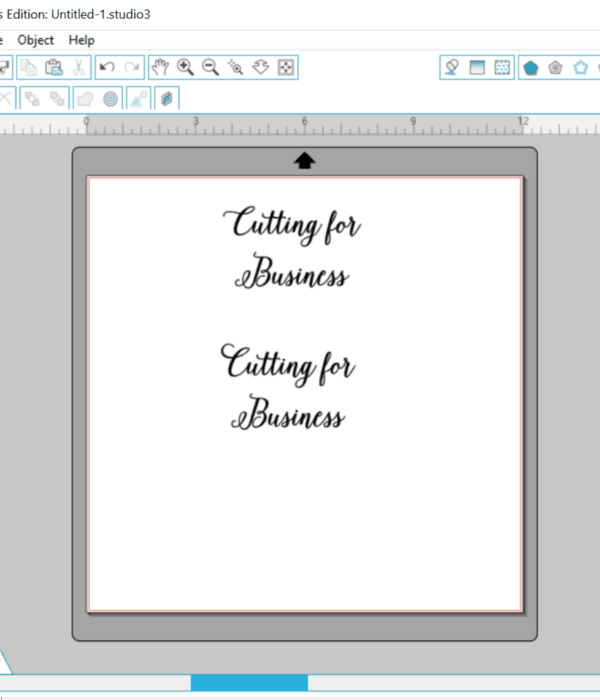
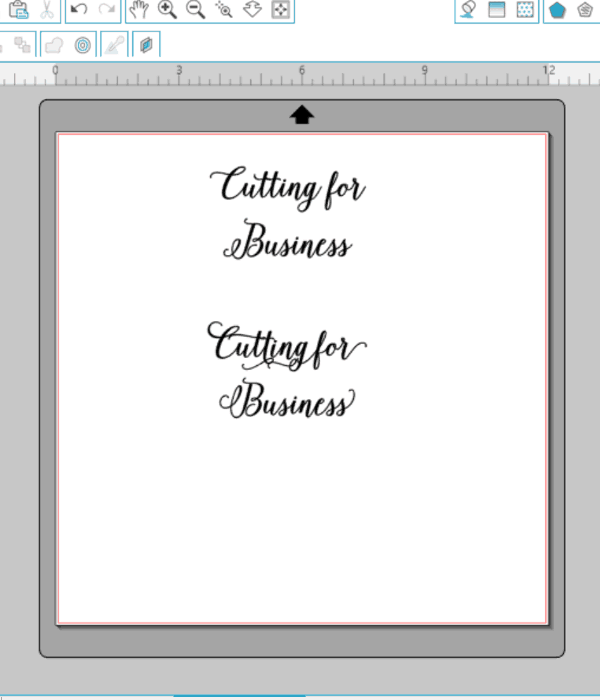
- Return to Silhouette Studio (or Cricut Design Space). Highlight the letter that you want to replace and paste the replacement letter from the character map into your project (Control + V). In this example, I replaced the C. The top phrase shows the original, while the bottom show my edited version.
- Repeat steps 3 and 4 for any other letters you want to replace. Remember, in most cases, less is more! The image below shows me going crazy substituting letters! Now that you’ve mastered Isabella Script – you can tackle the popular Samantha font which works exactly the same way as shown above. Samantha font retails for $75 but if you shop at Mighty Deals, you can find it for $17! (If it isn’t on sale when you visit, check back the following week.)
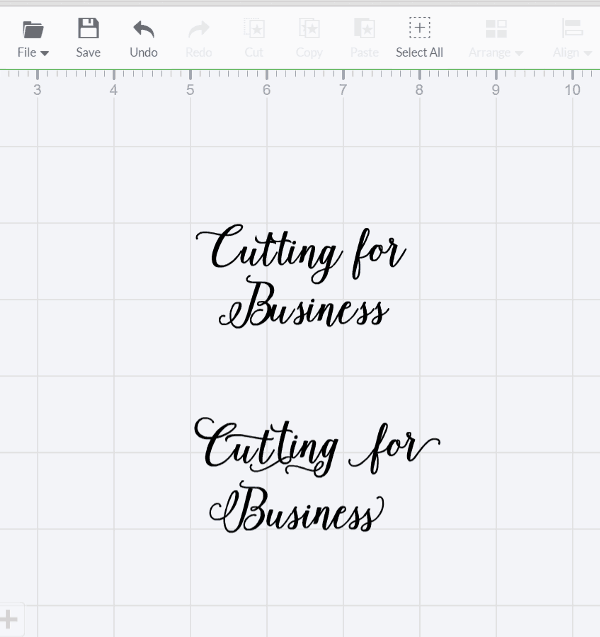
Cricut users: The process works the same in Design Space. Here’s the same example shown in Design Space:
That’s it! If you missed any of the posts on fonts you can catch up with them: How to Install Fonts, How to Organize and Manage Fonts, and TTF versus OTF fonts.
If you found this tutorial helpful, share it on your favorite social media by hovering or tapping on the image below.
Since 2015, Christine Schinagl has been helping crafters start and run craft businesses through her blog, Cutting for Business. As a Silhouette and Cricut crafter herself, she has a unique take on what works and what doesn’t work in the craft business world. She also enjoys teaching other crafters how to create digital SVG designs, available through the Design with Me series.