How to Use a Vinyl Stencil on Barnwood or Reclaimed Wood
Affiliate Disclosure: As an Amazon Associate I earn from qualifying purchases. Additionally, I may get commissions for purchases made through other affiliate links in this post.
Today’s post is a follow up to my post Why Does Paint Bleed when Using a Vinyl Stencil? In that post, I showed you how to use a vinyl stencil to get a perfect design every time. The takeaway from that was sand the surface well and use tiny amounts of paint. After posting that article, I got a lot of reader questions about how to stencil on rough wood such as barnwood, pallet wood, or reclaimed wood. Today, let’s tackle that.
Why Is it Difficult to Stencil on Rough Wood?
Most crafters who use barnwood or reclaimed wood want to save the texture of the wood, and don’t want to sand it. The uneven surface makes it difficult to get a good seal of the stencil and paint will bleed everywhere. I’ve seen some crafters use Mod Podge over the whole board before applying the stencil, but that discolors the wood and leaves a shiny finish over the wood.
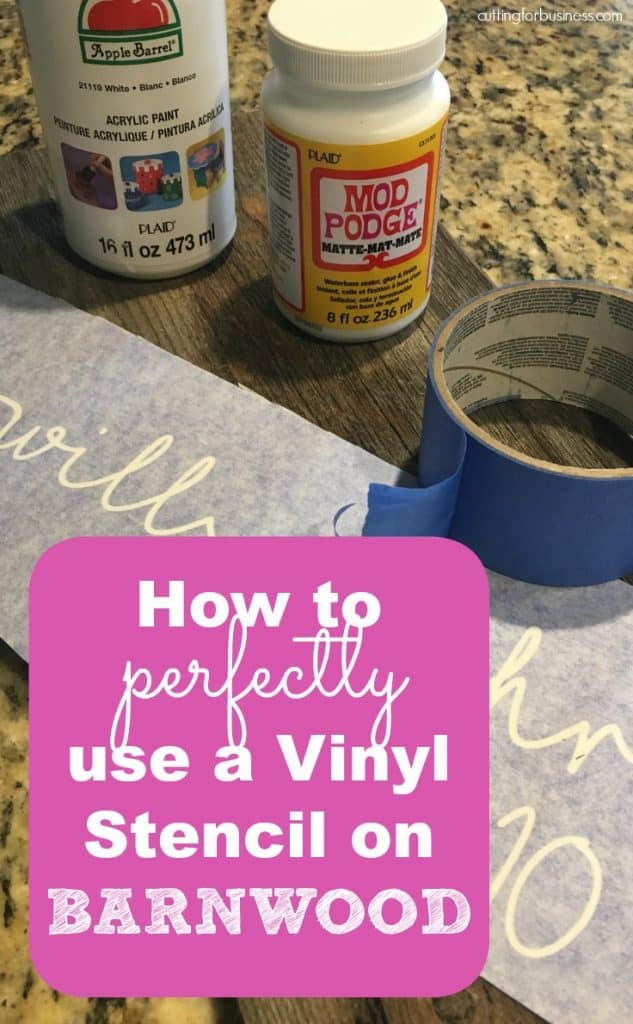
Supplies Needed
- Barnwood
- Silhouette Cameo or Cricut
- Vinyl
- Painters tape
- Foam brushes
- Mod Podge
- Transfer tape
- Sawtooth hangers
How to Stencil on Rough Wood
- Cut your vinyl stencil using your Silhouette Cameo or Cricut. Weed the design and apply transfer tape. I prefer to use the hinge method to apply the vinyl designs. First, align the design and tape across the center.
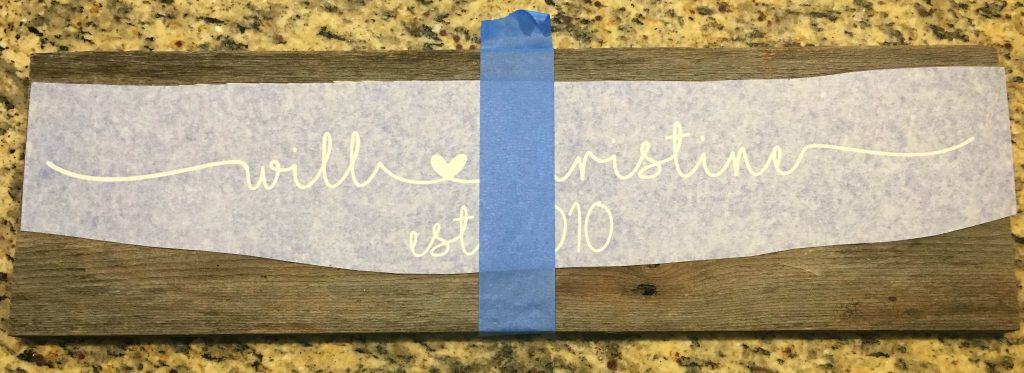
Next, remove the paper backing from the left side of the design and apply it to the wood.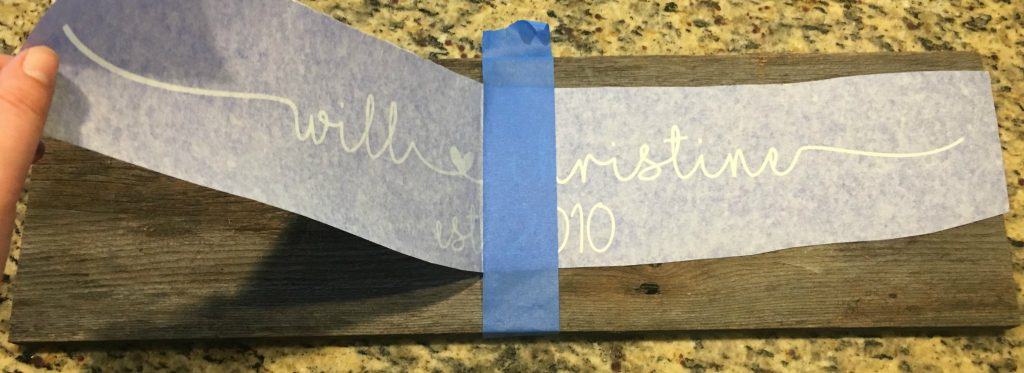
Remove the painter’s tape and the paper backing from the right side of the wood and apply it.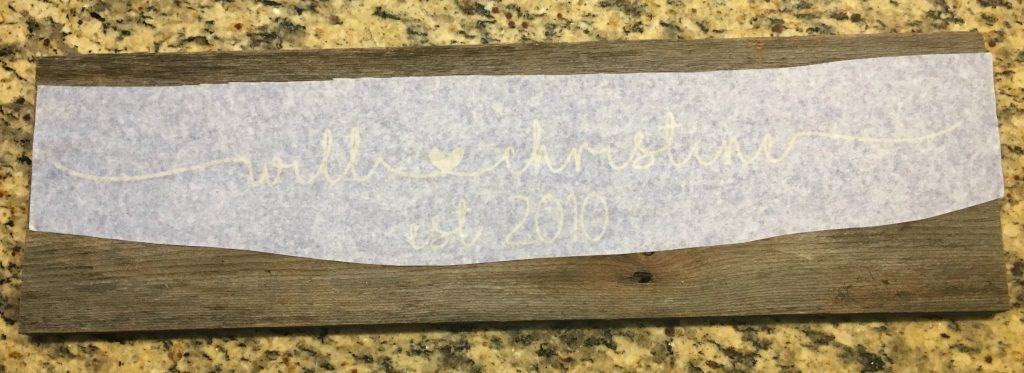
Last, remove the transfer tape.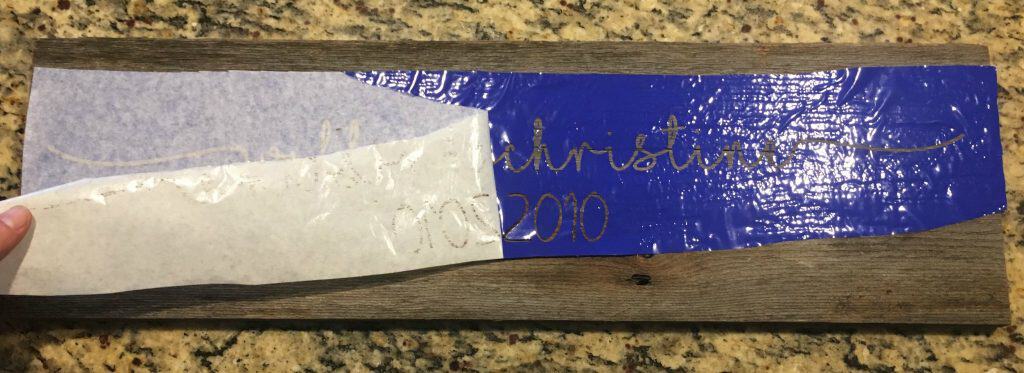
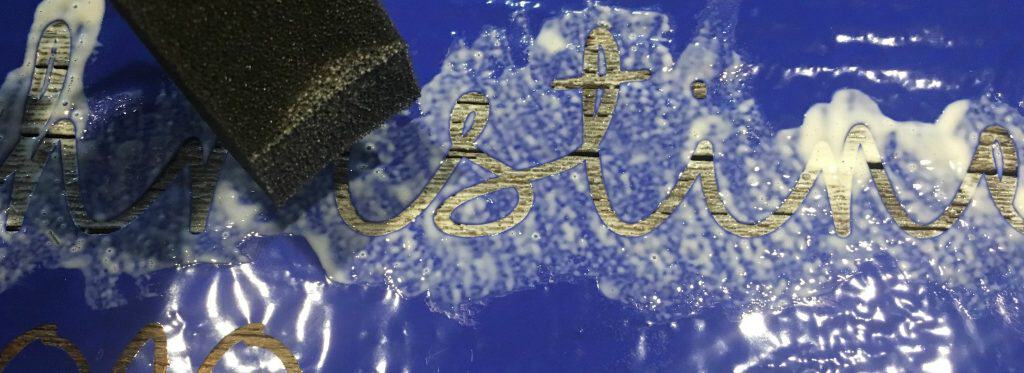
If you look close, you’ll notice that my vinyl stencil doesn’t stick well to my wood.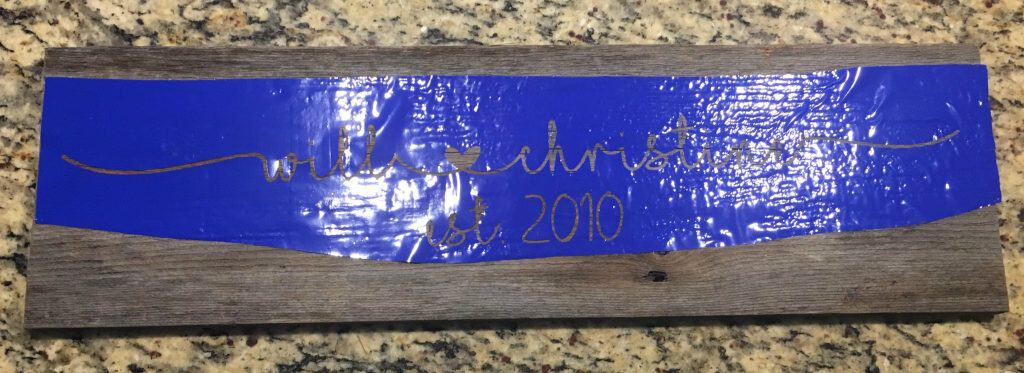
You can see in this picture that if I painted this, it would run under the stencil and make a huge mess. Due to the uneven wood texture, the vinyl simply doesn’t stick well.
- My solution is to apply a coat of Mod Podge to the area I want to paint. (Mod Podge is basically watered down glue. If you don’t have some on hand, make your own with Elmer’s Glue and water.) The Mod Podge glues the stencil in place and seals the edges so the paint won’t bleed. Apply Mod Podge with a foam brush and allow it to dry.
- After the Mod Podge dries, apply paint with a foam brush. Remember to use a tiny amount of paint!
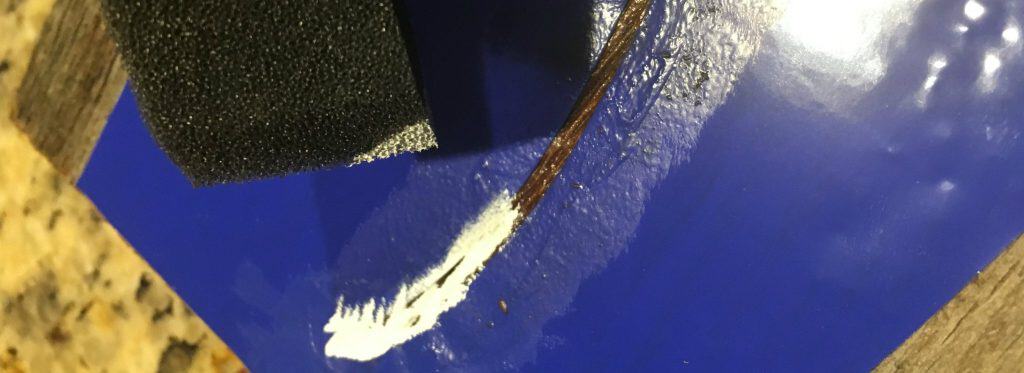
- Peel the stencil before the paint is dry.
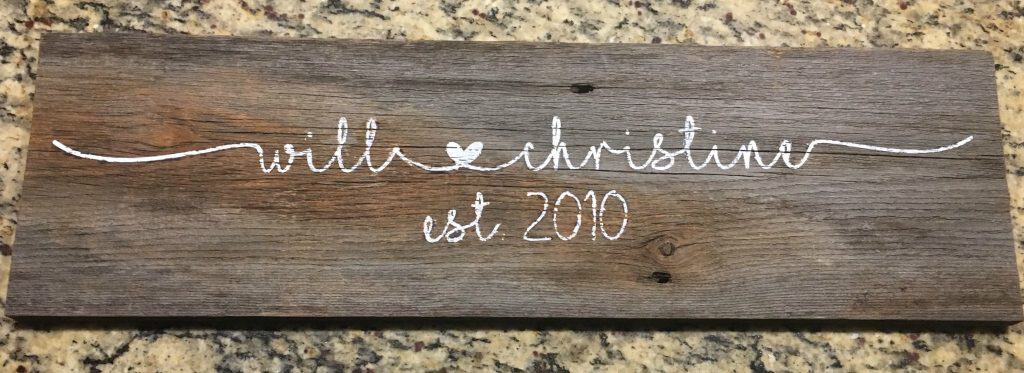
To finish up your sign, add hanging hardware to the back. Don’t have a source for barnwood? Did you know you can order it on Etsy? Click here.
Love this tutorial? Save it to Pinterest:
Since 2015, Christine Schinagl has been helping crafters start and run craft businesses through her blog, Cutting for Business. As a Silhouette and Cricut crafter herself, she has a unique take on what works and what doesn’t work in the craft business world. She also enjoys teaching other crafters how to create digital SVG designs, available through the Design with Me series.