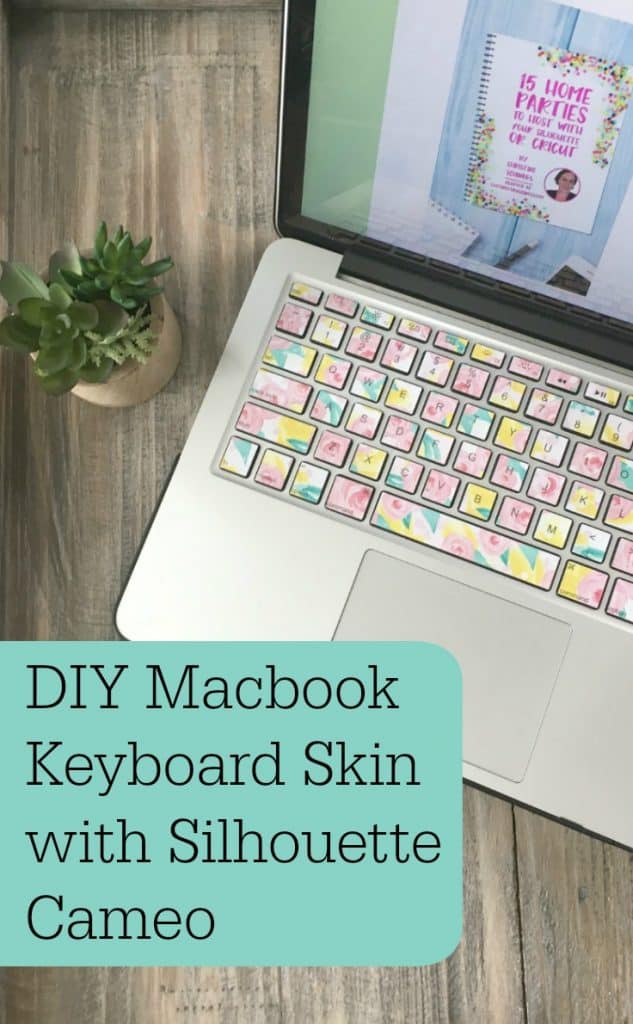
DIY Macbook Keyboard Skin with Silhouette Cameo
Affiliate Disclosure: As an Amazon Associate I earn from qualifying purchases. Additionally, I may get commissions for purchases made through other affiliate links in this post.
Whether it is designing and cutting, listing products for sale, or handling customer inquiries – Silhouette and Cricut small business owners spend a lot of time on the computer. I thought today that I would share the tutorial on how I made a keyboard skin for my MacBook Pro. If you have a recent Mac, the files should work for you, too. If you don’t use a Mac computer, I’ve included the method I used to make the file later in the post.
Supplies Needed
Silhouette Cameo
Pixscan mat
Printable vinyl
Macbook Pro Keyboard Skin Tutorial
- Purchase or download a 300 dpi seamless background of your choice. You can find these all over online. The floral print background that I’ve used on my keyboard can be found in this Etsy shop.
- Download the zip file for this tutorial at this link. It’s important that you not resize any of the files I have provided.
- Open your background in Silhouette Studio.
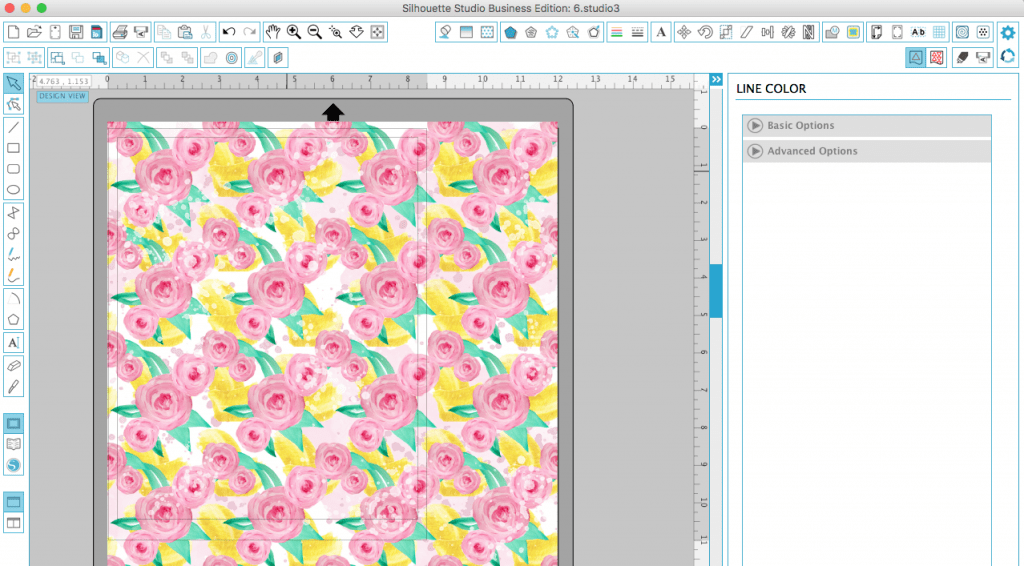
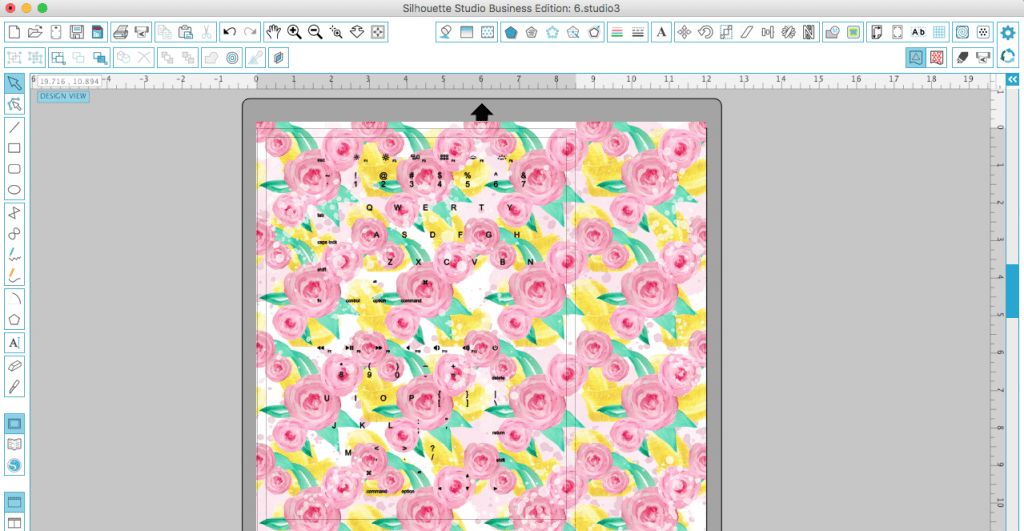
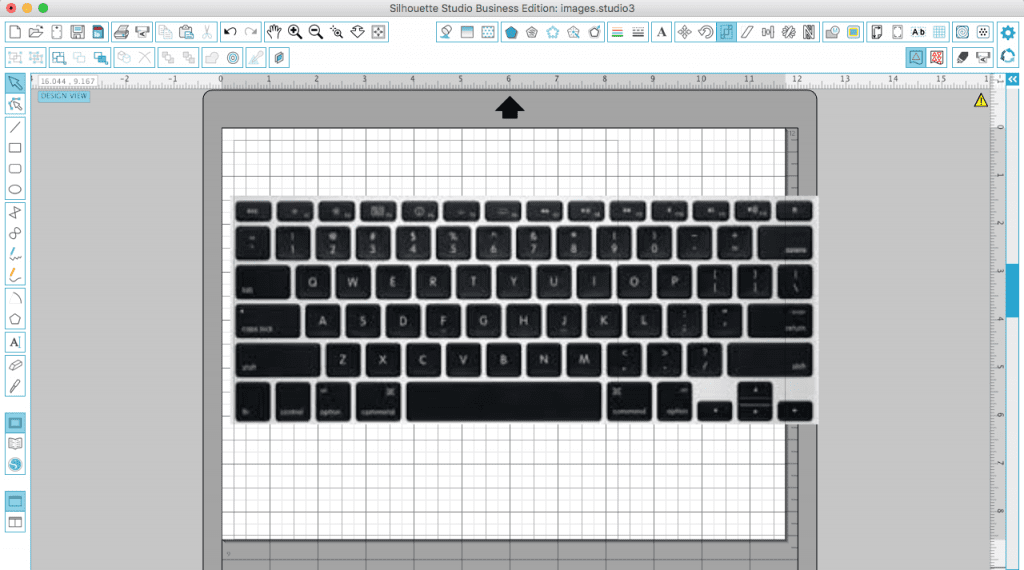
- Open the file called “KeyboardLetters.studio3” (downloaded in step 2) and place it on top of your background like shown in the photo.
 5. Print the design on printable adhesive vinyl. I used a matte finish vinyl, but you could also use your favorite sticker paper. Cut the design in half. Unfortunately, the keyboard decal is slightly larger than the print area for a standard printer. So, I’ve broken it into two halves.
 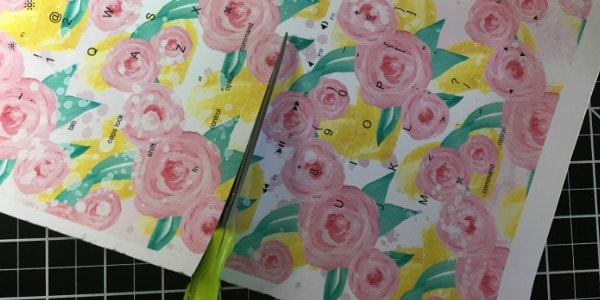 6. Place the design onto your Picscan mat. Take a clear photo of the design on your mat.
 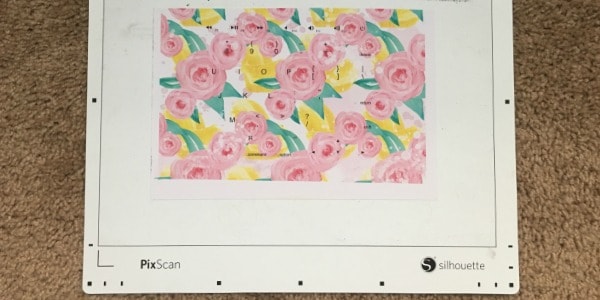 7. Upload the Pixscan image to Silhouette Studio.
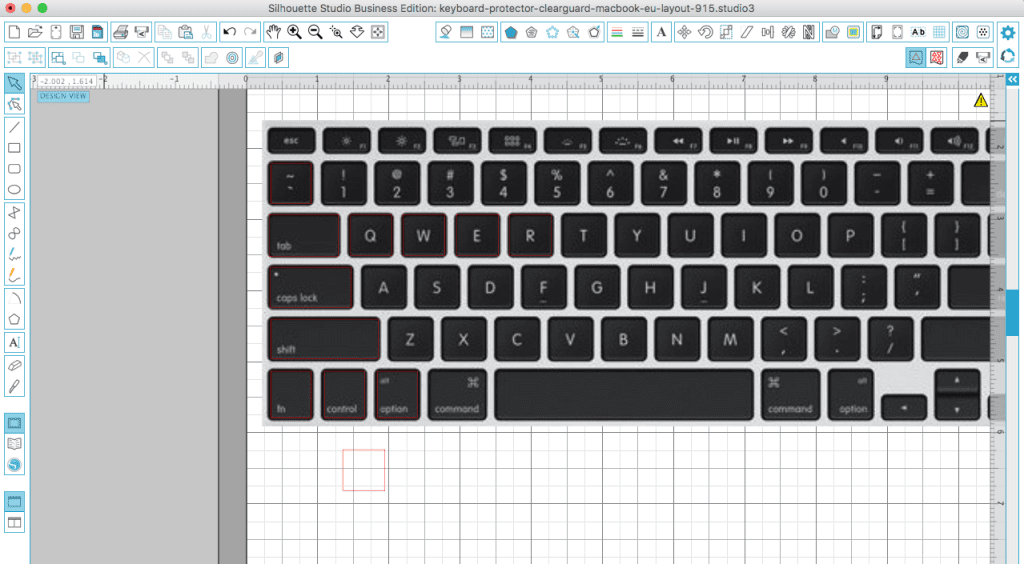
 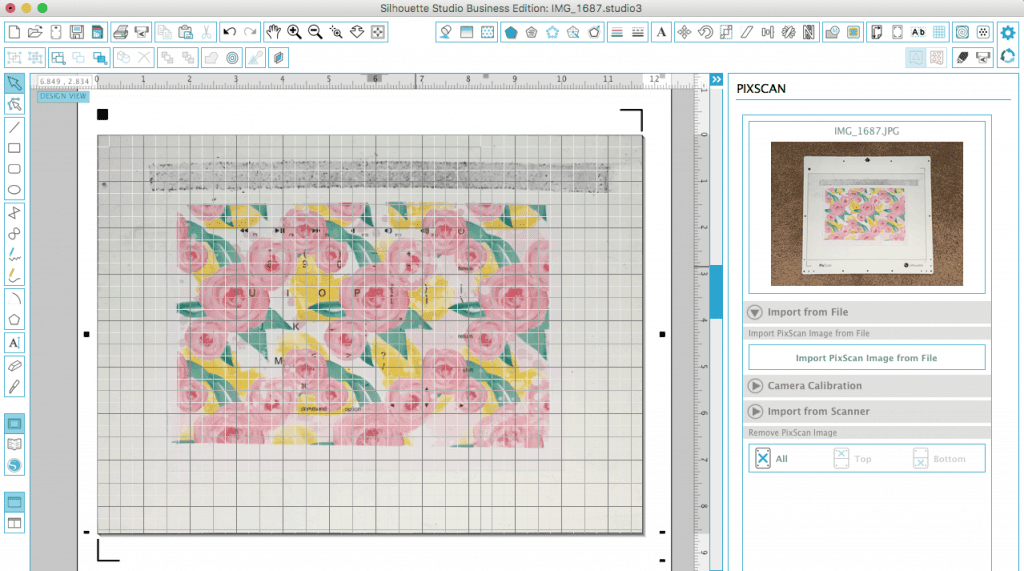 8. Overlay the file RightKeyboard.studio3 onto your Pixscan image. You’ll need to move it around to make sure the placement is perfect. I found it easiest to zoom in on the design to get it lined up just right.
 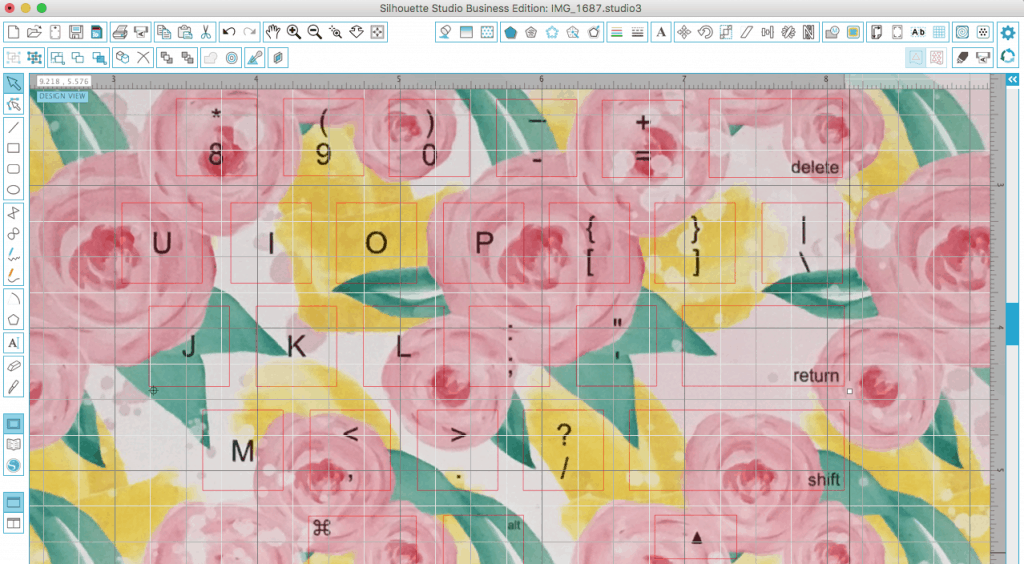 9. Load your Pixscan mat into your Silhouette and cut the keyboard decal.
 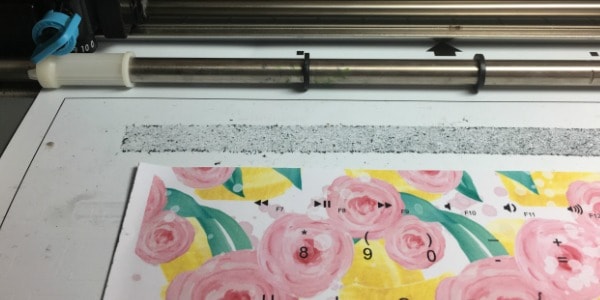 10. Weed the excess vinyl from the keyboard decal.
 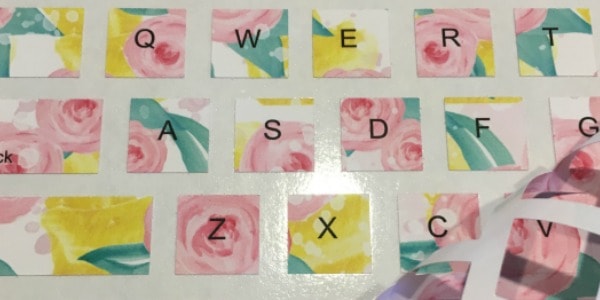 11. Apply transfer paper to the decal. Turn your computer off and apply the decal to the keys.
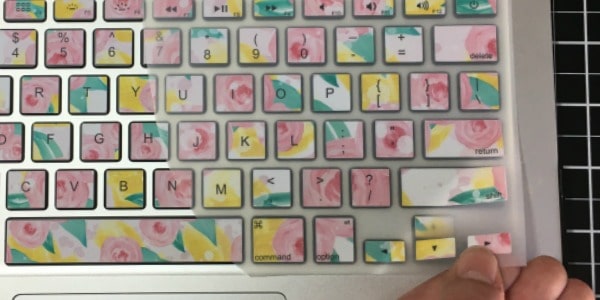 12. Repeat steps 6 to 11 to do the other side of your keyboard using the LeftKeyboard.studio3 file you downloaded earlier.
Now, if you don’t have a recent Mac computer – or you are interested in the process – here’s how I did this:
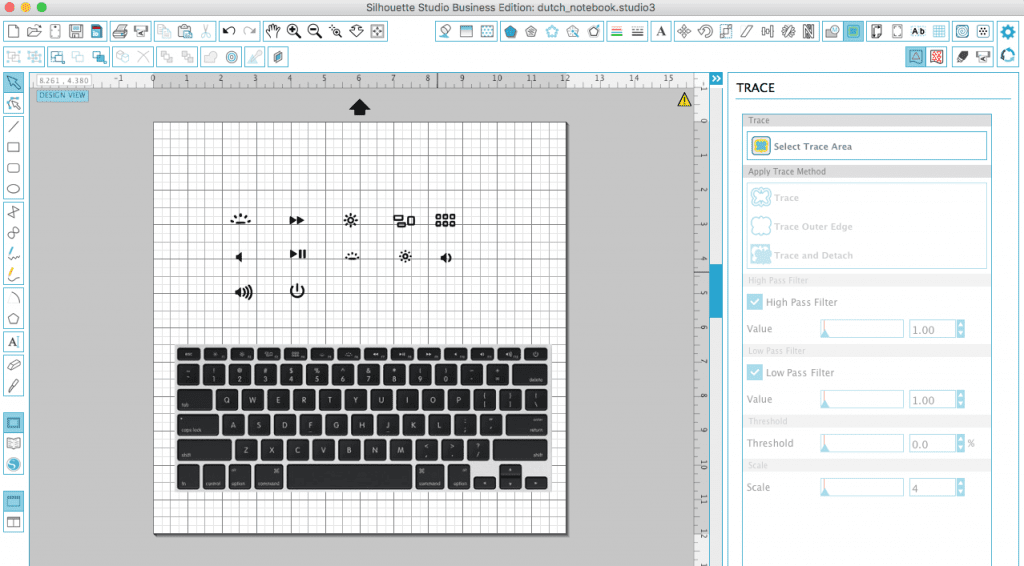
- I took a good photo of my computer keyboard from above. I then opened it in Silhouette Studio. Next, I measured the keyboard and resized it to the exact same size in Silhouette Studio using the “Scale” function.
- I drew squares and rectangles over each of the keys. I stopped several times and did actual cuts on my Silhouette to make sure that the decals would fit the keys.
- After all the keys had boxes on them, I deleted the photo of my keyboard. Here’s what I was left with:

- I then typed each letter onto the keys using Arial font. I used the “Align” function to make sure the letters were all lined up. Then, I traced the icons that I couldn’t type using the “Trace” function.
I’d be lying if I said this was a quick project to design from scratch. It took me longer than I expected, but I absolutely love my new keyboard decal!
Save this tutorial to Pinterest or Facebook – just hover over the image below or tap it on mobile:
Since 2015, Christine Schinagl has been helping crafters start and run craft businesses through her blog, Cutting for Business. As a Silhouette and Cricut crafter herself, she has a unique take on what works and what doesn’t work in the craft business world. She also enjoys teaching other crafters how to create digital SVG designs, available through the Design with Me series.