How to Create Your Own Designs in Silhouette Studio
Affiliate Disclosure: As an Amazon Associate I earn from qualifying purchases. Additionally, I may get commissions for purchases made through other affiliate links in this post.
Yesterday we talked about designing with fonts. Today, we are going to talk about creating your own designs in Silhouette Studio.
Why create your own designs?
Shops are likely to sell more when their products are unique and different from other shops. This is shown clearly by looking at big box retailers. You usually don’t see retailers selling inhouse brands that are the same as other retailers. Unfortunately, when you buy designs online you usually aren’t buying an exclusive design and your competition could be selling the same exact design!
How can you create your own designs?
First, stop tracing stuff! If you didn’t create the file you are tracing – you cannot use it in your business without a license or permission. There a number of ways you can create your own designs, including: drawing on a piece of paper and scanning it into your computer, drawing with a Wacom tablet and pen or Livescribe pen (or any other similar device), or using the drawing tools available in Silhouette Studio. But what if you can’t draw? First, don’t feel bad and know that you aren’t alone – I don’t draw well, either.
My favorite secret to creating in Silhouette Studio:
Think of whatever you want to draw and break it into basic shapes. For a non-art inclined crafter, this can be difficult – if not impossible for me to think of any object in basic shapes. What’s a crafter to do? Use Google! I usually search for whatever I want to design and the words “how to draw _______ step by step”. For example, if I want to design a robot shirt I would search “how to draw a robot step by step”. Several tutorials pop up and I can choose my favorite one. This is important: the actual tutorial you choose is not too important – it’s the step breakdown that you need.
Since we are already talking robots, grab your computer and let’s draw a robot together.
How Create a Robot in Silhouette Studio Step by Step
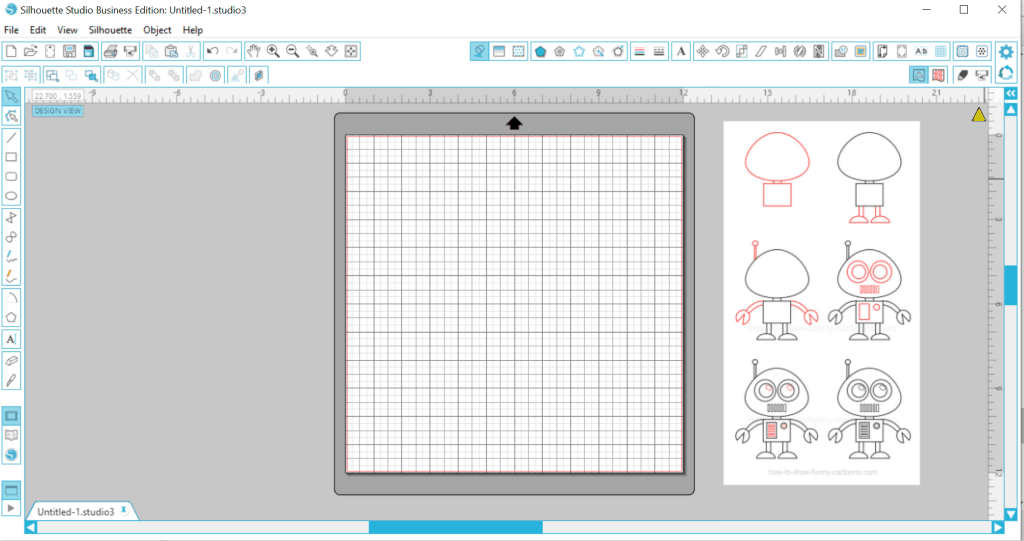
To start, open your step by step tutorial you found online in Silhouette Studio. I used a tutorial found here.
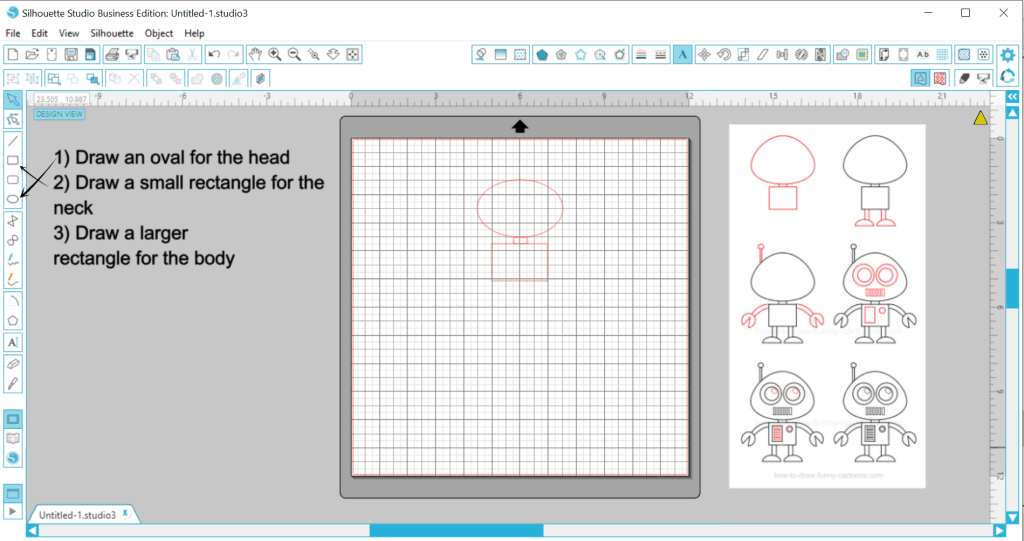
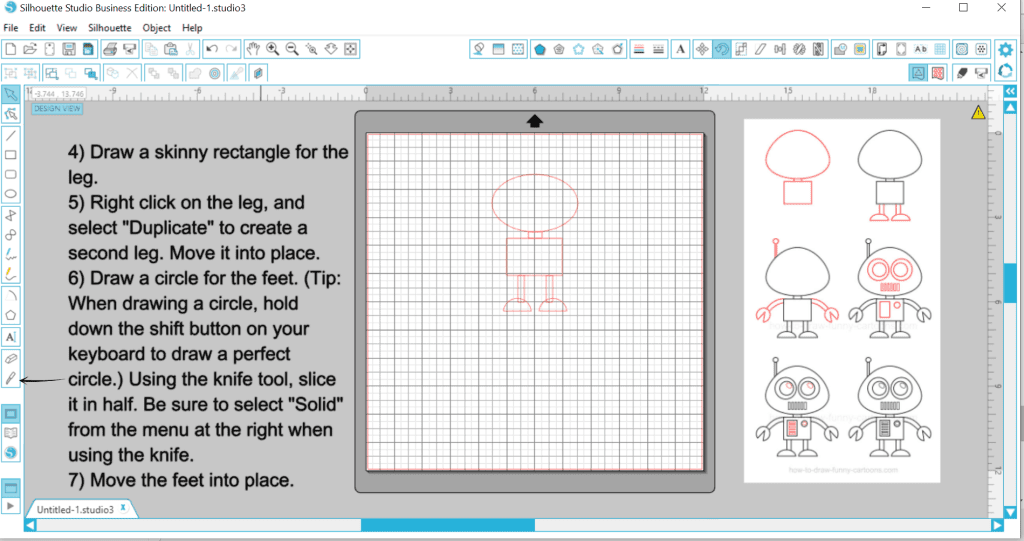
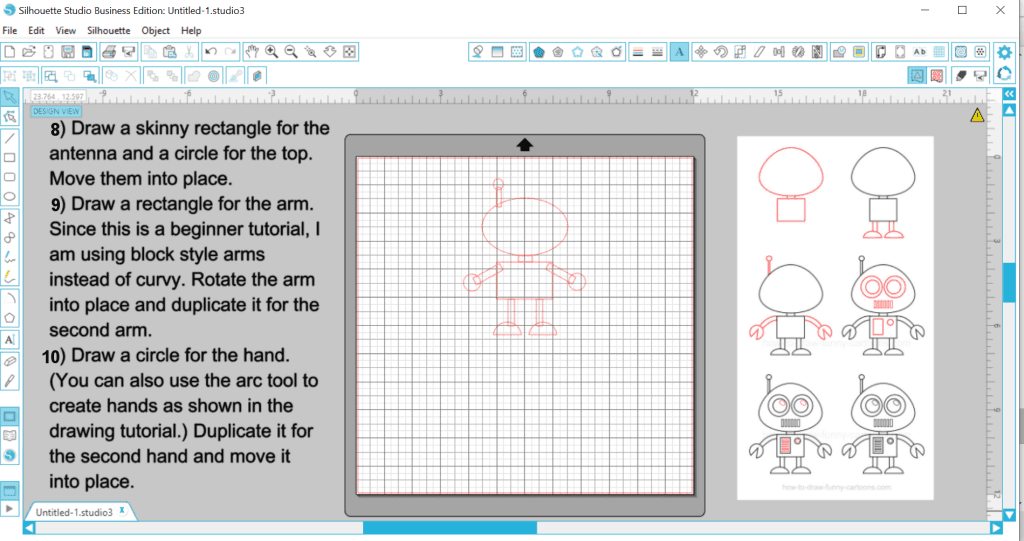
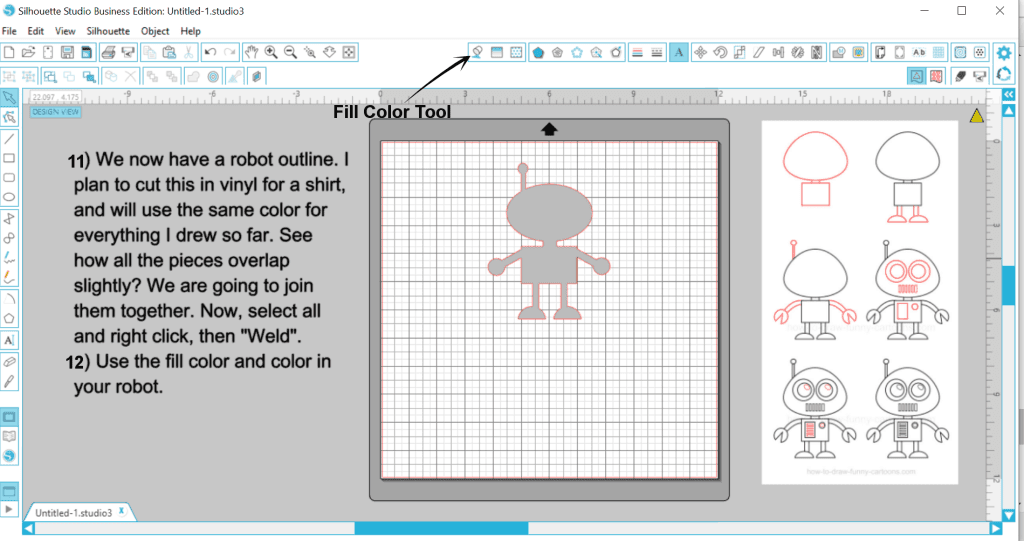
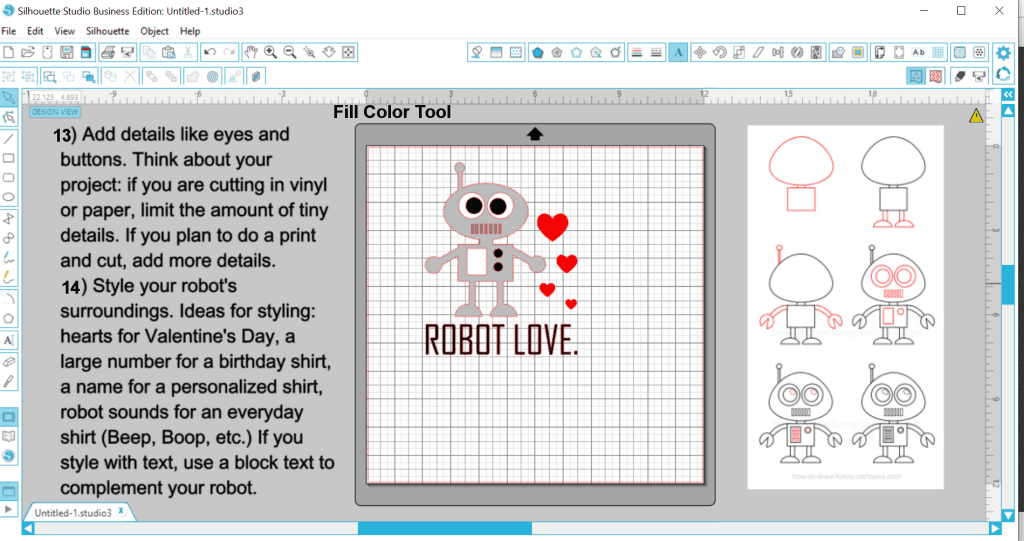
That’s it! Remember, you are now able to draw just about anything. Search “how to draw _______ step by step” for a step breakdown. As you draw your design, change and modify the design to fit your needs and style.
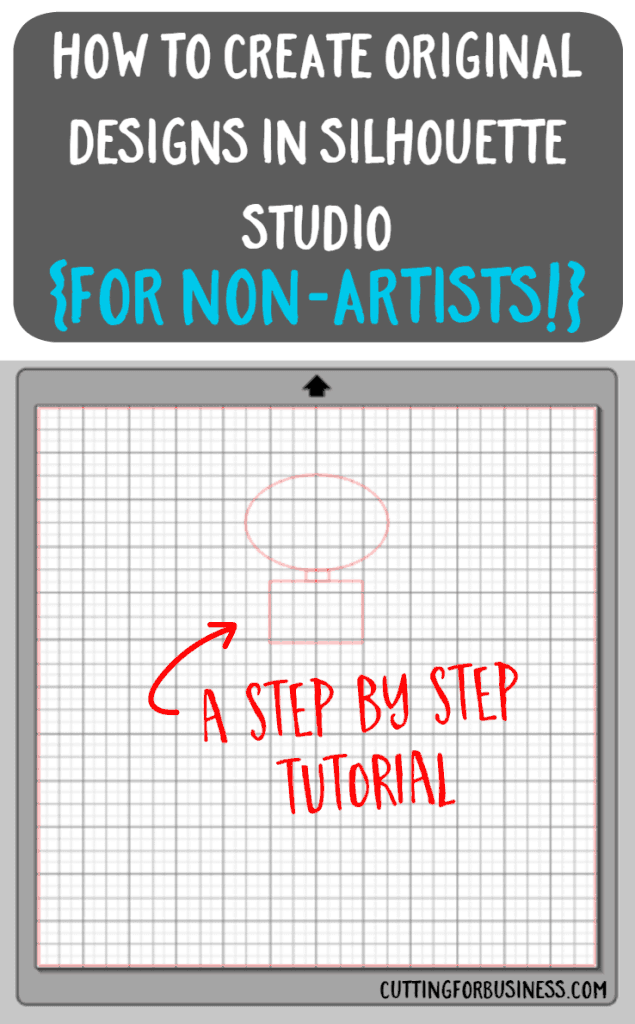
I hope that next time someone asks you where you got your design you can proudly say, “I drew it!” If you thought it was helpful, please share this post on social media by hovering over the image below.
Since 2015, Christine Schinagl has been helping crafters start and run craft businesses through her blog, Cutting for Business. As a Silhouette and Cricut crafter herself, she has a unique take on what works and what doesn’t work in the craft business world. She also enjoys teaching other crafters how to create digital SVG designs, available through the Design with Me series.


