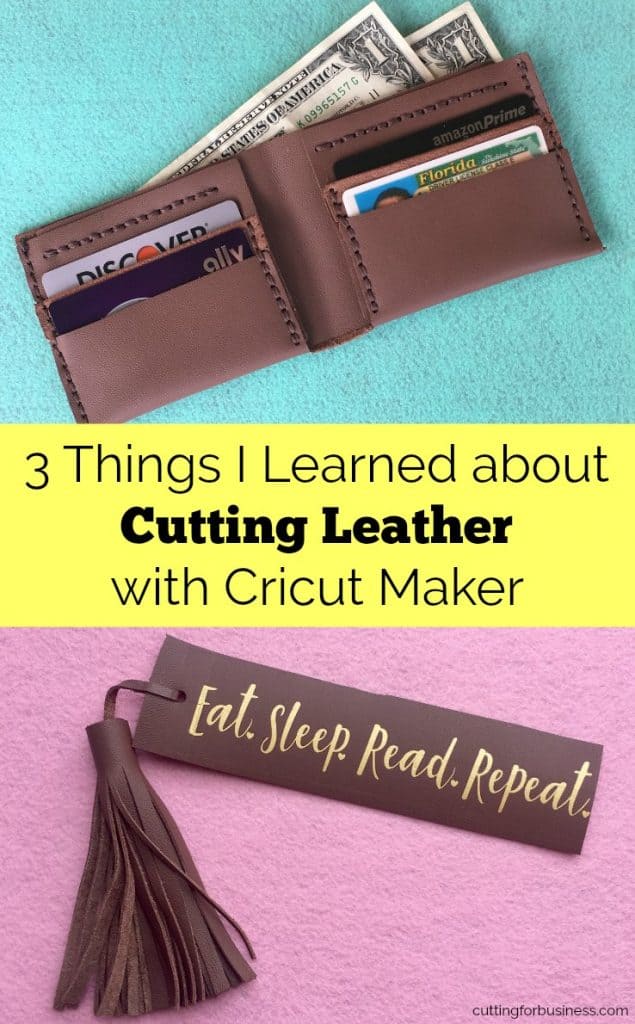
3 Things I Learned about Cutting Leather with Cricut Maker
Affiliate Disclosure: As an Amazon Associate I earn from qualifying purchases. Additionally, I may get commissions for purchases made through other affiliate links in this post.
If you follow me over on Instagram, you’ll know that I spent the majority of last week learning the ins and outs of Cricut’s newest machine – the Cricut Maker.
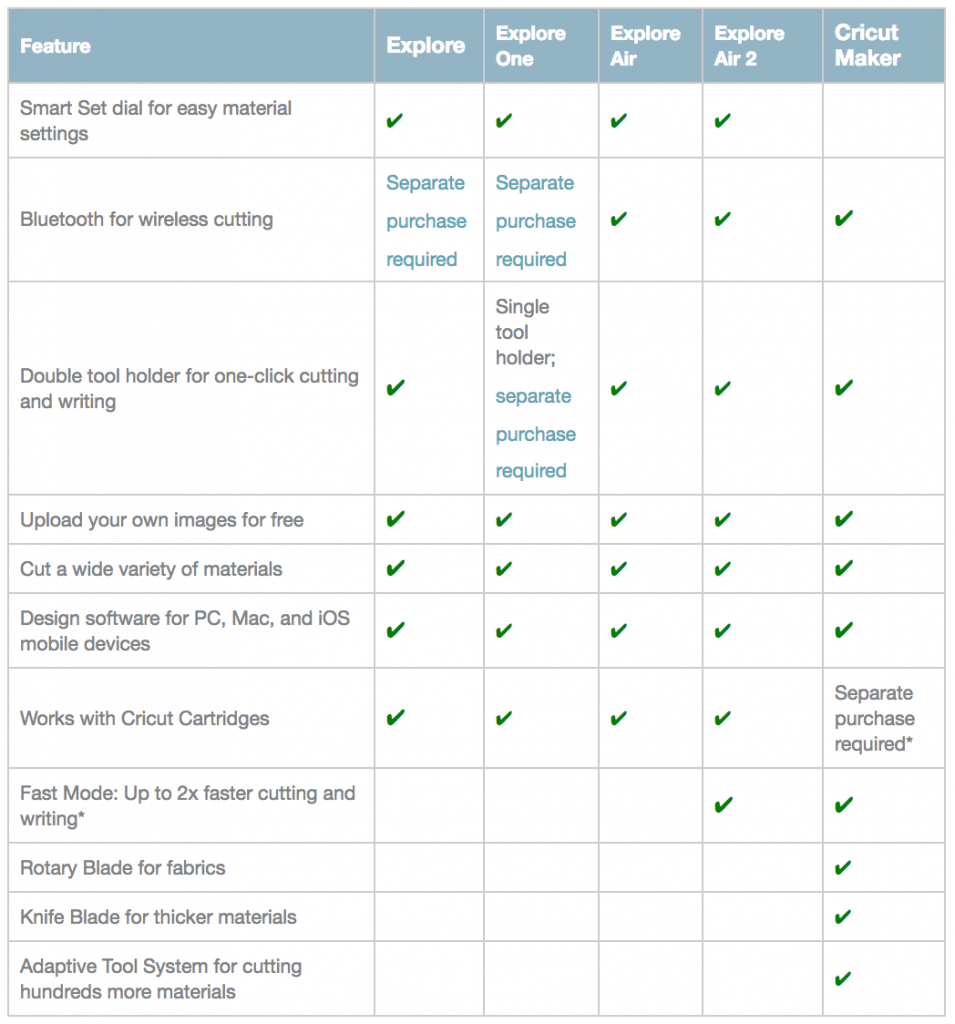
What is different about the Cricut Maker from other Cricut machines?
- Greater cutting force. The cutting force on a Cricut Maker is 4 kilograms of force – which is about 10 times more than a Cricut Explore. (Both the Silhouette Cameo 3 and Silhouette Curio have a cutting force of 210 grams – significantly less than the Cricut Maker.)
- Adaptive Tools. Cricut has stated that additional tools will be released for Cricut’s Maker. This would make it an “all-in-one” tool with no need to upgrade.
- Knife Tool. This adaptive tool cuts through thicker materials, but is not being released until Winter, 2017.
- Rotary Tool. One of the first in the line of adaptive tools is the rotary blade. This tool functions the same as a handheld rotary tool and allows you to cut fabrics and heavy materials like leather.
- Access to Sewing Patterns. With the rotary tool, you can now cut fabric without any type of backing or preparation. Cricut has teamed up with several pattern makers (including Simplicity) to bring patterns to Design Space.
- Dial Removed. The dial found on the top to set materials has been removed.
*These are the highlights of the differences. For a full list, see Cricut’s chart. Image credit: cricut.com.
Tips for Cutting Leather with Cricut Maker
Last week, I made two projects: a leather wallet and a bookmark. Here’s my tips to cutting leather with your Cricut Maker:
- Make sure your material is stuck to the mat well – very well! Once you put your leather onto your mat, use a brayer tool or vinyl squeegee to make sure it is stuck. If the material bunches it will jam your machine – ask me why I know!
- Cut the leather with the rough (inside) side up. This will prevent the rollers from marring your leather.
- Clean the mat frequently. Leather leaves behind little bits and pieces. I cleaned my mat between each cut to ensure that the leather could come into contact with the adhesive. I used water and a lint free tea towel.
Resources for the Wallet and the Bookmark
Want to make your own leather wallet or bookmark? Here’s what you’ll need:
- Wallet: I followed these instructions and patterns from the team at Bison Made/Ezra Arthur. I used 2 square feet of this tanned leather and this thread. I first used a marker to have the Cricut Maker draw a mark for each hole, then cut the pieces using the rotary tool, and sewed them together.
- Bookmark: Made from the scraps of the wallet. I used a shape in Design Space to make the rectangle and Cricut’s Leather Tassel Keychain – although I made it smaller and left off the trim work. I used Craft Perfect heat transfer vinyl for the wording on the bookmark, because it adheres to leather.
Loving this post? Save it to Pinterest:
Since 2015, Christine Schinagl has been helping crafters start and run craft businesses through her blog, Cutting for Business. As a Silhouette and Cricut crafter herself, she has a unique take on what works and what doesn’t work in the craft business world. She also enjoys teaching other crafters how to create digital SVG designs, available through the Design with Me series.
