Affiliate Disclosure: As an Amazon Associate I earn from qualifying purchases. Additionally, I may get commissions for purchases made through other affiliate links in this post.
If you read Part One of this post, Selling Your Silhouette Cameo Crafts on Etsy, you have just set up your Etsy shop and listed at least one item. Your item is now for sale, but there are a few things you need to do to finish setting up your shop – and you should look over the fees to sell on Etsy. Let’s go!
1) From the “Your Shop” link at the top of the screen, choose “Shop Settings” and “Info and Appearance”. Spend some time filling out all the details.
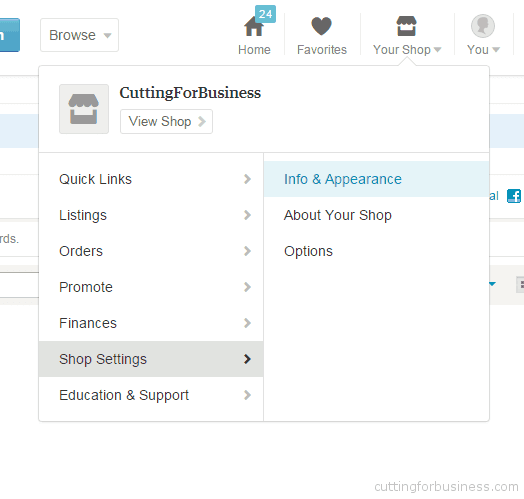
- Info and Appearance Tab
- Shop Title: A headline that customers see when they enter your Etsy Shop
- Shop banner image: An image that is 760 x 100 pixels, again, customers see this when they enter your Etsy shop. You can create one using your favorite photo editor, or have one created for you by a designer (be sure to check Etsy for lots of affordable designers).
- Local markets: If you do markets or craft fairs in your area, share them here.
- Social media links: Be sure to share your social media links – like the Facebook Business page you set up.
- Shop announcement: Write a brief description of the items that you sell in your shop. Etsy will pass this information to Google, and it will show up in search results.
- Messages to buyers: A thank you message is appropriate for these areas. The text you enter here will show up on your customers email receipts after they purchase an item.
- Shop Policies Tab
- Welcome message: General information about your shop or a welcome to your shop greeting is appropriate in this area.
- Payment policy: Methods of payments you accept, tax policies, and any other payment related information belongs here.
- Shipping policy: Information about shipping, what carriers you use, how insurance works, a shipping disclaimer, etc can be placed in this space.
- Refund policy: I urge you to be specific here. List your exact refund policy. Do you accept returns? In what timeframe? What about exchanges? Who pays for shipping back to you? Can they keep the item if the customer doesn’t like it and still get a full refund? A well written return policy can help you as a seller if a problem arises with a sale.
- Additional information: Anything that you couldn’t find a spot for above can be placed in this space.
- Seller information/private receipt info: If you are based in the USA, you won’t need to fill in these spaces.
- Shop Name Tab
- Name change: Don’t like your name? You can change it once, any changes beyond that need Etsy admin approval.
- Languages Tab
- Speak another language? Be sure to add it here.
2) Next, from the “Your Shop” link at the top of the screen, choose “About Your Shop”.
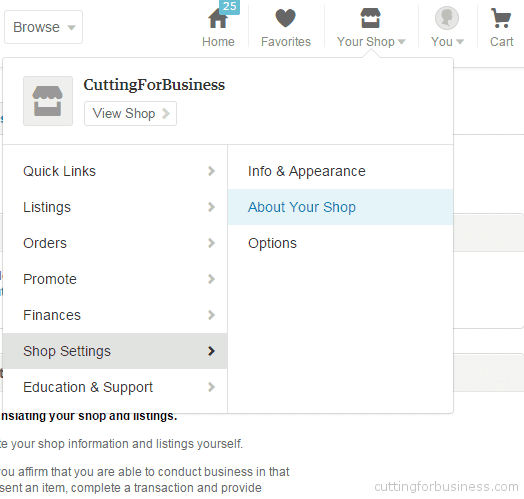
- Members tab
- Here you can write a brief story about yourself. Do you have kids? What do you enjoy doing? Where do you find inspiration? Use this space to connect with your buyers. Etsy buyers like being able to get to know the shop owner.
- Story tab
- Tell the story of your shop. What is the meaning of the name? Where do you craft? Share photos of your studio, projects in process, projects you’ve completed, goals you have for your Etsy store or anything else you want to share. The goal here is to again connect with potential buyers and let them learn about your shop.
- Manufacturers tab
- Most new sellers won’t have an outside manufacturer to partner with, feel free to skip this tab.
3) Now, from the “Your Shop” link at the top of the screen, choose “Shop Settings” and “Options”.
- There are a few quick settings to change (if desired), such as arrangement of items in your shop, ability to accept custom orders, shipping upgrades, and language translation. You’ll have to decide what works best for your business.
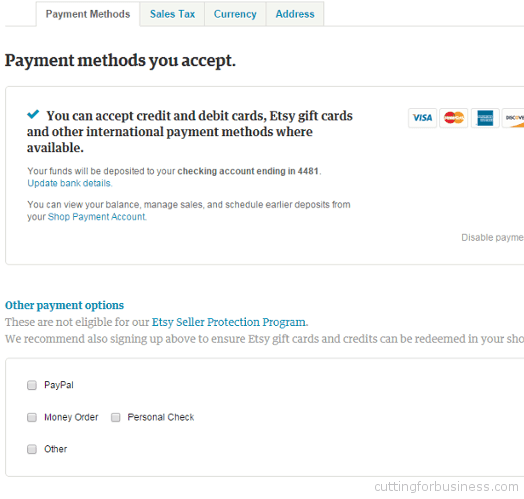
4) Last, from the “Your Shop” link at the top of the screen, choose “Finances” and “Accepted payments”. Then click “Other payments”. This will allow you to choose to accept other payments, such as Paypal (very popular!), or checks or cash. If you need to collect sales tax, you can set it up from the “Sales Tax” tab.
That’s it! Your Etsy shop is ready to go. I’ve guided you through the basic steps to set up your shop and sell on Etsy. When you have time, I suggest you click around and explore your seller dashboard within Etsy. We will visit Etsy more in depth in the coming weeks and get into advanced features like promoting your listings on Etsy. If I can leave you with just one more tidbit: If you are selling multiple types of items (such as tumblers, wooden signs, wall decals, and supplies in the same shop) you need to create shop sections to make your shop easier to navigate. Etsy allows you to have 10 different sections, and you can set them up by clicking on “Your Shop”, “Listings”, “Listings Manager”, then “Organize your listings” from the left hand side. Wondering what it will cost you to sell on Etsy? Read on to the last part of this post – Etsy fees.
Disclosure: In the event that you create an Etsy shop through my invitation to receive 40 free listings, I will receive free listings as well. This costs nothing additional to you, and helps keep my content on this blog free.
Since 2015, Christine Schinagl has been helping crafters start and run craft businesses through her blog, Cutting for Business. As a Silhouette and Cricut crafter herself, she has a unique take on what works and what doesn’t work in the craft business world. She also enjoys teaching other crafters how to create digital SVG designs, available through the Design with Me series.
