
Affiliate Disclosure: As an Amazon Associate I earn from qualifying purchases. Additionally, I may get commissions for purchases made through other affiliate links in this post.
Yesterday, I shared different ways to sell handmade products through Amazon and gave you some information about the fees to expect. Today, I wanted to share with you exactly how to create a product listing in Amazon’s catalog – officially called Amazon Marketplace.
How to Create a Product Listing on Amazon
- Decide which selling account is best for you: Individual or Professional. To recap: the Individual plan is best for sellers that sell less than 40 products per month; while the Professional plan is best if you sell more than 40 products per month. This walkthrough assumes you have an Individual account. (By the way, if you are new to selling on Amazon, I’d recommend you start with an Individual account.)
- Go to Amazon.com and log into your account. If you already have an Amazon account that you use to buy products, you are ready to start selling. If you want to create a new account solely for your small business, create one. Once you are logged into Amazon, head to Seller Central at this link.
- From the navigation menu at the top, go to ‘Catalog’, then ‘Add Products’. On the next screen, you will either be able to search for an existing product or create a new product. If the product you are selling is already on Amazon, you simply need to locate it. For example, if you are selling blanks or vinyl, it’s likely already on Amazon. However, to add a new product to Amazon (like a tee shirt or tumbler you’ve made) click ‘Create a new product listing’.


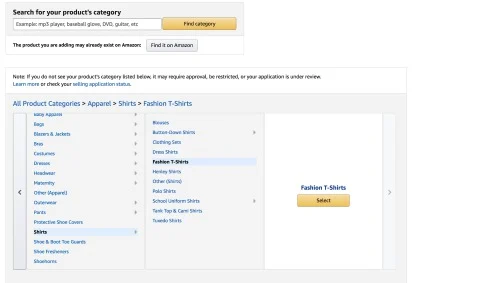
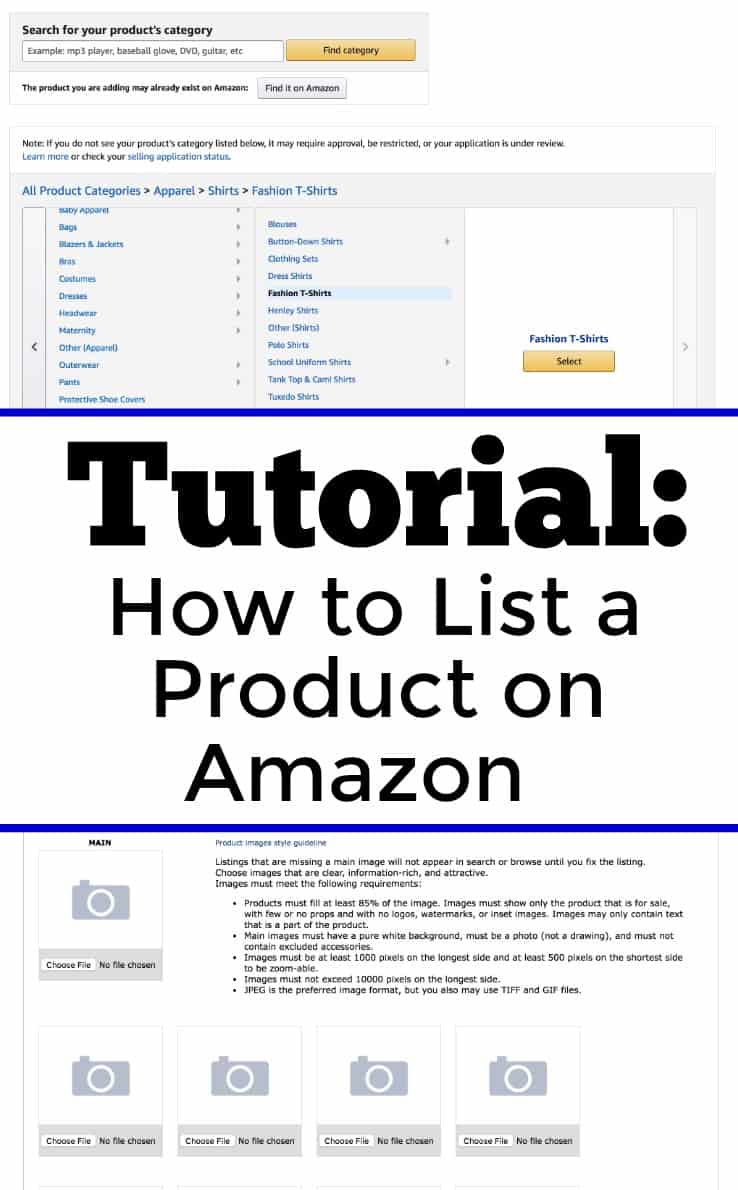
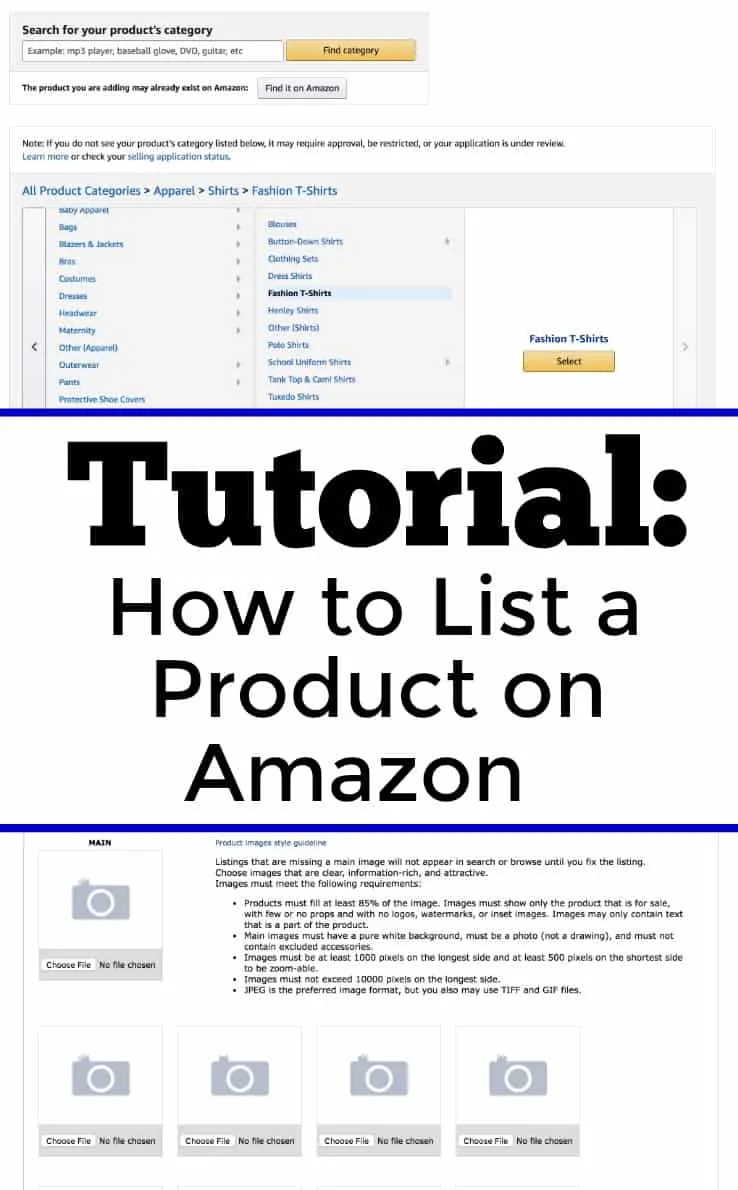
- Choose a category by working your way through the hierarchy. Click the ‘Select’ button once you narrow the category down. In this example, I’m listing a tee shirt that I made.

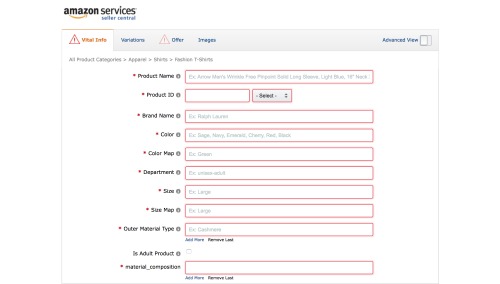
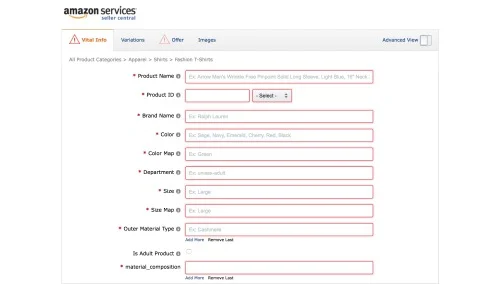
- Next, you’ll fill in all of the information about your product on the ‘Vital Info’ tab. Depending on your product, the options will be different. Any box in red will need to be completed before moving on. The one thing that often trips up new sellers is the requirement to have a barcode number. If your product is handmade, you will not have one. Instead, go to Ebay and search UPC numbers. You can buy a bulk lot of them and use them to list products on Amazon.
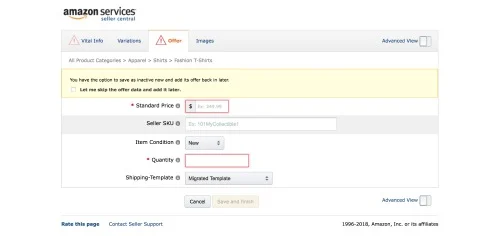
- After completing the ‘Vital Info’ tab, move to the remaining tabs and work your way through inputting the information. The ‘Variations’ tab is where you would enter size or color choice information and the ‘Offer’ tab is where you set the pricing.

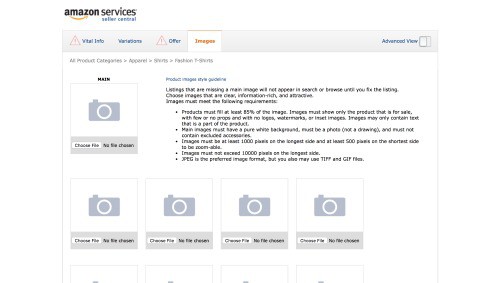
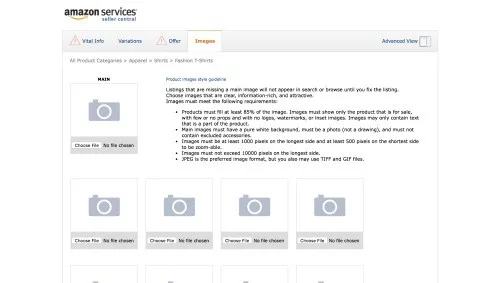
- Last, add images to your product listing. Amazon does not allow images with watermarks, borders, or additional text. Amazon prefers photos to be taken on a solid white background when available. Additional photos requirements are listed on the image upload page.
- Once your pictures are uploaded, click the ‘Save and finish’ button at the bottom of the page. You’ve now added your first product to the Amazon catalog!

You Don’t Own the Listing
Quickly, now that you’ve created a product in Amazon’s catalog, any other seller can list the same item for sale using your product page. Unlike other marketplaces, the listing you created is not owned by you.
Shipping on Amazon
You may have noticed when listing your product that you couldn’t specify shipping prices. Unlike other marketplaces, Amazon has a standard cap for every category. This means they have a maximum price your customer can be charged for shipping. In many, many cases, this price is not enough to ship your item to your customer. To compensate for this, remember to price your product accordingly.
How You Get Paid Through Amazon
Sellers on Individual selling plans get paid once a week and the payment is initiated through ACH directly to your bank account. New sellers will often have a hold on their payments for a period of time (21 days is standard, but I’ve also seen longer).
Sellers on Professional selling plans are paid every 14 days or twice a month. Again, new sellers may be subject to a hold period.
You cannot request payment sooner through wither the Individual or Professional selling plan.
Save the information below to Pinterest so you can find it when you need it!
Since 2015, Christine Schinagl has been helping crafters start and run craft businesses through her blog, Cutting for Business. As a Silhouette and Cricut crafter herself, she has a unique take on what works and what doesn’t work in the craft business world. She also enjoys teaching other crafters how to create digital SVG designs, available at through the Design with Me series.